Air Conditioning Compressor Bearing Replacement
Content
Owners of expensive domestic cars and foreign cars periodically face the need to repair a car. Sometimes such repairs do not take much time, in other cases it takes more than an hour to identify the cause of the breakdown. Now we will tell you how the air conditioning compressor bearing is replaced and what is needed for this.
Location and function
The air conditioner compressor can rightfully be called the heart of the entire car air conditioning system. Therefore, its condition must always be working so that there are no problems in the functioning of the climate system. The bearing plays an important role in the operation of the compressor, without which the operation of the air conditioner will be impossible.
The bearing runs all the time when the engine is running. Whether the air conditioner is running or not. At any time of the year and in any climate. As a rule, its decomposition occurs due to the aging of the element. Since this component is constantly heated during operation, its lubricant becomes very thick.
As for the place, it is installed on the compressor. In most cases, it can be accessed by removing the left front wheel and guard. But it all depends on the specific model of transport.
Failure symptoms
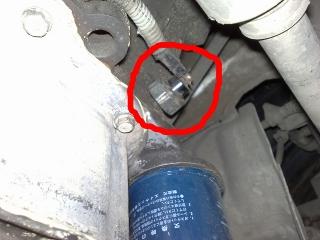
The consequences of bearing failure can be disastrous for the car owner. If the compressor element is stuck, then its landing can be “eaten”, which may subsequently lead to the need for repair or replacement of the compressor as a whole. Also, if the bearing fails, the compressor can move, which will later lead to a break in the air conditioning pulley belt.

Air conditioning clutch device: the bearing is marked with the number "5"
And this, in turn, will lead to unstable operation of the electrical wiring or even to the appearance of defects. The compressor pulley bearing is one of the weakest devices in an air conditioner. And they break down more often than other components of the air conditioning system.
What are the symptoms of a stuck A/C pulley bearing? There may be several. Hear how your engine works. If a pulley bearing is stuck, you will know about it almost immediately.
- The first sign is a hum in the engine compartment. This noise is characterized by the fact that it can appear both on a cold engine and on a hot one. From time to time this hum may disappear and reappear, depending on the operating mode of the compressor. In the event that this problem is not solved in time, then the noise of the pulley bearing, if it jams, can become permanent. In addition, the buzzing may be accompanied by a loud crackling sound.
- If the compressor pulley bearing is stuck, jamming or knocking may occur, which you will certainly hear. As a result of such a blow to the air conditioner, bulging dents may remain on the hood.
- Sometimes, but this happens very rarely, when the pulley bearing has already worn out and began to fall apart, collapse appears in the system. Therefore, the electromagnetic clutch of the air conditioner may fail. Such a breakdown is the most deplorable from a financial point of view, as it implies the need for a complete repair of the compressor. In most cases, such repairs do not help and the device needs to be replaced.
Replacement process
If you decide to repair the air conditioner compressor with your own hands, you can use this material. But first, think: can you do all this yourself? If something is done incorrectly, then in the future it may affect the operation of the system as a whole.
A set of necessary tools
- a set of keys;
- Screwdriver Set;
- rag
Key set to replace element
Flat and Phillips screwdrivers
Clean rag
Step by step guide
So, how to replace the air conditioning compressor if it is stuck? The instructions show the replacement using the Volkswagen Sharan car as an example. In principle, the process is not much different for other machine models, but there may be some differences in the procedure:
- The first thing you need to do is access the device directly. In some cars it is limited. Sometimes it will be enough to remove the front wheel and protection, that is, the fender liner. But sometimes this can be interfered with by the hydraulic booster pipes and cooling systems, as a result of which it will be necessary to remove the antifreeze and remove the power steering. However, depending on the design of the vehicle, it is necessary to gain access to the compressor in order to remove the pulley bearing if it is stuck.
If you choose to access from the top instead of the bottom, as is the case with the Volkswagen Sharan, you will need to remove the intake manifold. Remove the nozzle. - The fuel pressure valve can be left open. Just take it off the bar.
- Now you need to remove the fasteners from the bar. To do this, use a wrench or a screwdriver, depending on the mount. The bar can be removed together with nozzles.
- Next, using a wrench, unscrew the studs from the intake manifold. Once this is done, you will need to remove the air tube and crankcase ventilation tube from the unit. Remove the collector. Take old rags and plug the timing inlets with them so that nuts and other small things do not get into it during operation.
- Now, to get to the compressor pulley bearing, which is jammed, you need to disassemble the generator. The device, together with the compressor, in our case, is fastened with screws, each of which is attached to the engine block. Turn away bolts and remove the generator.
- The hoses that go to the compressor are made of rubber so there is no need to relieve pressure. You need to unscrew the nut that secures the friction pulley. You can use a screwdriver for this.
- Now you need to remove the friction pulley. To do this, you can use two pre-prepared screwdrivers and remove the pulley from the splines of the shaft. Here, note that several wedges can be seen under the disassembled pulley; there can be from one to three, depending on the design and model of transport. Therefore, it is impossible to lose these washers in any case. If they go somewhere, the work will remain unfinished. And in case of loss, it will be very difficult to collect them.
- If you have a special circlip remover, you will need it now. If not, use a flathead screwdriver. Remove the retaining ring.
- Now you can remove the clutch pulley. In this case, you can also use a flathead screwdriver.
- This will give you access to the stuck bearing. If it got stuck the first time and you never changed it, then most likely it will spin around the installation site. But you should not stop there, because you have already done most of the work and there is no point in returning.
Take over the ground and head to "32". It is necessary to remove the item, so there was an additional rumble. Buy an identical bearing and replace it with a new one. Don't forget to grease it. - All subsequent assembly must be done in reverse order. There are several nuances that must be taken into account. When mounting the friction pulley along with the very washers that cannot be lost, pay attention to the splines themselves. In one place, the slot will not be visible, as well as on the disk. This shows the correct position of the pulley on the shaft.
- When the assembly is completed, it is necessary to check the operation of the coupling. Rotate the disc, while the friction pulley should not rotate. When rotating, nothing should stick out anywhere. Also note that the nut securing the friction pulley must be replaced with a new one. If this is not possible, then the threads where they go should be lubricated with thread sealant. When installing the intake manifold, its sealing rubber must be lubricated with a small layer of heat-resistant sealant. When installing nuts, do not forget that everything must be done correctly. In particular, it is necessary to remember the sequence of nuts and tightening torque.
- Before removing the manifold, the fuel pressure valve must be removed.
- Now you need to move the valve holder along with the nozzles.
- Plug the timing outlets with rags to prevent foreign objects from entering.
- Now you need to remove the friction pulley from the splines of the shaft.
- Remove the circlip using a puller or screwdriver.
- After that, you can already disassemble the clutch pulley.
This completes the element replacement procedure. As you understand, this process is not so simple, one might even say complex. Calculate your strengths and capabilities in advance - is it worth doing it yourself? Perhaps it is more convenient to pay money, but be sure of the quality of work? We hope our guide will help you.
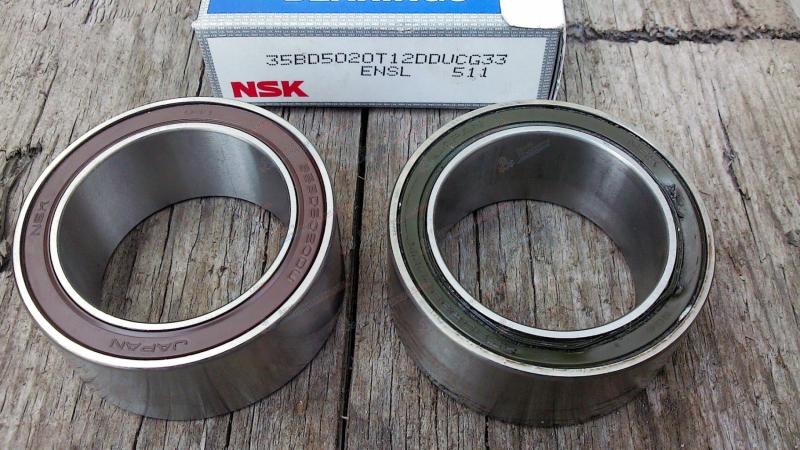
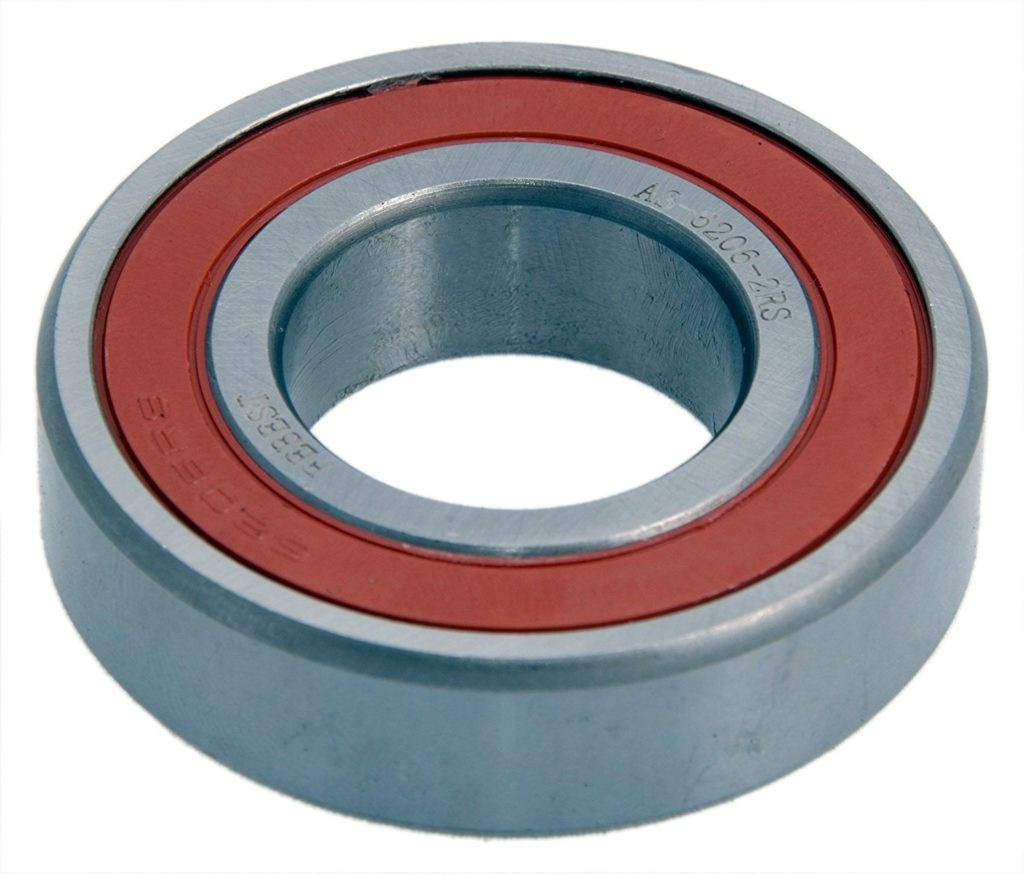
Buy bearings for your car model. These items may vary depending on the model and year of the vehicle. And forcing the wrong bearing into the installation location is not the best solution.
Video "How to replace the compressor bearing on your own"