Replacing the heater radiator Audi 80 and 100
Content
In order for the car heating system to work normally, it is necessary to maintain the working condition of all its components and mechanisms. One of them is a radiator device. If this element fails, the driver will know about it when the heater is turned on for the first time. How to replace the radiator on the Audi 80 stove and in what cases it is necessary - read this article.
In what cases does the stove radiator need to be replaced?
By what signs can you determine that the radiator on the Audi 80 B3, B4, Audi 100 C4 or any other model needs to be repaired or replaced:
- Coolant leak. In this case, the radiator of the Audi 80 B4 stove could fail or the pipes could be damaged.
- Cool air is blown out of the fans and the heater is set to heat.
- The heating system heats up for a long time before it starts to cool down.
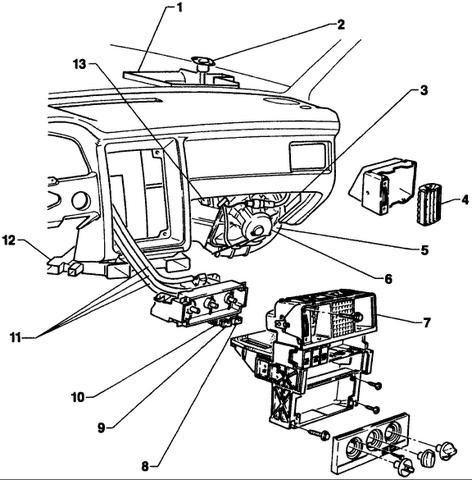
Replacement Instructions
Replacing the radiator on the Audi 100 stove is not a very simple task; it will take several hours of free time and all the necessary tools to complete it. As for the latter, you will need to prepare standard locksmith tools, including keys, pliers, screwdrivers, etc.).
Sequence of execution
So, how to replace the device at home:
- First you need to disassemble the steering wheel; To do this, you must first carefully remove the signal panel. Next, you need to disconnect the wire that goes to the speaker. Once this is done, unscrew the nut that secures the steering wheel and remove it.
- After removing the steering wheel, you need to unscrew the two screws and remove the top cover of the steering column control unit.
- After completing these steps, you will need to unscrew the two screws that secure the control panel. After that, the tidy can be disassembled, and then disconnect the two plugs.
- Now, using a hexagon, it is necessary to loosen the screw of the bottom cover of the steering column switch block, it is more convenient to access it through a special hole. You also need to disconnect two more connectors and then remove the rubber plug.
- Once this is done, proceed to disassemble the center console. To do this, remove the car radio, as well as the levers for controlling the heating system. When disassembling the handles, be careful, as there is a possibility of damage to them. Gently pull the handles towards you, use a screwdriver if necessary.
It should be noted that under the extreme levers you can see two self-tapping screws, they need to be unscrewed, after which you can disassemble the plastic cover. Having done this, unscrew a few more bolts that fix the ashtray. - Next, you will need to dismantle the shelf located in the area of \uXNUMXb\uXNUMXbthe driver's feet, as well as the glove compartment, which is located in front of the passenger seat.
- Now you need to move the plastic trim under the ashtray, and then use the key to unscrew two more screws that secure the middle part of the center console. On the sides of the console, you also need to disassemble the decorative caps and unscrew a few screws.
- Having done this, you need to unscrew another nut securing the center console to the heating system. This nut is located on the side of the glove box.
- On the driver's side, there is another connector - you need to disconnect it, after which you can disassemble the console by gently pulling it towards you, while also lifting yourself up. There are still some connectors left, they all need to be disconnected during disassembly.
- After completing all these steps, we proceed to the most important thing - in the engine compartment, you need to remove the pipes from the heating unit. In the area of the ignition coil there is a nut that is screwed onto a bolt with a large washer. This nut needs to be unscrewed, and under it you can see another one; also needs to be unlocked.
- Now you need to remove the wiper from the passenger side. To do this, dismantle the lining that covers the filter element, the filter itself can be dismantled on site using a pallet. Having done this, we unscrew two more bolts with which the heater block is attached to the car body. Climb into the cabin and from there, gently rocking the heater in different directions, pull it towards you.
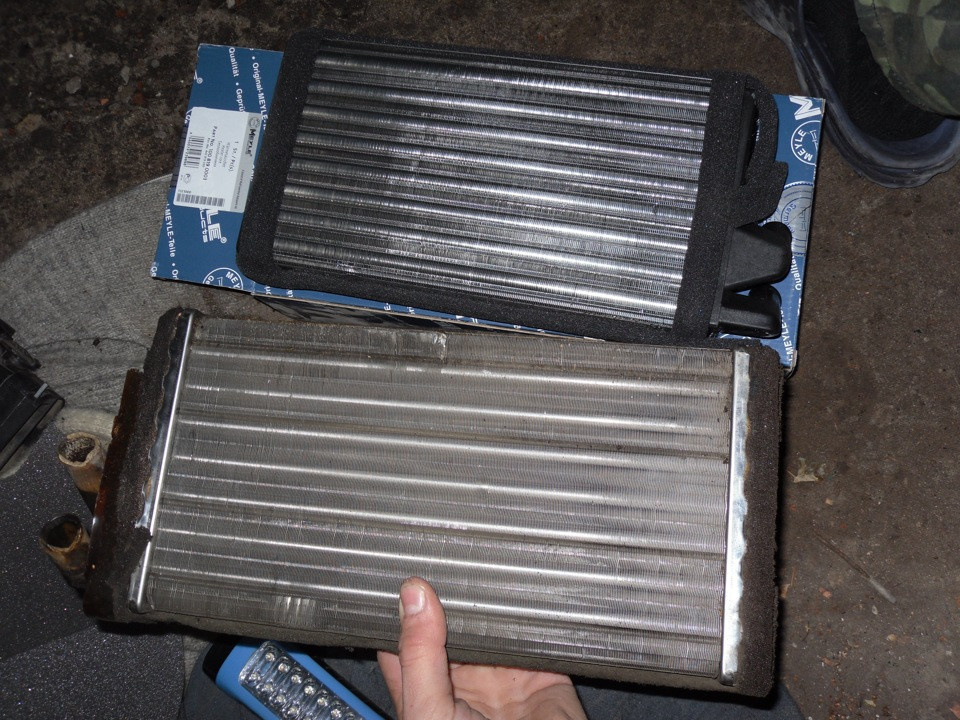
Disassemble the heatsink assembly and replace it with a working unit. The procedure for additional installation is carried out in reverse order.
Video "Repair and restoration of the Audi 100 radiator device"
You can learn more about how to repair and restore the radiator assembly in garage conditions from the video (author - Kostas-TV channel).
