Replacing the timing belt on the Volkswagen Golf V GTI
Today, in our article, the fifth generation of the Golf GTI sports hatchbacks will be presented. The powerful 200-horsepower engine of this car will give you pure driving pleasure if you do not forget to service it in time. And an integral part of maintenance is the replacement of the timing belt. Volkswagen recommends changing every 150 km.
Remember that a broken belt while driving can cause critical engine damage.
For comfortable operation, you will need to jack the engine and remove the right front wheel.
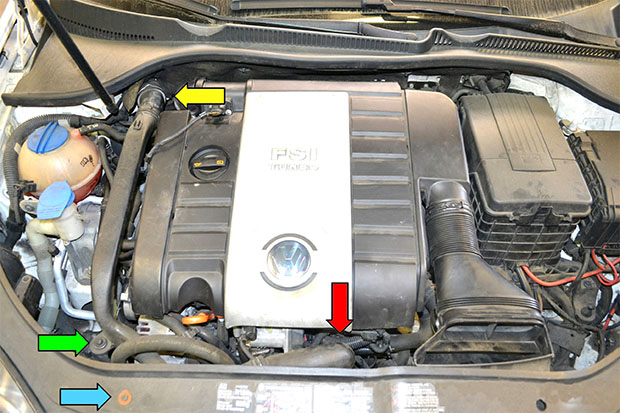
First, remove the air duct. The air duct and hoses exit the intake system and release air before it reaches the throttle body (red arrow). This air travels through a tube secured with an 8mm screw (blue arrow) and a T30 star (green arrow) and enters through a quick connect fitting (yellow arrow).

Then you need to remove the engine protection. There are four Torx T25 screws on each side (red arrows) holding the shield in place, remove them and pull out the friction clip tray (yellow arrows) on the front bumper.

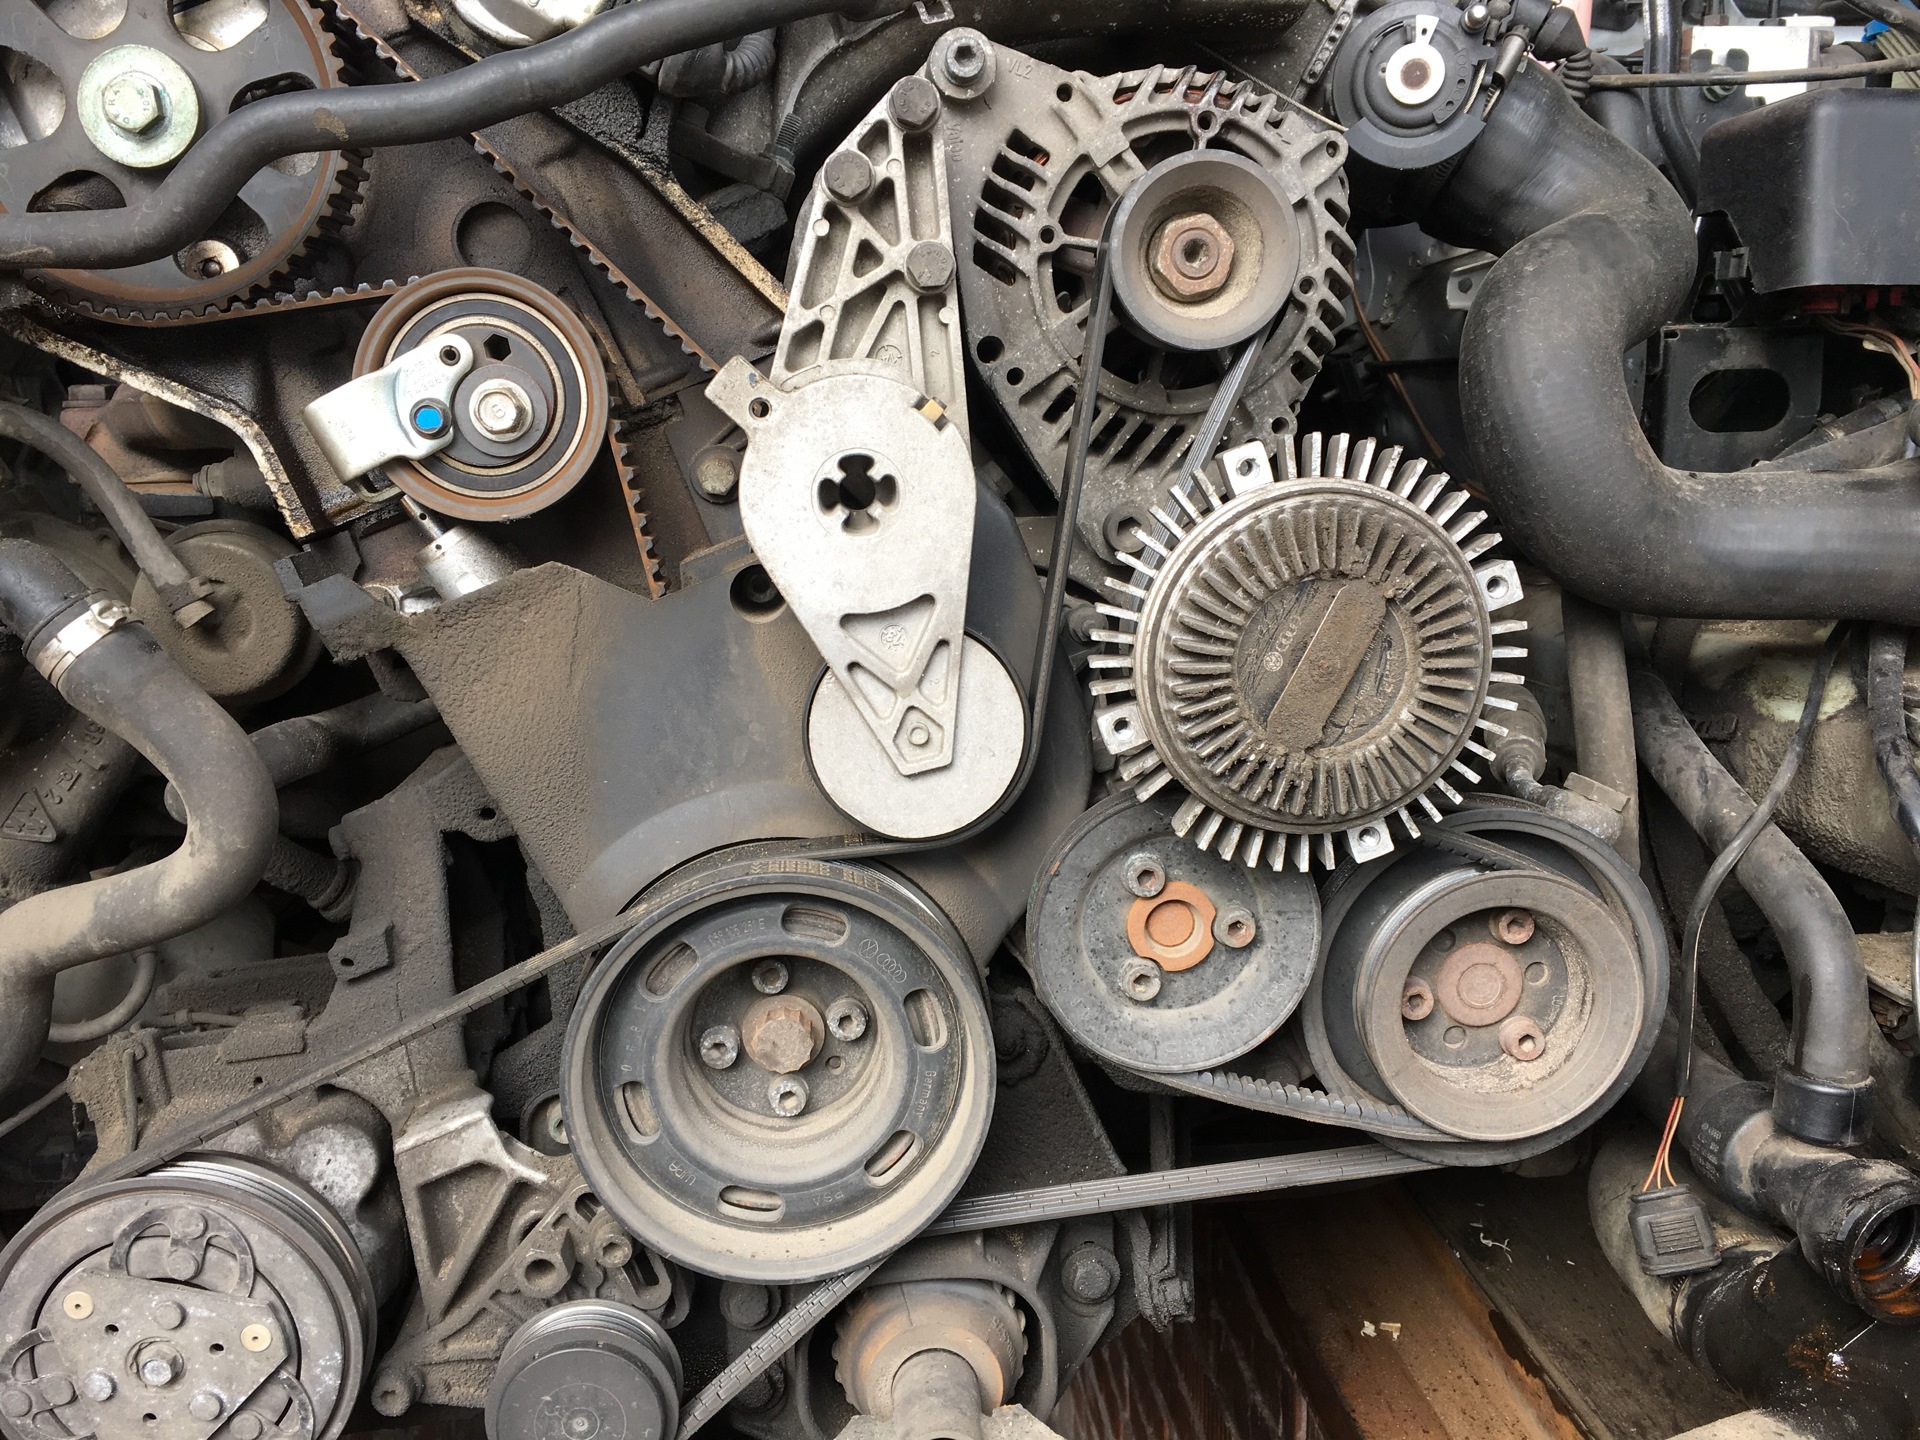
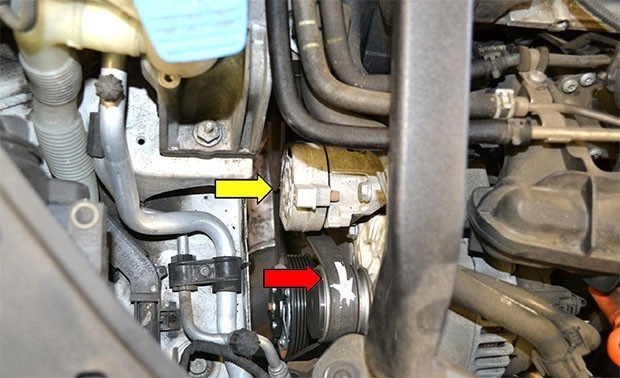
Next, you will need to remove the drive belt (yellow arrow) and tensioner (red arrow).
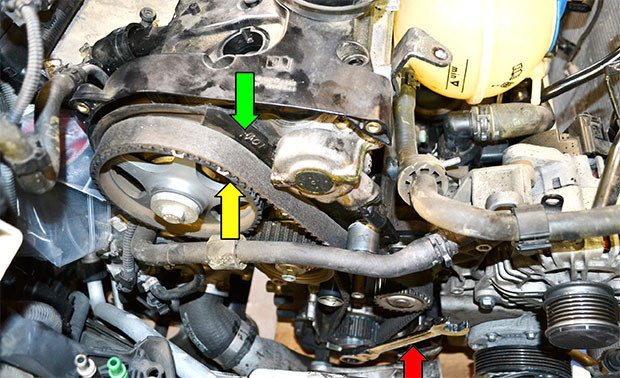
We remove the protective casing of the gas distribution mechanism to see the belt and gear. To do this, unscrew the two Torx T30 screws on top of the protective cover.
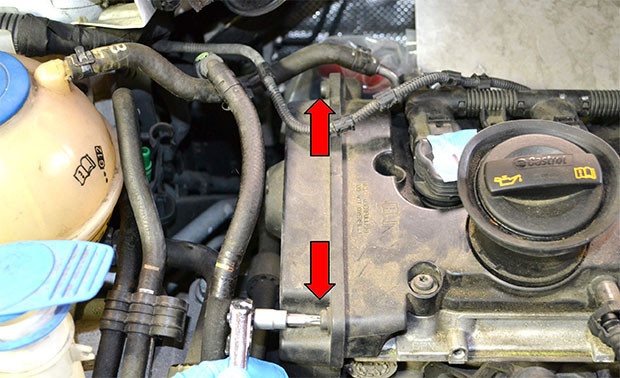
The cover fits snugly, so be careful not to damage it when removing it. Under protection (red arrow) you can see the belt and sprocket (yellow arrow).

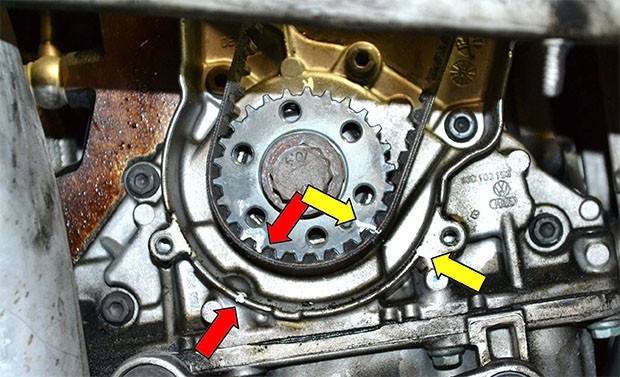
We rotate the motor until the notch on the gear (red arrow) matches the mark on the body (yellow arrow).
Note: Someone marked the wheel in two places with white, but we should be able to see the notch in the gear (red arrow).

You can turn the engine clockwise by turning the 19mm nut on the crankshaft.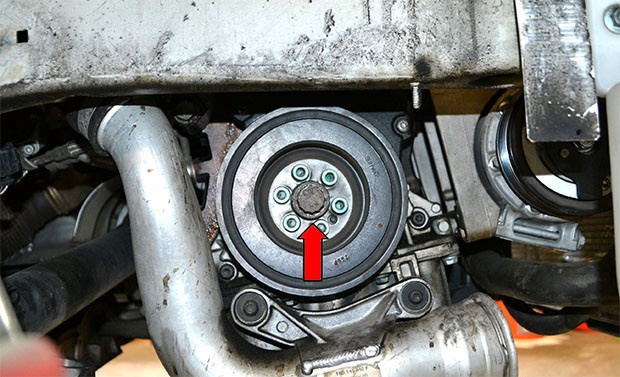
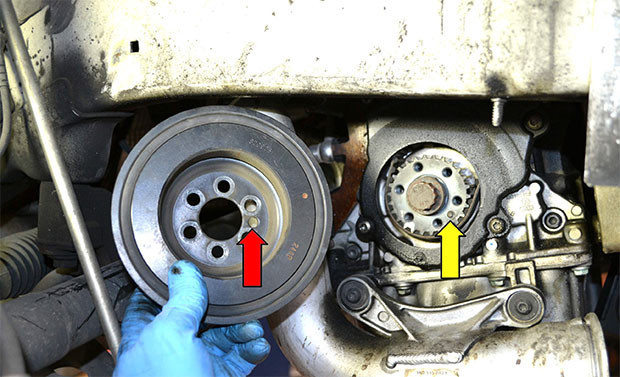
Remove the crankshaft pulley. While holding the 19mm center bolt (red arrow), remove the six 6mm hex bolts from the pulley (yellow arrow).
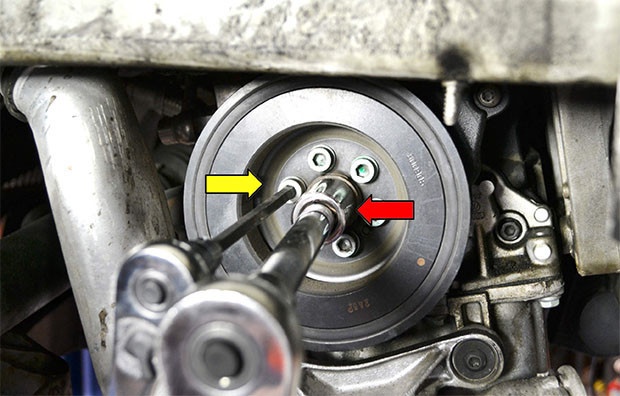
The crankshaft pulley has a pin hole (red arrow) that mates with the crankshaft pin (yellow arrow), so it can only be installed in one position.
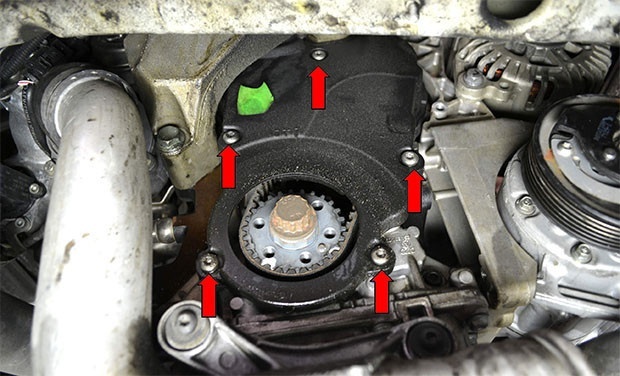
We unscrew the five Torx T30 screws from the bottom cover of the timing belt drive. We can't remove the cover yet as we need to remove the engine mounts first.
Then you must move the expansion tank to gain access to the engine. If you are not afraid to spill coolant, then you do not need to drain it from the coolant reservoir; disconnect the small rod (green arrow), disconnect the sensor (yellow arrow) and unscrew the two Torx T25 screws (red arrows) and remove the reservoir to the side, holding it vertically so as not to spill coolant. If you are afraid of spilling coolant, disconnect the hose at the bottom and drain the coolant from the reservoir. The rest of the steps are the same as in the first case.

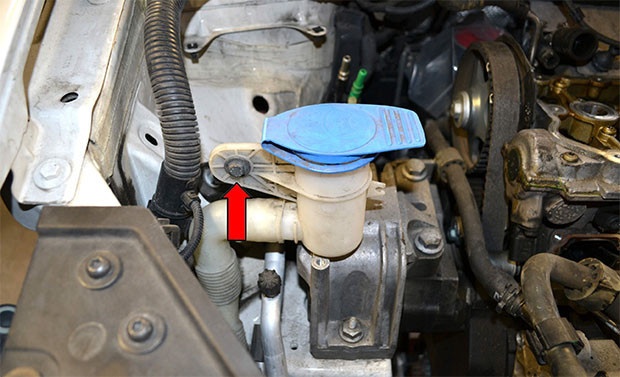
Using a 10 wrench, remove the windshield washer reservoir.
To get the job done, you will need to place stands under the engine. To evenly distribute the weight of the motor, a board or thick plywood can be inserted between the skid and frame.

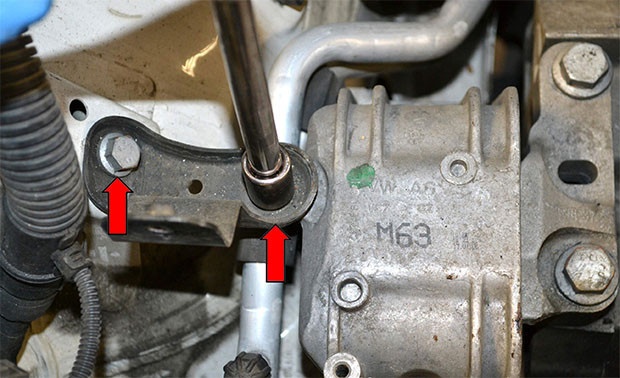
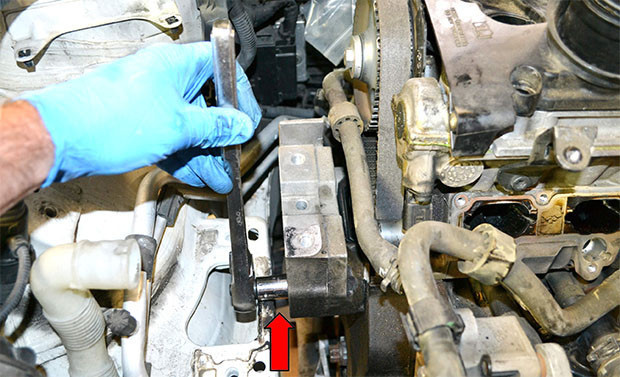
We unscrew the two 13mm bolts that hold the bracket between the wheel and the motor mount. We understand the base.
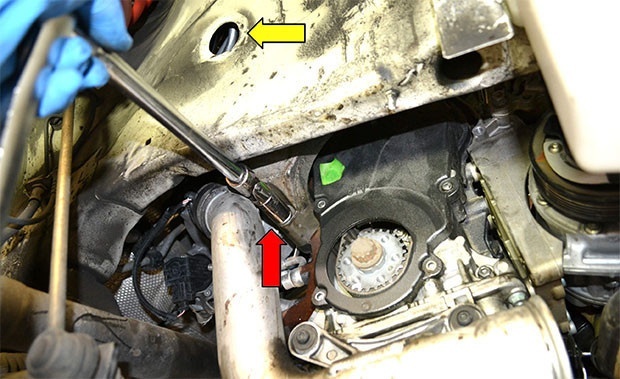
Remove the plug under the right wheel and unscrew the 18mm bolt under it.

Using an 18mm socket wrench, remove the lower engine mount bolt (red arrow). The yellow arrow shows the hole in the wing to remove the second bolt.
Next, unscrew the two 18mm screws.
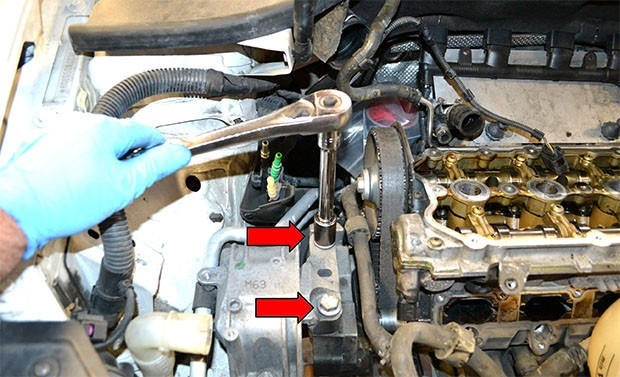
We unscrew the two 16 mm screws that secure the mount to the frame.
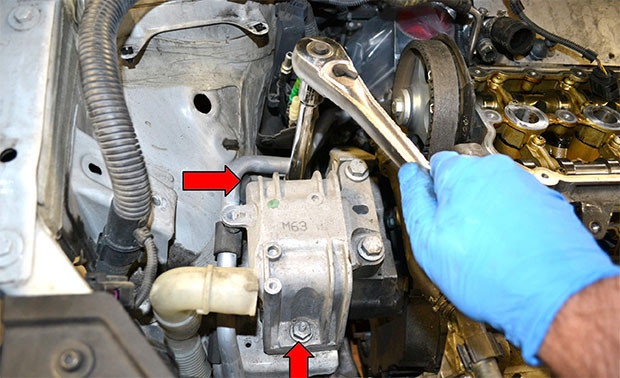
Remove from the car a part of a frame with an engine support.
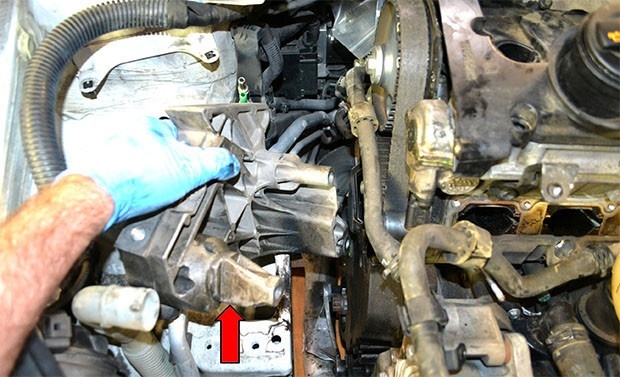
Using a jack, raise the engine to get enough clearance to access the last 18mm engine mounting bolt.
The bolt is long so there should be enough room to pull it out.

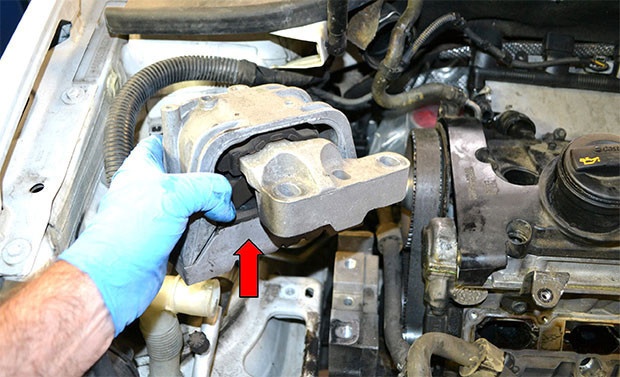
Remove the engine mount from the vehicle. It fits snugly so you have to loosen it to take it off.
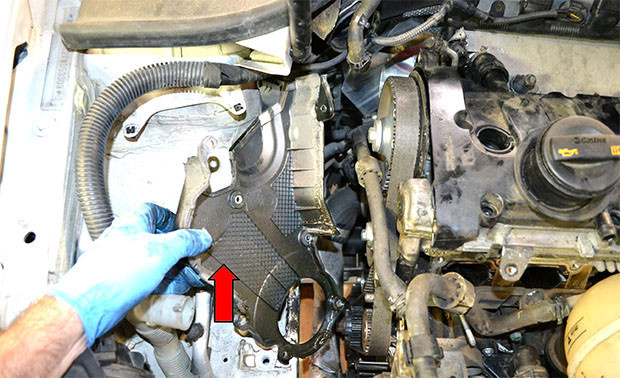
Now we unscrew the last two Torx T30 screws that hold the lower timing belt cover.
Remove the lower timing belt cover.
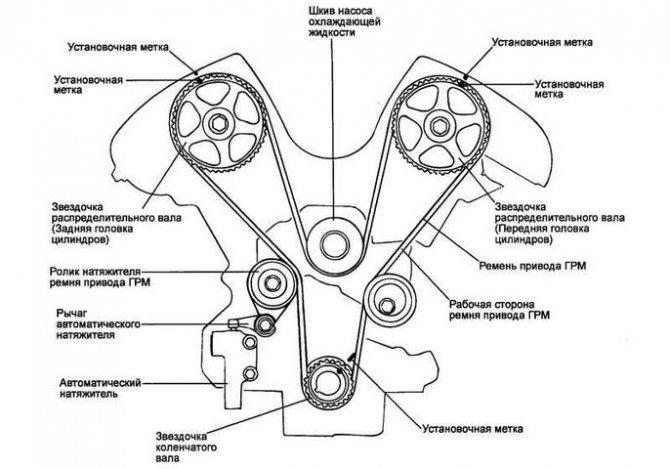
We now have access to the entire front of the engine. Using a 19mm socket wrench (red arrow), turn the motor clockwise and check that the mark on the sprocket (yellow arrow) is aligned with the mark on the head (green arrow).
With the timing belt on, make a few marks on the sprocket and crankcase.
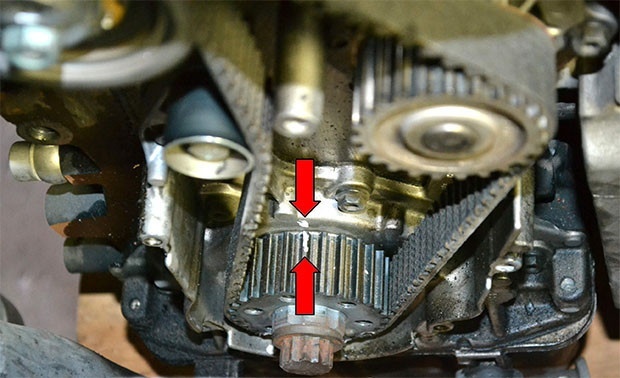
I make 2-3 marks to see if you are working above or below the motor (red and yellow arrows).
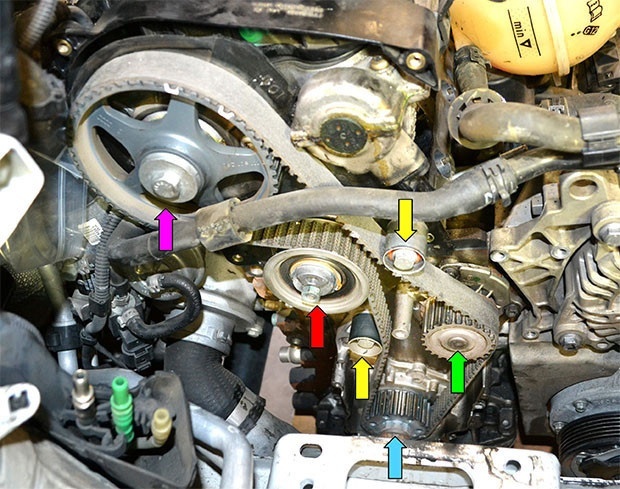
Now that everything is removed, we have access to all the components of the front of the engine: the camshaft sprocket (purple arrow), the belt tensioner (red arrow), the rollers (yellow arrows), the crankshaft (blue arrow) and the water pump (green arrow). ).
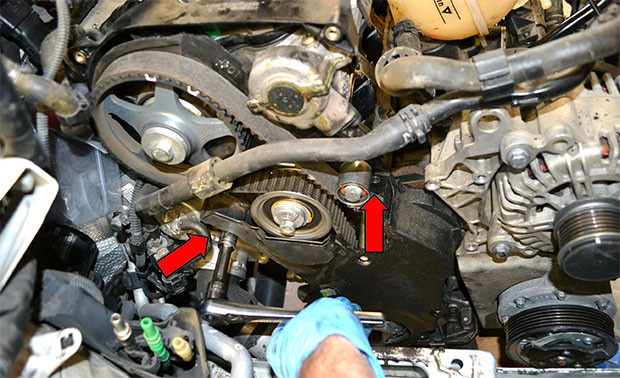
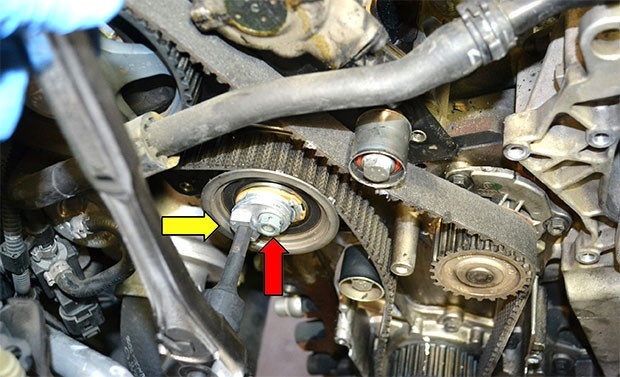
To remove the belt, loosen the 13mm nut (red arrow) on the tensioner, and then use an 8 hex wrench to turn the tensioner counterclockwise until the belt is loose.
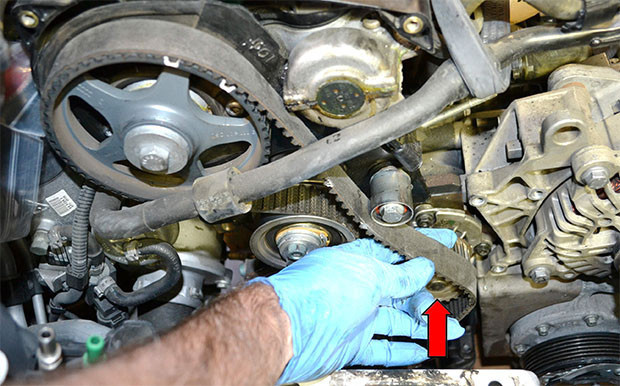
First remove the pump belt.
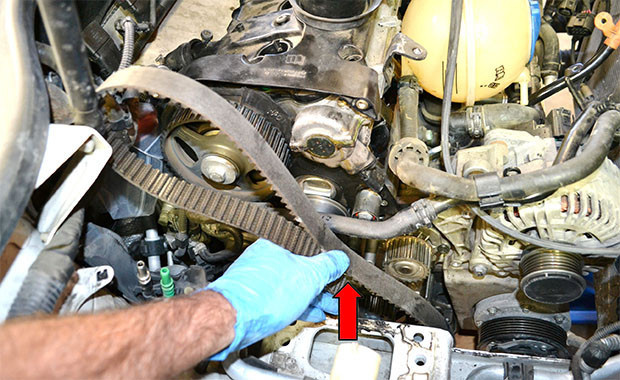
After that, remove it from the steel parts of the engine.
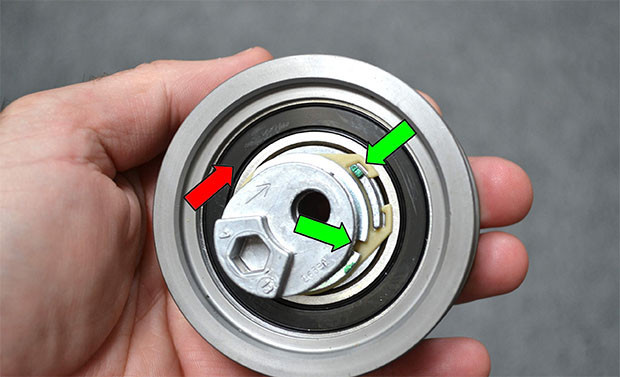
Installation is in the reverse order. Always install the belt on the crankshaft pulley last. When installing a new belt, turn the tensioner in the direction of the arrow (red arrow, clockwise) until the notch lines up with the tab (green arrows) and tighten the 13mm nut. Using a 19mm socket wrench, turn the motor 2 full turns clockwise by hand. The marks on the sprocket, the head and the marks we made should be on the same line. If they don't match, then you made a mistake somewhere, remove the belt and try again until everything matches correctly.