Replacing crankshaft oil seals on a VAZ 2107: a step-by-step description of the process with photos and videos
Content
Many motorists face the problem of an oily engine, and especially those who drive the "classic". This situation is usually associated with oil leakage from under the crankshaft oil seals. In this case, the sealing elements need to be replaced. If the repair is delayed, the consequences will be more significant.
Appointment of crankshaft oil seals VAZ 2107
The crankshaft of the VAZ 2107 engine, as well as any other car, is constantly lubricated with engine oil, which is located in the oil pan. However, with constant rotation of the crankshaft, grease may leak from the cylinder block. The owners of the “classics” are not surprised by such words as “oil leakage”, as well as subsequent problems. Although this does not mean at all that such problems should not be paid attention to. Special elements are installed in front and behind the crankshaft - oil seals, which prevent arbitrary leakage of oil from the engine block. The seals differ in size - the rear one has a larger diameter, due to the design of the crankshaft.
Since the cuffs are under the influence of constant friction during engine operation, and the crankshaft rotates at high speed, the seal material must be endowed with a certain heat resistance. If we consider ordinary nitrile, then it will not work, because during operation it will burn out and destroy. Fluororubber rubber or silicone is excellent for this purpose. In addition to the material, when choosing an oil seal, attention should be paid to the presence of markings and shape. A quality product should have a sharp working edge and easily readable inscriptions on the outside.
Where is the front crankshaft oil seal VAZ 2107
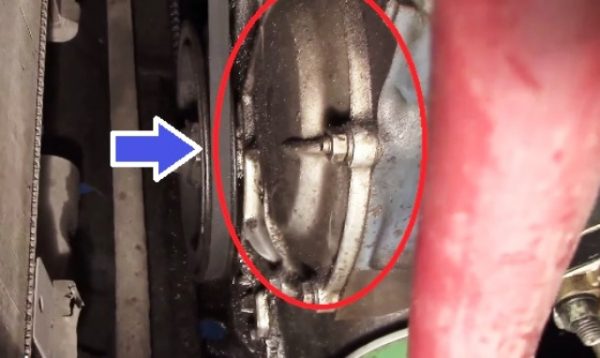
The sealing element on the VAZ 2107 engine is located in the front cover of the cylinder block in a special hole. Even without having an idea where the front crankshaft oil seal is located on the "seven", its location can be determined without much difficulty. To do this, you need to open the hood and look at the front of the engine: the part in question is located behind the crankshaft pulley.
Seal size
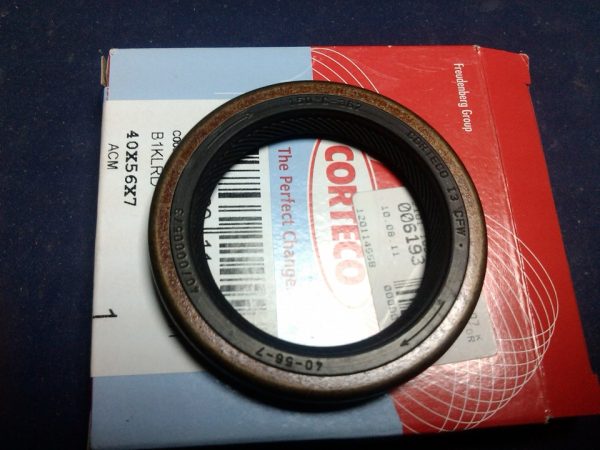
In order to perform a high-quality repair and at the same time there are no unpleasant situations, you need to know what size the cuff is installed in front of the crankshaft. On the VAZ 2107, as on the rest of the "classics", the seal has a dimension of 40 * 56 * 7 mm, which means the following:
- outer diameter 56 mm;
- inner diameter 40 mm;
- thickness 7 mm.
When choosing manufacturers, preference should be given to Corteco, Elring.
Signs of damage to the front oil seal
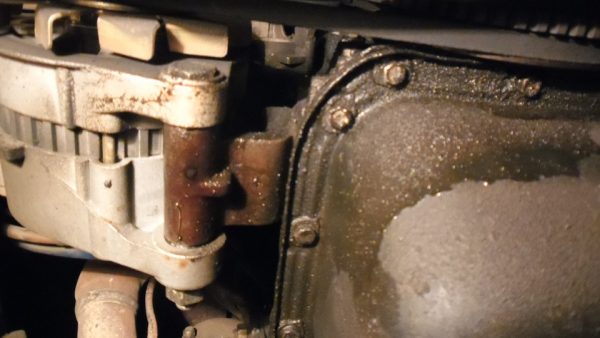
How to determine that the front oil seal on the VAZ 2107 has become unusable and needs to be replaced? This can be judged by a characteristic feature - an oily front of the engine and flying spray throughout the engine compartment. This happens as a result of the penetration of motor lubricant through the working edge of the stuffing box onto the crankshaft pulley and further spreading through the engine compartment. In addition to the indicated symptom, it is necessary to know for what reasons the sealing element is damaged:
- Big run. As a rule, with a run of over 100 thousand km. the seal wears out and begins to leak lubricant. As a result of exposure to vibrations from the crankshaft, the inner part of the cuff becomes unusable and cannot provide a snug fit to the working surface.
- Long downtime. If the car has not been used for a long time, especially in winter, the rubber gasket may simply harden. This will lead to the fact that the gland will not be able to perform its functions.
- Leak from under the new element. This phenomenon may be due to the installation of a low-quality product. Therefore, you should choose products only from trusted manufacturers.
- Incorrect installation. A leak can occur when the stuffing box is skewed, that is, if the part fits unevenly.
- Power unit problems. Oil leakage may be due to problems with the engine itself. If for some reason the pressure of the crankcase gases has increased, they can squeeze out the cuff and a gap will appear, which will lead to a lubricant leak.
- Oil filter leak. Often a situation arises when oil seeps out from under the filter element and the front of the engine is also covered in lubricant.
Oil seal replacement
If the oil seal is out of order, it must be replaced, since such a part cannot be restored. This is due to the fact that rubber loses its properties, wears out. To replace the front seal with a VAZ 2107, you first need to prepare the necessary list of tools:
- a set of keys;
- beard;
- a hammer;
- screwdriver;
- mounting blade.
When the preparatory activities are completed, the tool and new parts are at hand, you can begin the repair procedure.
Removing the front cover
To dismantle the front cover of the engine on the VAZ 2107, the car is installed in a pit or overpass, the gear is turned on and put on the handbrake, after which the following steps are performed:
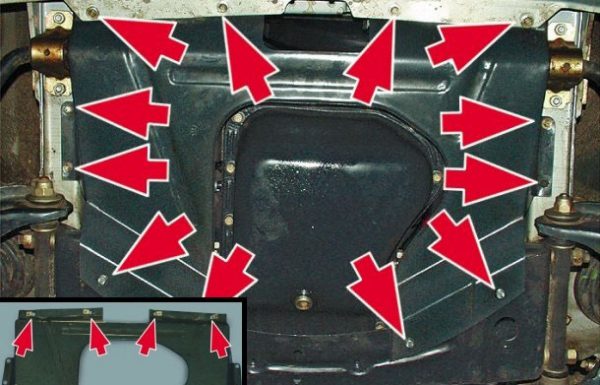
- We remove the crankcase protection by unscrewing the corresponding fasteners.
 To dismantle the engine crankcase protection, you will need to unscrew the appropriate fasteners
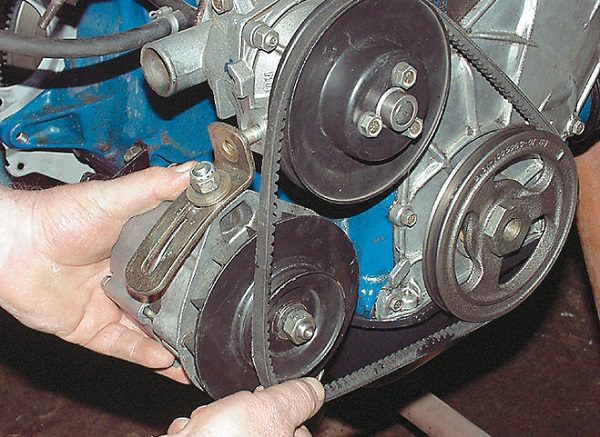
 - Weaken the tension of the alternator belt and remove the belt itself.To remove the alternator belt, it is necessary to loosen the mount, and then dismantle the flexible element
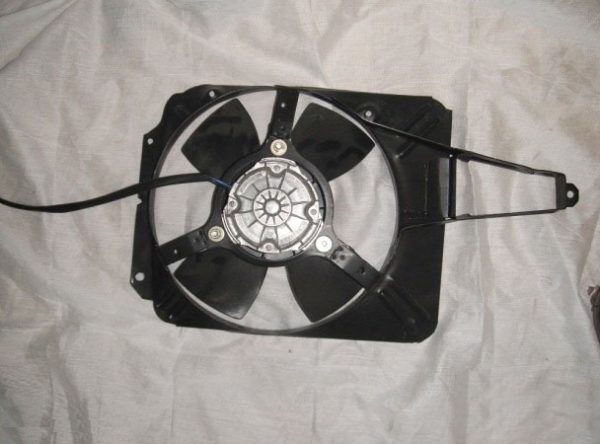
- We dismantle the casing from the cooling system together with the fan.We dismantle the cooling system fan together with the casing
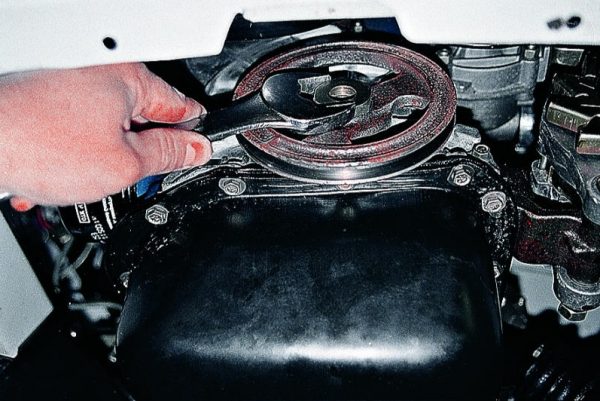
- We unscrew the bolt securing the crankshaft pulley with a 38 wrench.To remove the crankshaft pulley, you will need to unscrew the bolt with a 38 wrench.
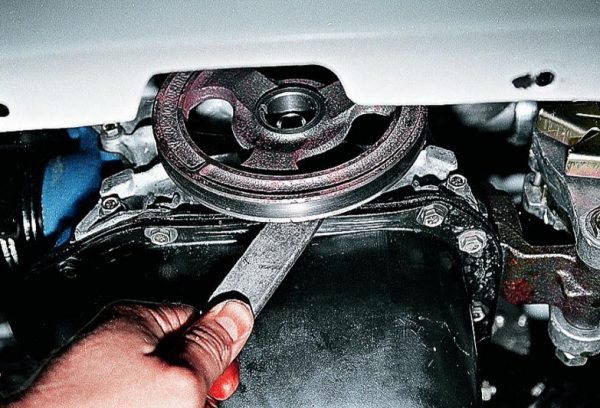
- We dismantle the pulley with our hands, prying it, if necessary, with a large screwdriver.If the crankshaft pulley cannot be removed by hand, pry it with a screwdriver or a pry bar
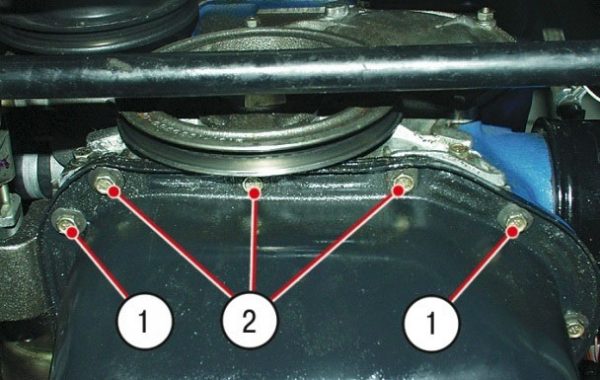
- We loosen the two bolts of the pallet cover (1), after which we unscrew the bolts securing the cover itself (2).At the bottom, the front cover is bolted through the pallet
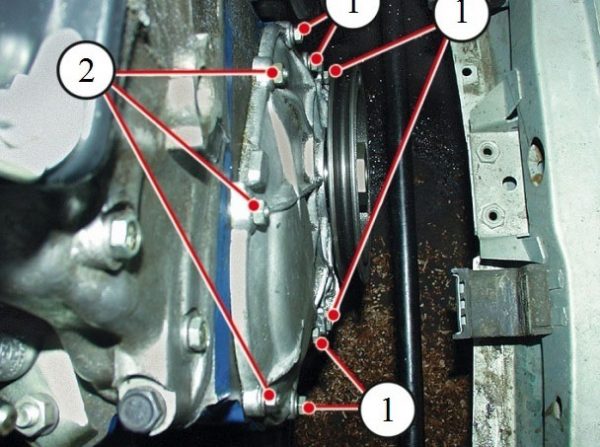
- We unscrew the bolts (1) and the upper nuts (2) securing the cover to the engine block.The front cover is fastened with bolts and nuts. To remove it, all fasteners will need to be unscrewed.
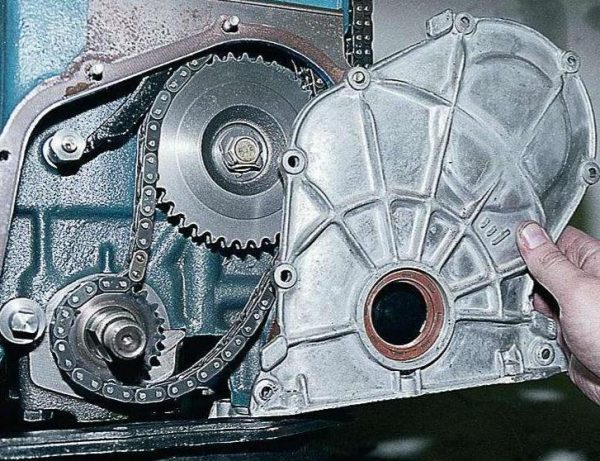
- We remove the cover from the engine along with the gasket, prying it with a screwdriver.Remove the front cover of the engine together with the gasket, gently prying it with a screwdriver
Some owners of the "sevens" avoid the described procedure and manage to replace the oil seal without dismantling the cover. If you do not have sufficient experience in such repairs, then it is better to remove the camshaft drive cover from the engine.
Oil seal removal
On the removed front cover, it will not be difficult to remove the sealing element. To do this, you will need to resort to the help of a hammer and a beard (adjustment).
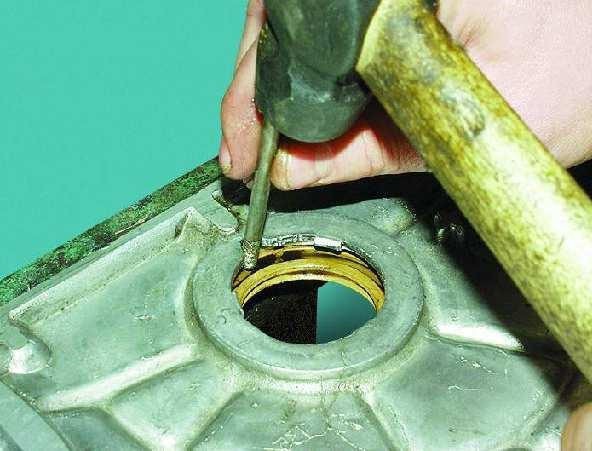
By applying light blows, the gland is easily removed from its seat, and this procedure is performed from the inside of the cover. Otherwise, it will be problematic to remove the old seal.
Video: replacing the front crankshaft oil seal on the "classic"

Installing a new oil seal
Before installing a new part, it is necessary to degrease the seat and lubricate the working edge with engine oil. Next, we perform the following steps:
- We install a new cuff in the cover with the working edge inward.
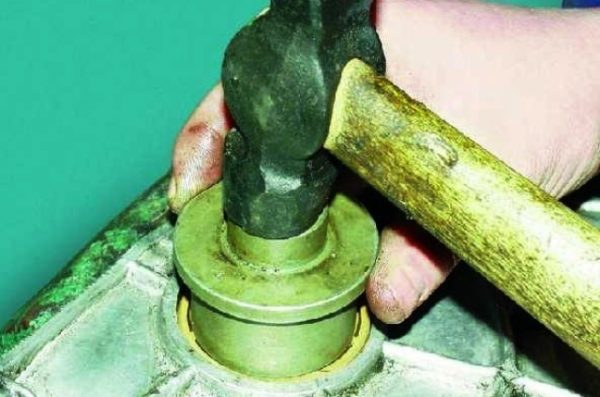
- Using a hammer and a suitable size adapter, we press the part into place.
Cover and gasket installation
After installing the gland, it remains to prepare the cover and install it:
- If the old gasket has become unusable, we replace it with a new one, while applying sealant on both sides for better tightness.
- We install the cover together with the gasket in place, baiting all the fasteners (bolts and nuts).
- We center the cover with a special mandrel.
- We do not completely wrap the fastening of the cover, after which we clamp the bolts and nuts crosswise.
- We twist the bolts of the oil pan in the cover.
At the end of the described procedures, the crankshaft pulley and the generator belt are installed, after which it is tensioned.
Video: how to install the front cover on the VAZ 2101/2107 engine

Where is the rear crankshaft oil seal on the VAZ 2107
If there should not be any particular difficulties with replacing the front crankshaft oil seal with a VAZ 2107, then in the case of the rear seal, you will need to make not only efforts, but also spend a lot of time. This is due to the fact that the cuff is located at the rear of the engine behind the flywheel and to replace it, you will need to dismantle the gearbox, clutch and flywheel. The need to replace the sealing element arises for the same reason - the appearance of an oil leak. If the protective element is out of order, but the car is still operated further, then events can develop as follows:
- due to oil getting on the clutch, the vehicle loses power;
- increased fuel consumption due to clutch slip;
- there is a need for periodic addition of oil to the engine.

Dismantling the gearbox on the VAZ 2107
The overall picture for dismantling the checkpoint consists of the following steps:
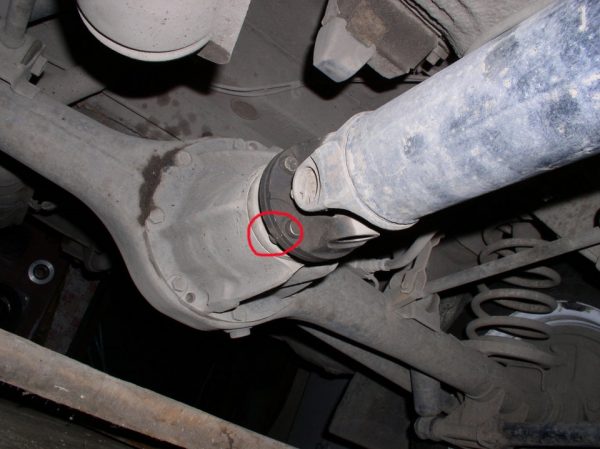
- We remove the cardan shaft together with the outboard bearing by unscrewing the corresponding fasteners.One of the stages of dismantling the gearbox is the removal of the cardan shaft
- We dismantle the starter and all the elements that will prevent the removal of the gearbox (speedometer cable, reverse wires, clutch slave cylinder).For trouble-free removal of the gearbox, you will need to dismantle the starter, speedometer cable, reverse wires, clutch slave cylinder
- In the passenger compartment, we remove the gear lever and, having removed the upholstery, unscrew the cover that closes the opening in the floor.
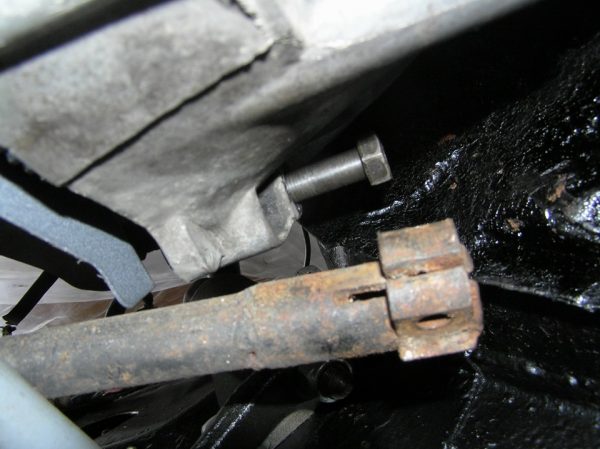
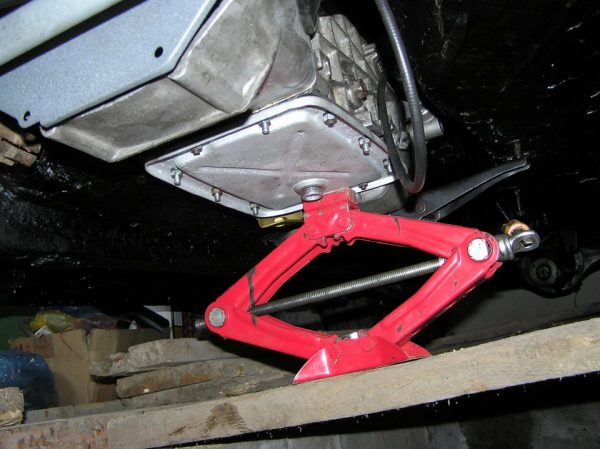
- Substituting an emphasis under the box, we turn off the bolts of fastening to the cylinder block.To dismantle the box, it is necessary to substitute the stop under the mechanism, and then unscrew the fastening bolts
- Carefully pull the gearbox back, removing the input shaft from the clutch disc.To remove the gearbox, the assembly is carefully pulled back, removing the input shaft from the clutch disc.
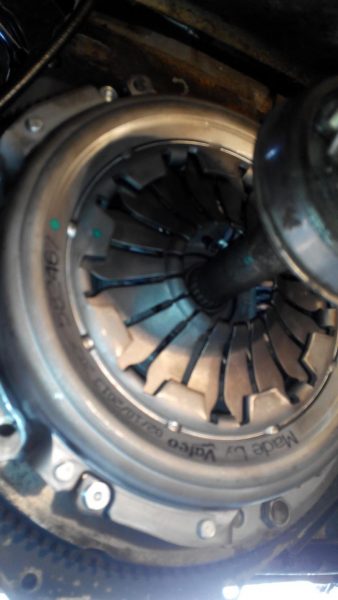
Removing the clutch
The process of removing the clutch mechanism on the "seven" is less complicated than with the box. To remove the flywheel, you will need to remove the basket and the clutch disc itself. To unscrew the fasteners, wrap the bolt into the hole on the engine block and, resting a flat mount on the bolt, insert it between the teeth of the flywheel to prevent crankshaft rotation. It remains to unscrew the bolts securing the flywheel with a 17 key, remove it, and then the clutch shield.

Oil seal removal
The sealing element can be removed in two ways:
- without removing the gland holder, which is somewhat easier;
- with the removal of the holder, which is more correct and eliminates the risk of damage to the cuff.
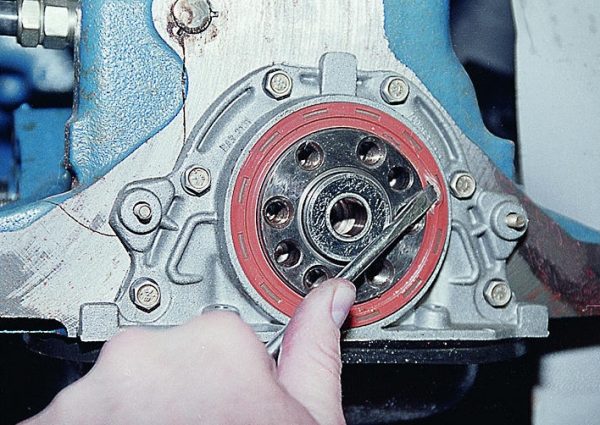
Let's consider both options. In the first case, after dismantling the protective shield, it remains to pry off the seal with a screwdriver and remove it.
With a more correct approach, do the following:
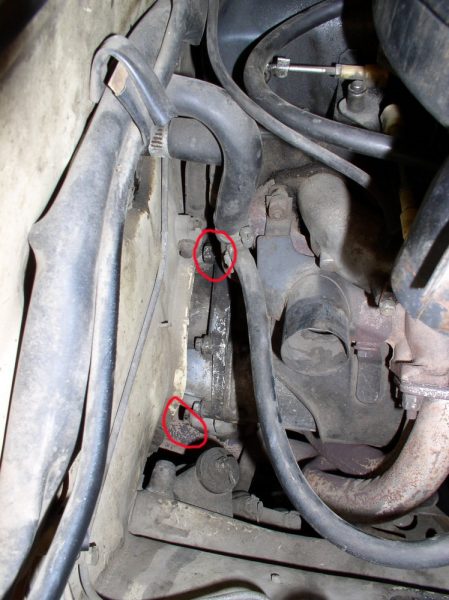
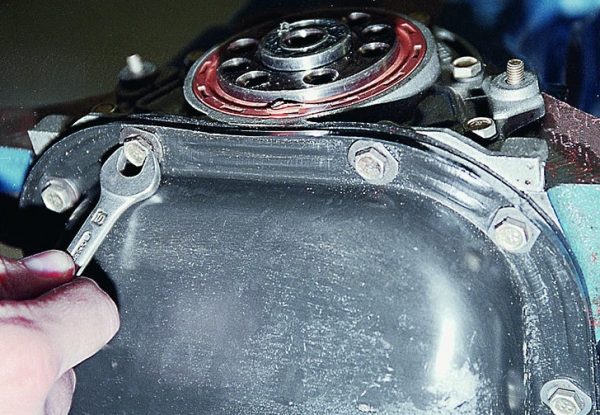
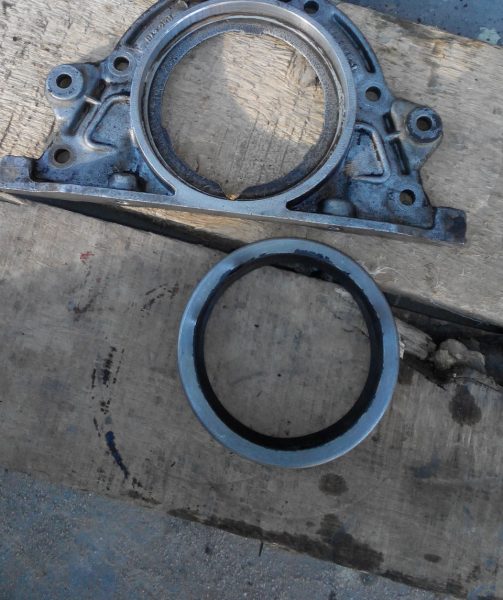
- We unscrew the two bolts securing the crankcase to the stuffing box cover with a 10 key and six bolts that fasten to the power unit block.To dismantle the rear cover of the unit, you will need to unscrew the bolts of its fastening to the engine and the pallet to the cover
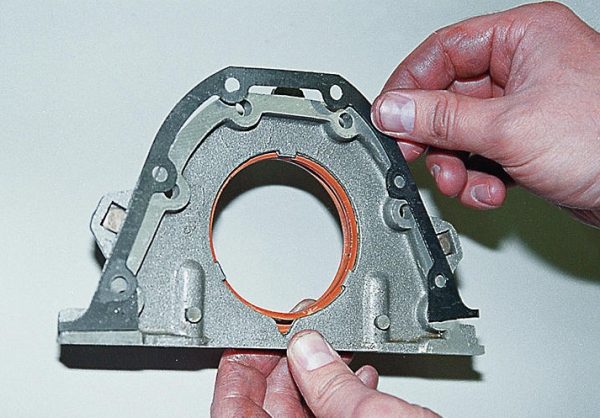
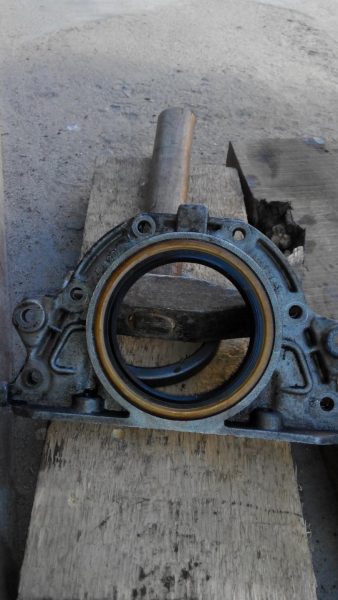
- We pry off the cover with a screwdriver and remove it together with the gasket.To remove the back cover along with the gland, pry it off with a screwdriver
- We press out the old cuff with a screwdriver or a suitable guide.To remove the old oil seal, it is enough to use a suitable size adapter and a hammer
Installing a new oil seal
When buying a new part, be sure to pay attention to its dimensions. The rear crankshaft oil seal on the VAZ 2107 has a dimension of 70 * 90 * 10 mm. Before installing a new element, they inspect the crankshaft itself - it is possible that the surface to which the seal is adjacent is damaged, which led to the failure of the cuff. In addition, similar procedures are carried out for degreasing the seat and lubricating the working surface of the stuffing box.
Attention is also paid to the gasket of the back cover. It is best to replace this element, because it will be a shame if, after assembly, the oil still leaks due to poor tightness. You can use the old seal to press in the new seal.
Video: replacing the crankshaft rear oil seal on a VAZ 2107

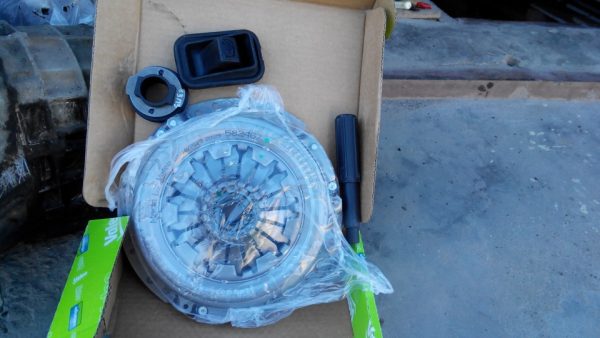
Installing the clutch
The assembly of the clutch after replacing the oil seal is carried out in the reverse order, but before installation it is necessary to inspect all the elements for heavy wear and damage so that after a short period of time there are no problems with this assembly. The flywheel, basket and clutch disc, clutch release and fork are inspected. With a lot of wear, cracks and other characteristic flaws, one or another part needs to be replaced. Reassembly shouldn't be an issue. The only thing to pay attention to is the centering of the clutch disc. To do this, use a special adapter or input shaft from the gearbox.
Installing the checkpoint
Regarding the installation of the gearbox in place, it should be noted that the procedure is best performed with an assistant. This also applies, in principle, to dismantling, because the mechanism still weighs a lot, and safety should come first in any repair work. The input shaft of the gearbox, namely the spline connection, is recommended to be lubricated with a thin layer of Litol-24. After that, the box is installed in the reverse order:
- mount all fasteners;
- return to place all the removed elements that are attached to this node;
- install cardan.
Replacing the crankshaft oil seals on the VAZ 2107 is a necessary procedure if the engine shows signs of this problem. You can carry out repairs in garage conditions, which will require a standard set of tools and clear step-by-step instructions, the observance of which will help to replace failed parts without any nuances.

