Replacing the silent blocks of the front and rear suspension on the VAZ 2106
Content
The silent blocks of the VAZ 2106 suspension have to be changed, although infrequently, but all car owners have to deal with this procedure. This event is quite time consuming, but it is quite within the power of every motorist.
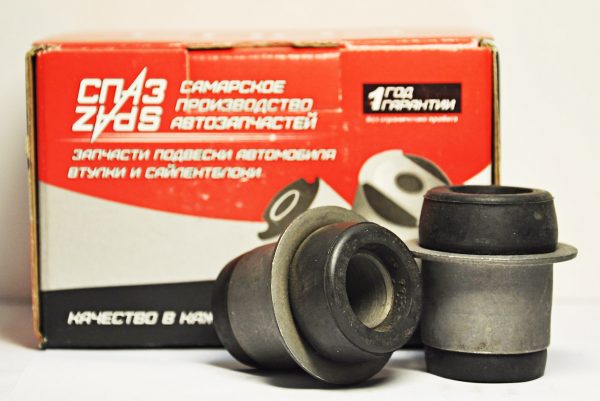
Silent blocks VAZ 2106
Quite high loads are constantly placed on the silent blocks of car suspensions, especially on roads with poor coverage. Such conditions significantly reduce the life of these parts, as a result of which they fail and need to be replaced. Since the controllability of the car depends on the state of the silent blocks, you need to know not only how to identify the malfunction, but also how to replace these components of the suspension.
What's this
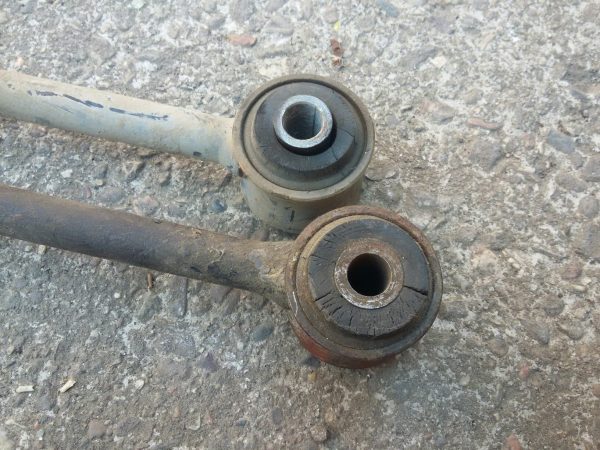
The silentblock is a rubber-metal product, structurally made of two iron bushings with a rubber insert between them. These parts connect the vehicle's suspension components, and the rubber part dampens vibrations transmitted from one suspension element to another.
Where installed
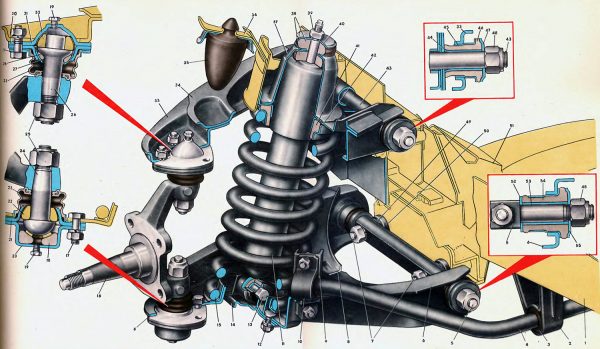
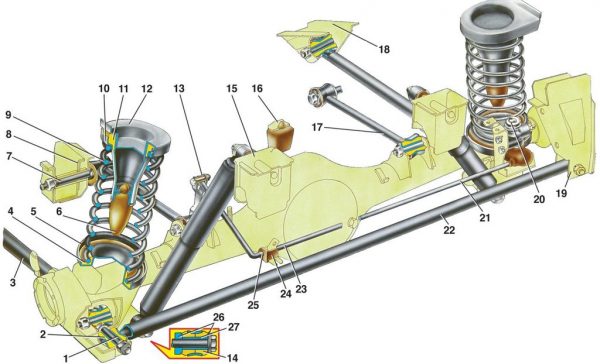
On the VAZ 2106, the silent blocks are pressed into the front suspension arms, as well as into the jet rods of the rear axle, connecting it to the body. The condition of these elements must be periodically monitored, and in case of damage, repairs must be carried out in a timely manner.
What are the
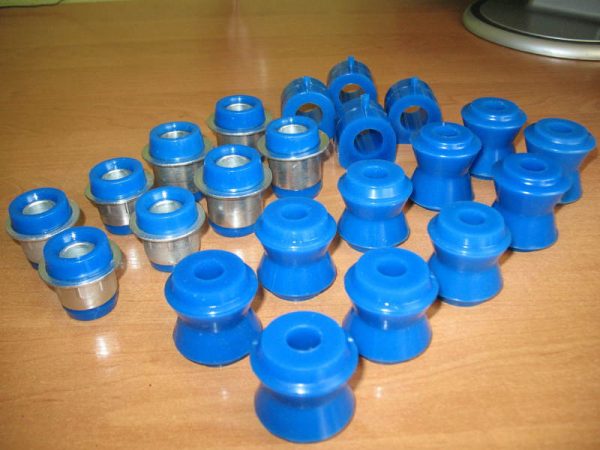
Rubber silent blocks were installed from the factory on the VAZovka Six and other Zhiguli models. However, instead of them, you can use polyurethane products, thereby improving the performance of the suspension and its characteristics. Polyurethane hinges have a longer service life than rubber ones. The main disadvantage of polyurethane elements is their high price. If a set of rubber silent blocks on a VAZ 2106 costs about 450 rubles, then from polyurethane it will cost 1500 rubles. Joints made of modern material not only improve the behavior of the car, but also better absorb shocks and vibrations, reducing noise.
What is the resource
The resource of rubber-metal hinges directly depends on the quality of the products and the operation of the vehicle. If the car is used mainly on good quality roads, then silent blocks can cover 100 thousand km. With frequent driving in holes, of which there are many on our roads, the resource of the part is noticeably reduced and repairs may be required after 40-50 thousand km.
How to check
Hinge malfunctions can be judged by the behavior of the car:
- controllability worsens;
- vibrations appear on the steering wheel and knocks in the front when driving over bumps.
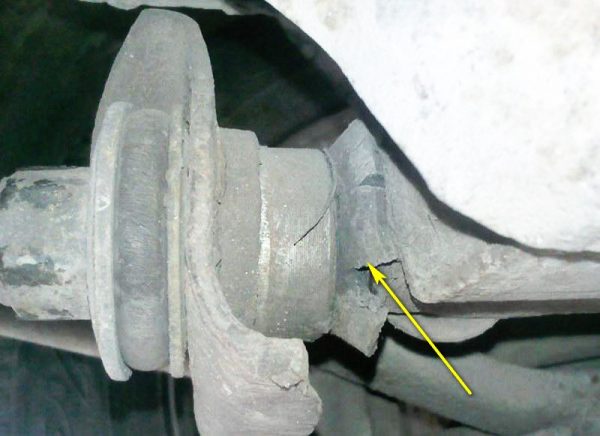
To make sure that the silent blocks have worn out and need to be replaced, they should be checked. First, the parts are visually inspected for damage to the rubber. If it is cracked and partially crawled out, then the part is no longer able to cope with its tasks.
In addition to inspection, the upper and lower arms can be moved with the pry bar. If knocks and strong vibrations of silent blocks are observed, then this behavior indicates a lot of wear and tear on the hinges and the need to replace them.
Video: checking the front suspension silent blocks

Replacing the silent blocks of the lower arm
By its design, the rubber-metal element is made in the form of a non-separable part, which is not repairable and only changes in the event of a breakdown. To carry out repairs, you need to prepare the following list of tools:
- remover of silent blocks;
- ball joint puller;
- keys for 13, 19, 22, 24;
- a hammer;
- chisel;
- mount;
- grease (for example, WD-40);
- jack.
Removing the lever consists of the following steps:
- We jack up one side of the car and dismantle the wheel.
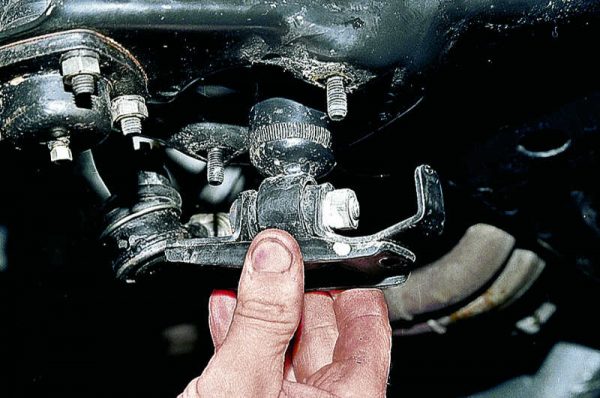
- We turn off the fasteners of the shock absorber and remove it.
 To remove the front shock absorber, unscrew the upper and lower fasteners.
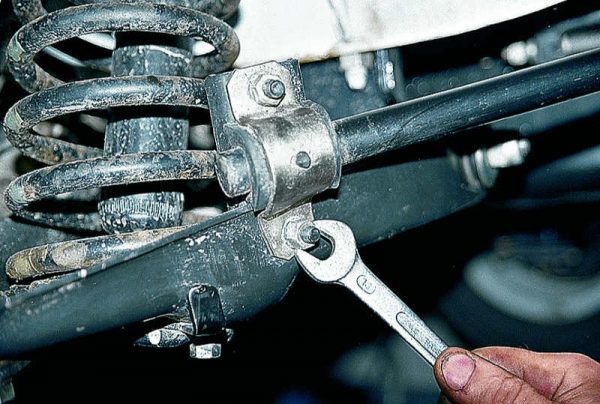
 - We tear off the nuts that hold the axis of the lower arm.Using a 22 wrench, unscrew the two self-locking nuts on the axis of the lower arm and remove the thrust washers
- Loosen the cross stabilizer mount.We unscrew the fasteners of the anti-roll bar cushion with a key of 13
- We load the suspension, for which we lower the jack.
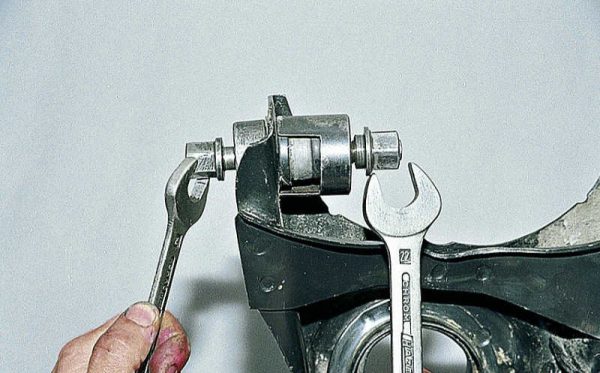
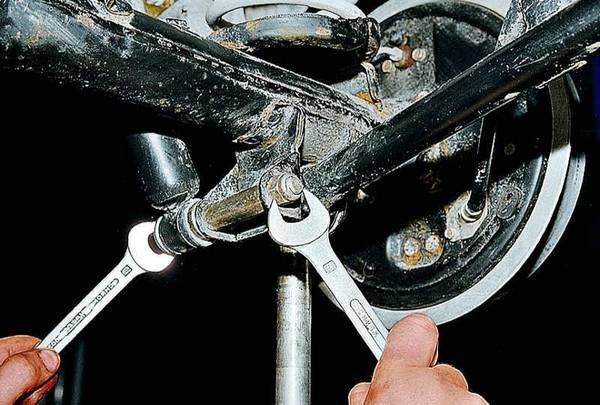
- Having unscrewed the nut, we press out the pin of the lower ball joint.We install the fixture and press the ball pin out of the steering knuckle
- We remove the load from the suspension by raising the jack and moving the stabilizer through the stud.
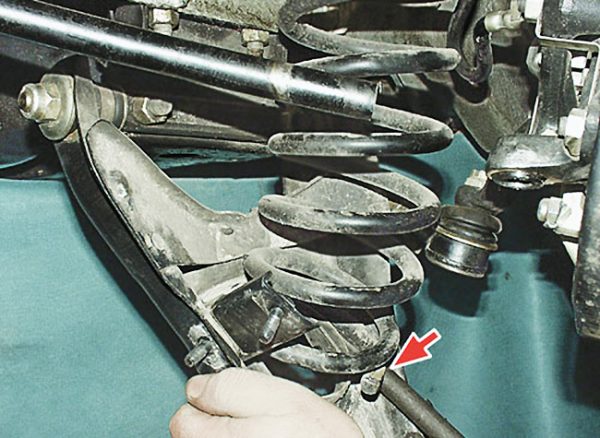
- We dismantle the spring from the cup.We hook the spring and dismantle it from the support bowl
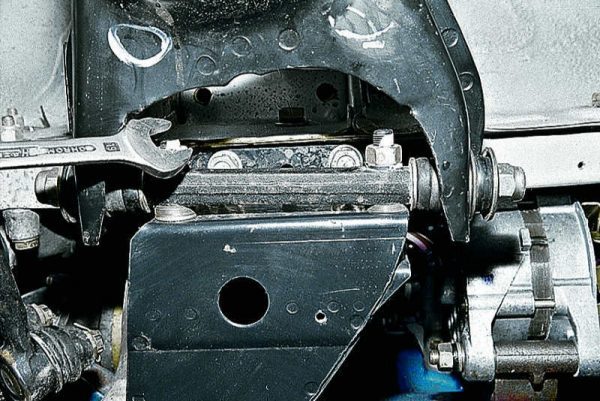
- We unscrew the fasteners of the lever axis to the beam.The axis of the lever is attached to the side member with two nuts
- We drive a mount, a screwdriver or a chisel between the axis and the beam.To facilitate the process of dismantling the lever, we drive a chisel between the axle and the beam
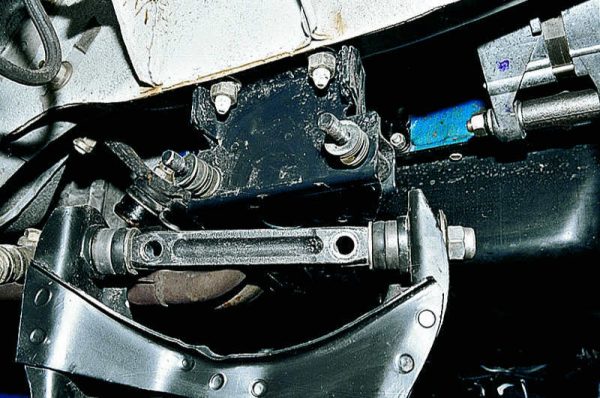
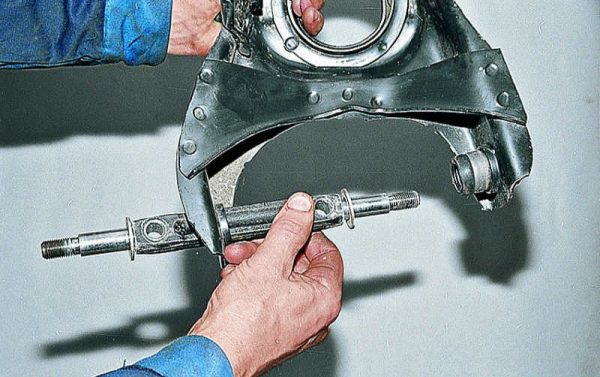
- We pull off the lower lever from the studs.Sliding the lever from its place, remove it from the studs
- Adjusting washers are located between the axle and the beam. We remember or mark their number in order to return the elements to their places during assembly.
- We squeeze out the hinges with the device, having previously fixed the axis in a vice.We fix the axis of the lever in a vice and press out the silent block with a puller
- We mount a new silent block in the eye.Using a puller, install a new part in the eye of the lever
- We put the axle into the hole of the lever and press in the second hinge.We start the axis through a free hole and mount the second hinge
- We assemble in the reverse order.

Dismantling and installation of rubber-metal elements is carried out with one puller, while only the position of the parts changes.
Replacing hinges without removing the lower arm
If there is no time or desire to completely disassemble the suspension, then you can replace the silent blocks of the lower arms without dismantling the latter. Having jacked up the front from the desired side, we perform the following steps:
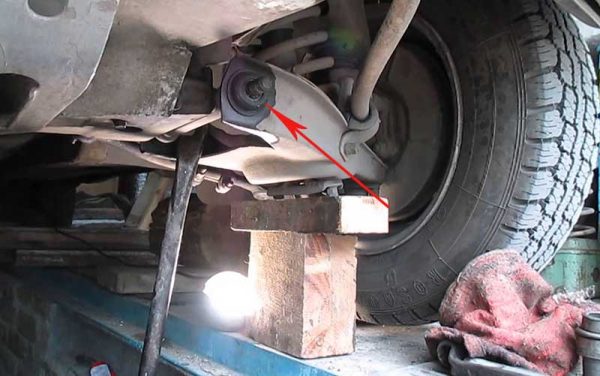
- We substitute a wooden stop under the lower ball joint. Its height should be such that when the jack is lowered, the wheel does not hang out.We substitute a wooden stop under the lower lever
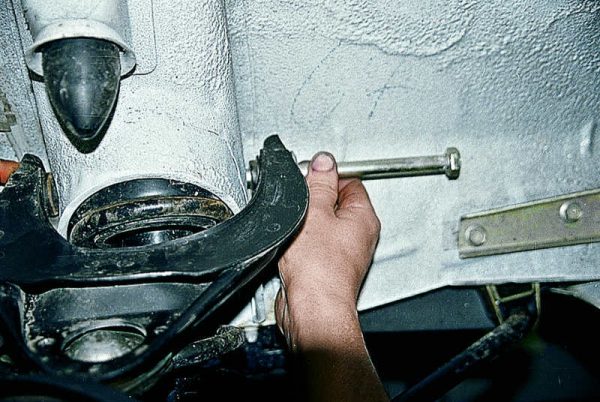
- We unscrew the nuts of the lever axis.
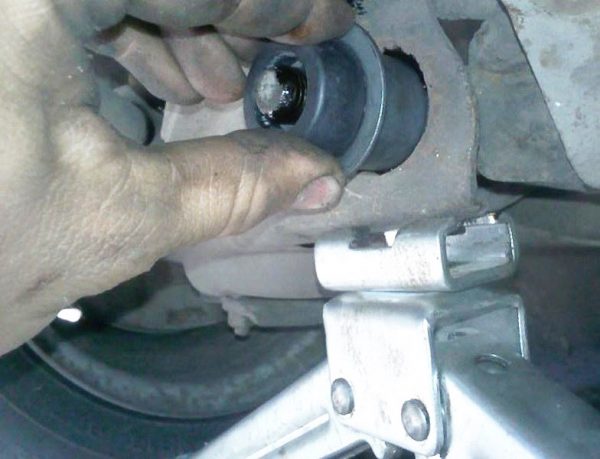
- Carefully apply a penetrating lubricant between the axle and the inner part of the silent block.
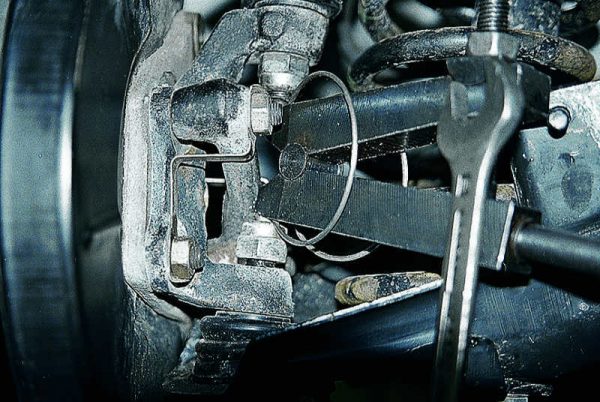
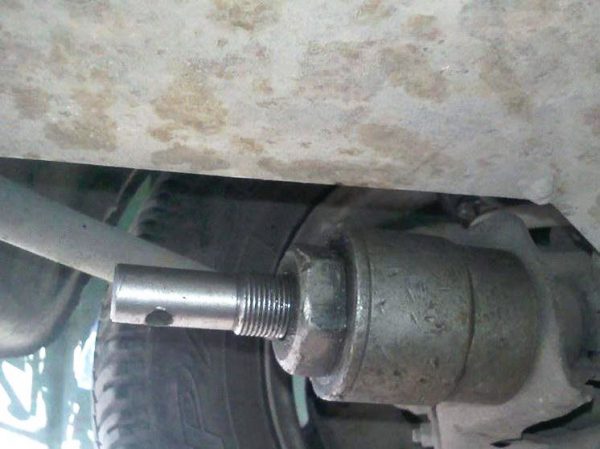
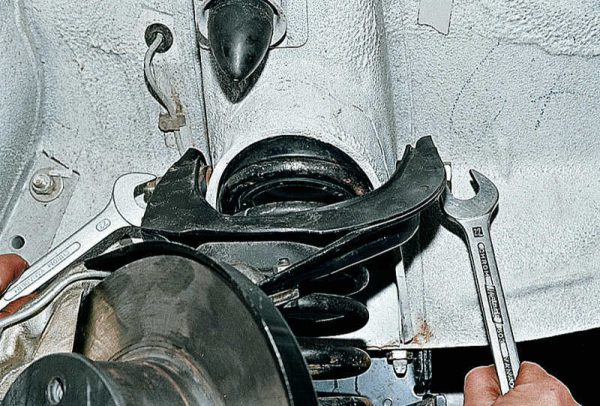
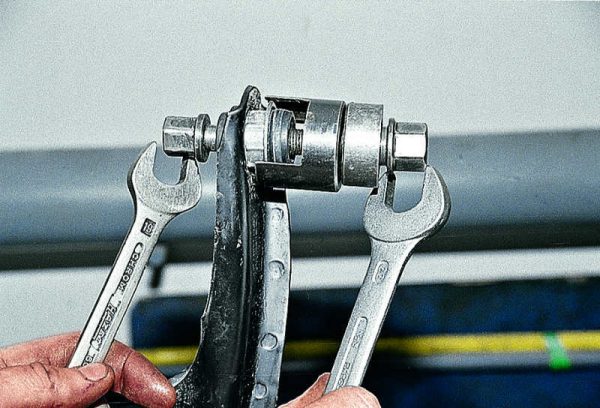
- We fix the puller and press the front hinge out of the lever.We press out the silent block of the lower arm with a puller
- To ensure good access to the second silent block, remove the steering tip using the appropriate puller.
- We remove the old hinge, apply any lubricant to the axis and the ear of the lever and insert a new element.We clean and lubricate the eye of the lever, after which we insert a new part
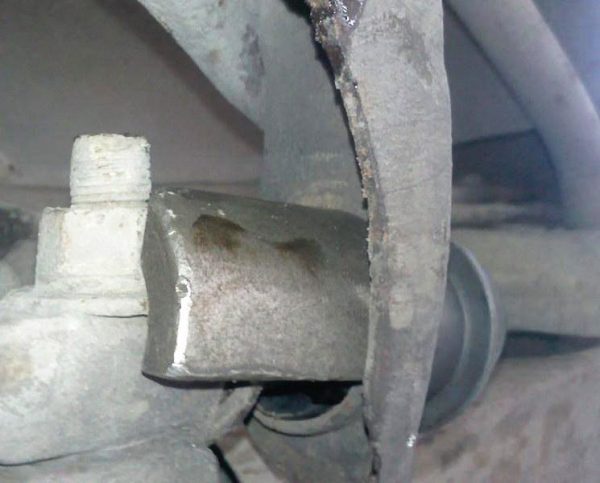
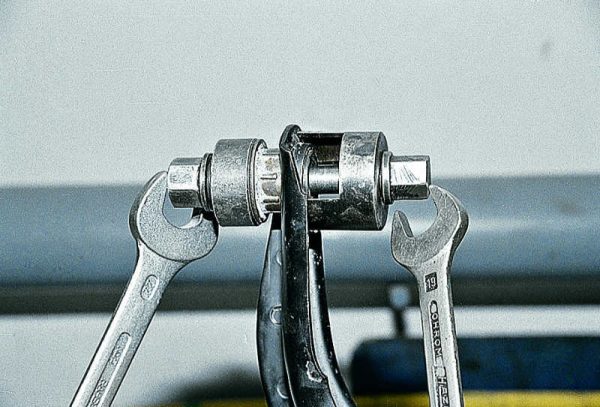
- Between the eye of the lever and the nut for attaching the axle to the beam, we insert the stop bracket from the puller kit.A special bracket is used as a thrust element for pressing the hinge
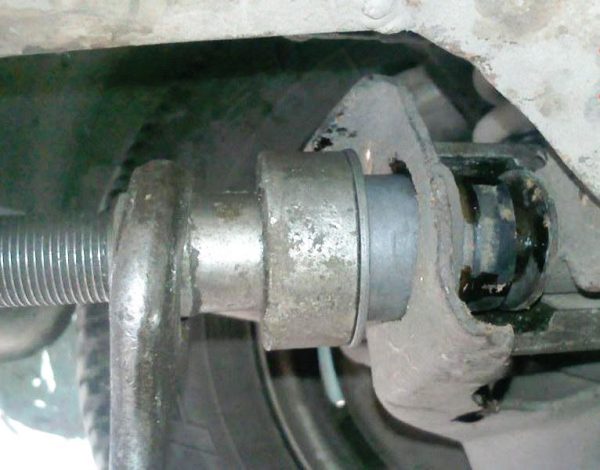
- We press the rubber-metal elements into the lever.I push both silentblocks into the spring lever with a puller
- Install previously removed parts in place.
Video: replacing the hinges of the lower arms on the VAZ 2101-07 without disassembling the suspension

Replacing the silent blocks of the upper arm
To dismantle the upper arm, use the same tools as for the lower arm, and carry out similar actions for hanging the front of the vehicle and removing the wheel. Then perform the following steps:
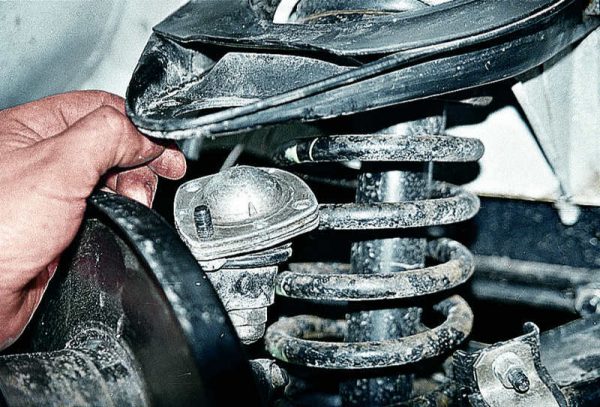
- We unscrew the fasteners of the upper support.Loosen the upper ball joint
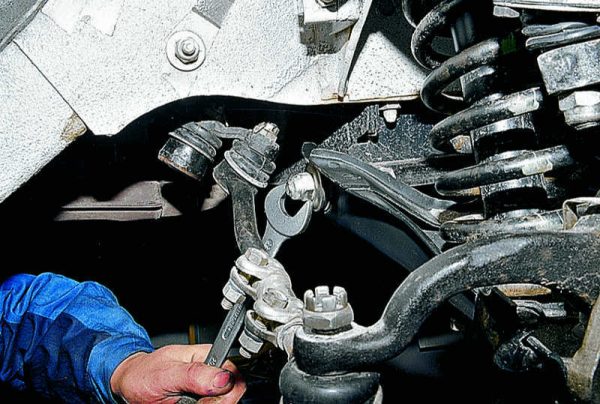
- Using two keys, unscrew the fastening of the axis of the upper arm.We unscrew the nut of the axis of the upper arm, fix the axis itself with a key
- We dismantle the axle and the lever.After unscrewing the nut, remove the bolt and remove the lever
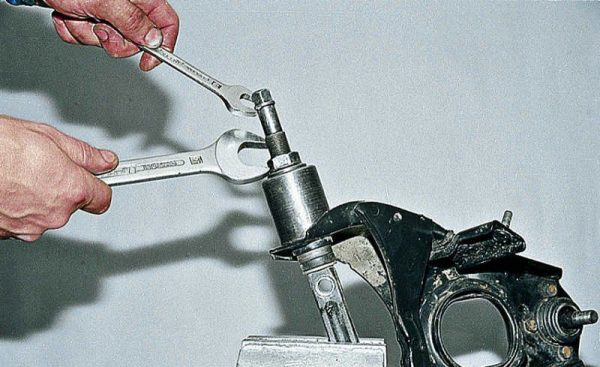
- We squeeze out the silent block with a puller, holding the lever in a vice.We press out the old silent blocks and install new ones using a special puller
- We mount new elements.Using a puller, we press the new silent blocks into the upper arm
- We assemble the suspension in the reverse order.
After repair, you should visit the service and check the alignment of the wheels.
Replacing the jet thrust bushings VAZ 2106
The rubber joints of the rear axle reaction rods are changed when they are worn or visible damage. To do this, the rods themselves are dismantled from the machine, and the rubber-metal products are replaced by pressing out the old ones and pressing in the new ones.
On the "six" rear suspension rods are installed in the amount of five pieces - 2 short and 2 long, located longitudinally, as well as one transverse rod. Long rods are fixed at one end to special brackets fixed to the floor, on the other hand - to the rear axle brackets. Short rods are mounted to the floor spar and to the rear axle. The transverse element of the rear suspension is also held by special brackets.
To replace the linkage joints, you need to prepare the following tools:
- keys for 19;
- new silent blocks;
- penetrating lubricant;
- metal brush;
- mounting blade.
Bushings on all rods change according to the same principle. The only difference is that you have to unscrew the shock mount from below to remove the long bar. The procedure is performed in the following sequence:
- We drive the car onto a flyover or a pit.
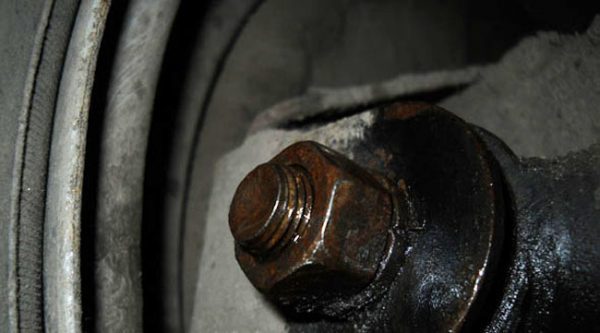
- We clean the fasteners from dirt with a metal brush and apply a penetrating lubricant.Threaded connection treated with penetrating lubricant
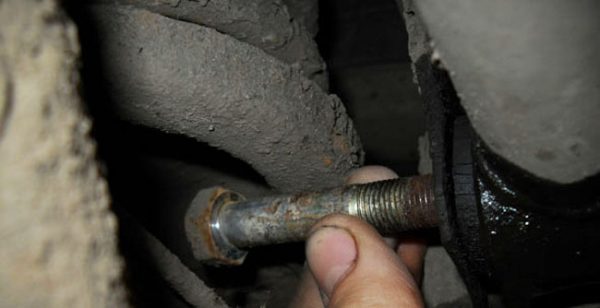
- We hold the bolt with a 19 wrench, and on the other hand, unscrew the nut with a similar wrench and remove the bolt. It is not always easy to remove, so a hammer may be required.Unscrew the bushing nut and remove the bolt
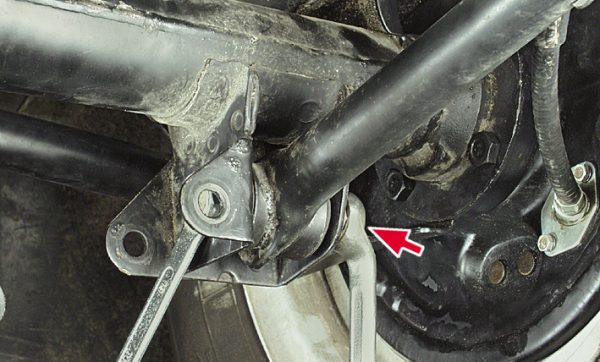
- To remove the mount on the other side of the rod, unscrew the bolt holding the shock absorber from below.To unscrew the fastening of the thrust to the rear axle, remove the lower shock absorber fasteners
- Move the shock absorber to the side.
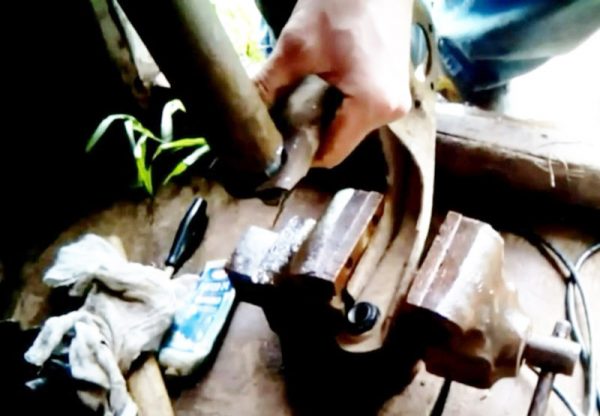
- We unscrew the fastening of the rod from the other edge and remove it from the car, prying it with a mount.Using 19 keys, unscrew the rod mount on the other side
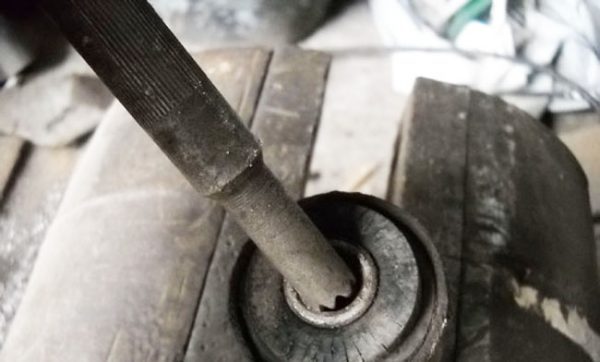
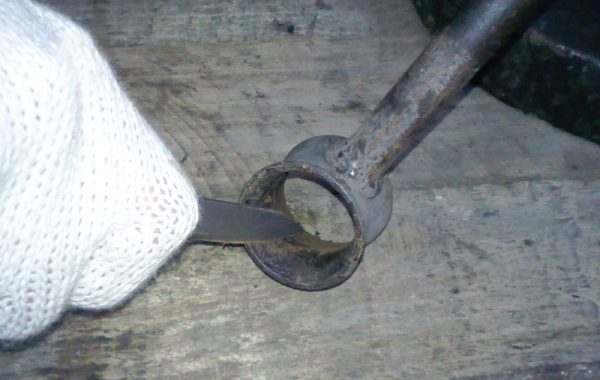
- We knock out the inner bushing of the hinge with a suitable guide.To knock out the bushing, use a suitable tool
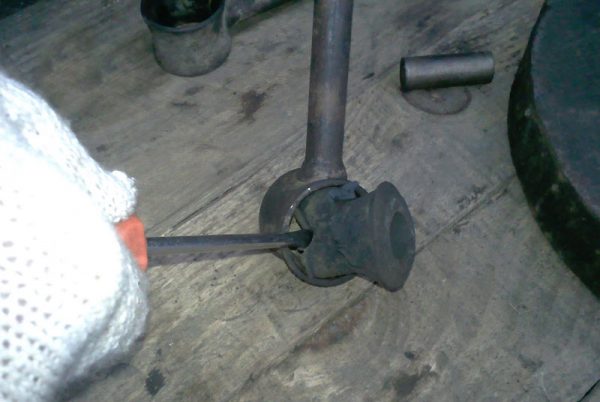
- Remove the rubber part of the silent block with a screwdriver.Remove the rubber part with a screwdriver
- After removing the old part, with a knife and sandpaper, we clean the clip inside from dirt and corrosion.We clean the bushing seat from rust and dirt
- We lubricate the new rubber product with detergent or soapy water and push it into the holder.Wet the new bushing with soapy water before installation.
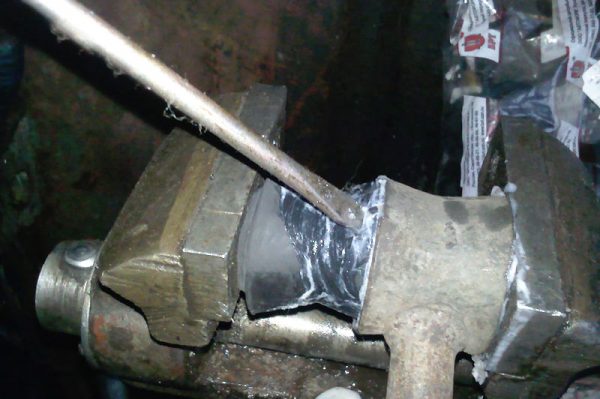
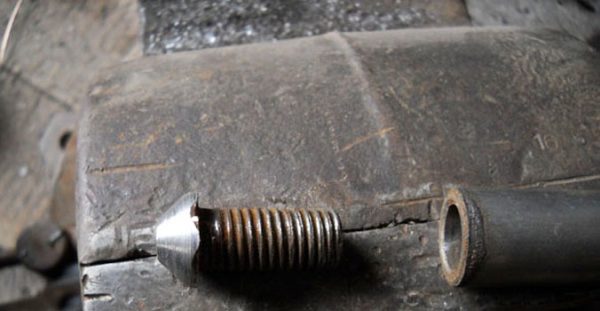
- To press the inner sleeve, we make a fixture from the bolt, grinding off the head from it. The diameter of the cone for the most part should be equal to the diameter of the metal sleeve.To install a metal sleeve, we make a bolt with a conical head
- We apply detergent to the sleeve and cone, after which we press them in a vice.We press the sleeve soaked in soapy water with a vice
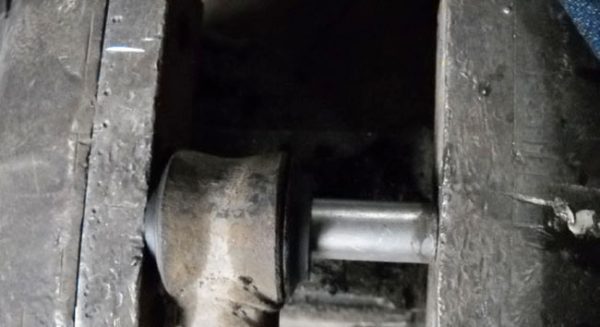
- When the bolt rests against the lip of the vise, we use a small piece of pipe or any other suitable element, which, upon further pressing, will allow the bolt to completely come out.To install the bolt in place, use a suitable size coupling
- We mount the rods in the reverse order, pre-lubricating the fasteners with Litol-24 grease.
Video: replacing the bushings of the rear axle rods on the "classic"

Homemade silent block puller
It is convenient to change rubber-metal elements of the front suspension using a puller. However, not everyone has it. Therefore, you have to make the device yourself, since it is quite difficult to dismantle the hinges with improvised tools. Let us consider in more detail how and from what materials a puller can be made.
Description
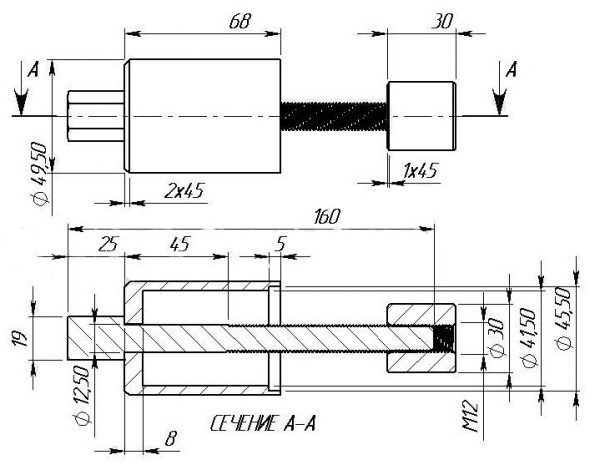
To work, you will need the following list of parts and tools:
- a piece of a water pipe 3 cm long with an inner diameter of 40 mm and an outer diameter of 50 mm;
- washer with an outer diameter of at least 50 mm;
- M12 bolt 7 cm long with washers;
- two pieces of pipe 10 cm long and 40 mm in diameter;
- vice;
- a hammer;
- grease.
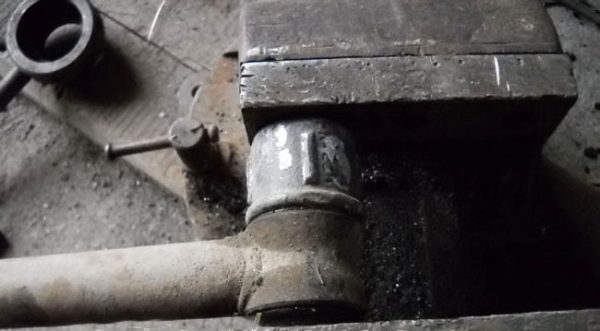
The puller is made in the following sequence:
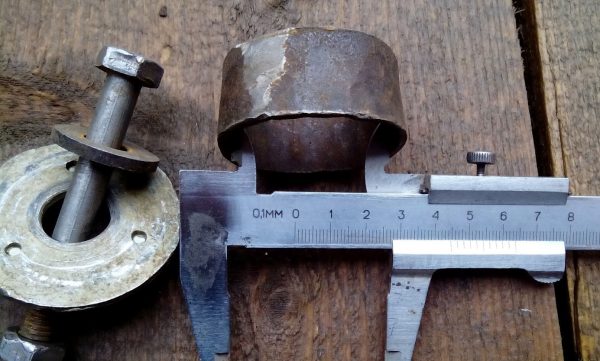
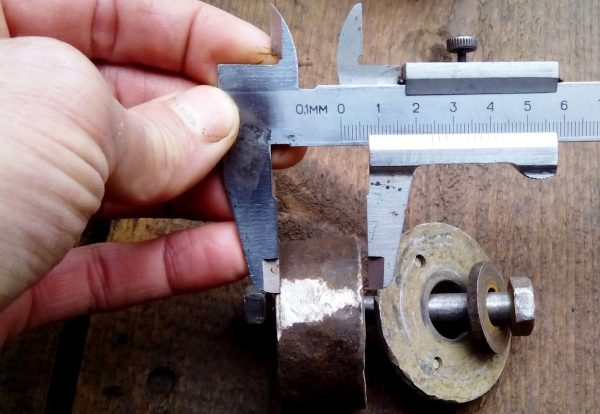
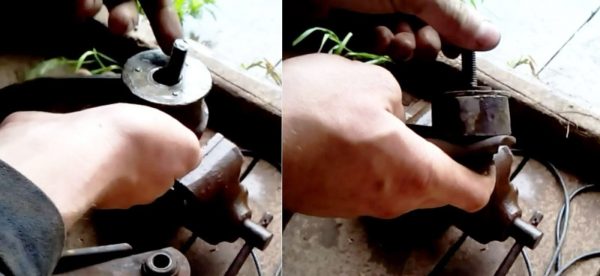
- We rivet a part of the pipe with a diameter of 40 mm with a hammer, increasing it to 45 mm.A piece of pipe with a diameter of 40 mm is riveted to 45 mm
- From a 40 mm pipe we cut two more elements for mounting new silent blocks.We make two small blanks from a 40 mm pipe
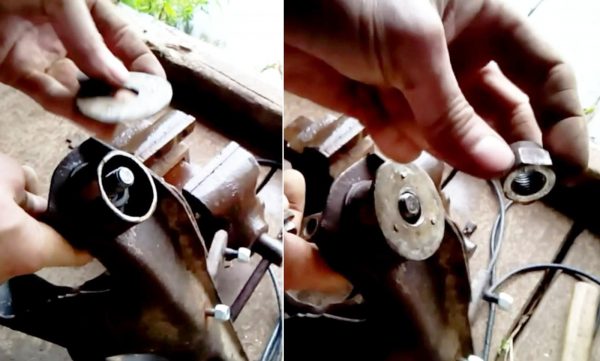
- To remove the old part from the upper arm, we put a washer on the bolt. In diameter, it should have an intermediate value between the hinge cages.
- We insert the bolt from the inside of the eyelet, and from the outside we put on the adapter of a larger diameter. We put on the washer and tighten the nut, which will lead to the extrusion of the silent block.We insert the bolt from the inside of the lever, and outside we put on a mandrel of a larger diameter
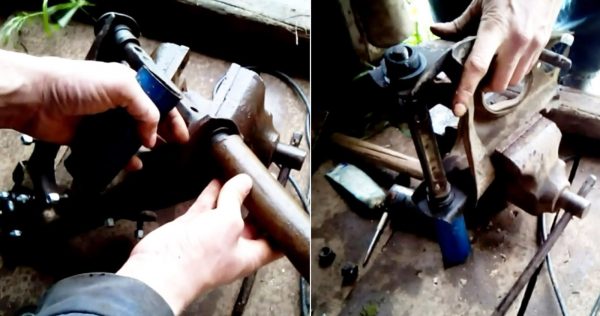
- To install a new product, we use 40 mm pipe sections corresponding to the external size of the hinge. We place the latter in the center of the hole in the lever and set the mandrel on it.
- We hit the mandrel with a hammer, driving the part into the eye.We press the silent block by hitting the mandrel with a hammer
- We change the hinges of the lower levers in the same way. We remove the nuts and washers from the lever axis and use the large adapter with the washer, after which we wrap the axle nut. Instead of a bolt, we use the axle itself.To remove the silent blocks of the lower arms, we install a large adapter and tighten it with a nut, laying a washer inside
- Sometimes the hinge comes out very badly. To break it from its place, we beat with a hammer on the side of the lever or on the mandrel itself, then tighten the nut.
- Before installing new silent blocks, we apply lubricant to the lever axis, and clean the lugs with sandpaper and also lightly lubricate.
- We start the axle through the holes, put the hinges on it and put the mandrels on both sides. We press in the parts, striking first on one and then on the other mandrel.We start the lever axis through the eyes and insert new hinges
- We assemble the suspension in reverse order.
To avoid trouble when driving, it is periodically necessary to inspect the condition of the suspension elements and timely change not only silent blocks, but also other parts that are out of order. By following step-by-step instructions and using the appropriate tool kit, you can replace the hinges without special skills.

