Clutch replacement for Opel Astra
Replacing the clutch on an Opel Astra is a very laborious process and will require a lot of tools. You will need a pit or elevator. The engine will need to be suspended, as the engine mounts on the side of the box will need to be removed. When replacing the Opel Astra clutch, you will need to remove the drive wheels and drain the oil from the gearbox. You need to remove the battery. When removing the gearbox, you will need an assistant. To center a new clutch disc, be sure to prepare a special mandrel. It will take a lot of time, even reading the instructions, not like real work.

1. Open the hood of your Opel Astra.
2. Loosen the nut on the connecting bolt at the end of the cable connected to the negative battery terminal.
3. Remove the cable from the negative battery terminal.
4. Peel back the cover on the end of the cable connected to the positive battery terminal.
5. Remove the cable from the positive battery terminal.
6. Turn away a fixing bolt of a pressure plate, then dismantle it.
7. Remove the battery from the vehicle.
8. Turn away fixing bolts of the shelf of the accumulator.
9. Remove the battery tray.
10. Next, you need to remove the drive wheels from the Opel Astra.
- Remove the engine protection.
- Drain the transmission oil.
- Remove the front wheel liner.
- Bend back the serrated end of the hub nut with a thin chisel and hammer.
- Loosen the front wheel hub nut.
- Completely unscrew the hub nut and remove the thrust washer under the nut.
- Loosen and remove the nut on the front suspension ball joint pin tip bolt to the steering knuckle, and then remove the bolt.
- Move the telescoping strut to the side a little, and then remove the outer CV joint rod from the hub.
- Remove the pinion drive inner joint from the axle shaft while supporting the mounting plate on the transaxle case through a piece of wood.
- Remove the front drive assembly.
Next, you need to perform the following operations.
11. Unscrew and remove the drive relay power cable retaining nut.
12. Remove the power cable from the drive relay terminal bolt.
13. Unscrew and remove the drive relay control cable retaining nut.
14. Remove the control cable from the drive relay terminal bolt.
15. Move the disconnected cables to the side.
16. Unscrew and remove the fixing nut from the wire ground.
17. Disconnect the ground cable from the lower starter mounting bolt, then move the cable aside.
18. Rotate and remove the top mounting bolt of the starter to the engine.
19. Turn out the bottom fixing hairpin of a starter to the engine.
20. Remove the starter from the vehicle.
21. Mark with a felt-tip pen, felt-tip pen or paint the relative position of the tip of the gear lever and rods. This is necessary in order to roughly maintain the fit of the unit when it is reinstalled. Slightly loosen the shift control unit terminal clamp bolt, and then disconnect the stem and tip from the shift lever.
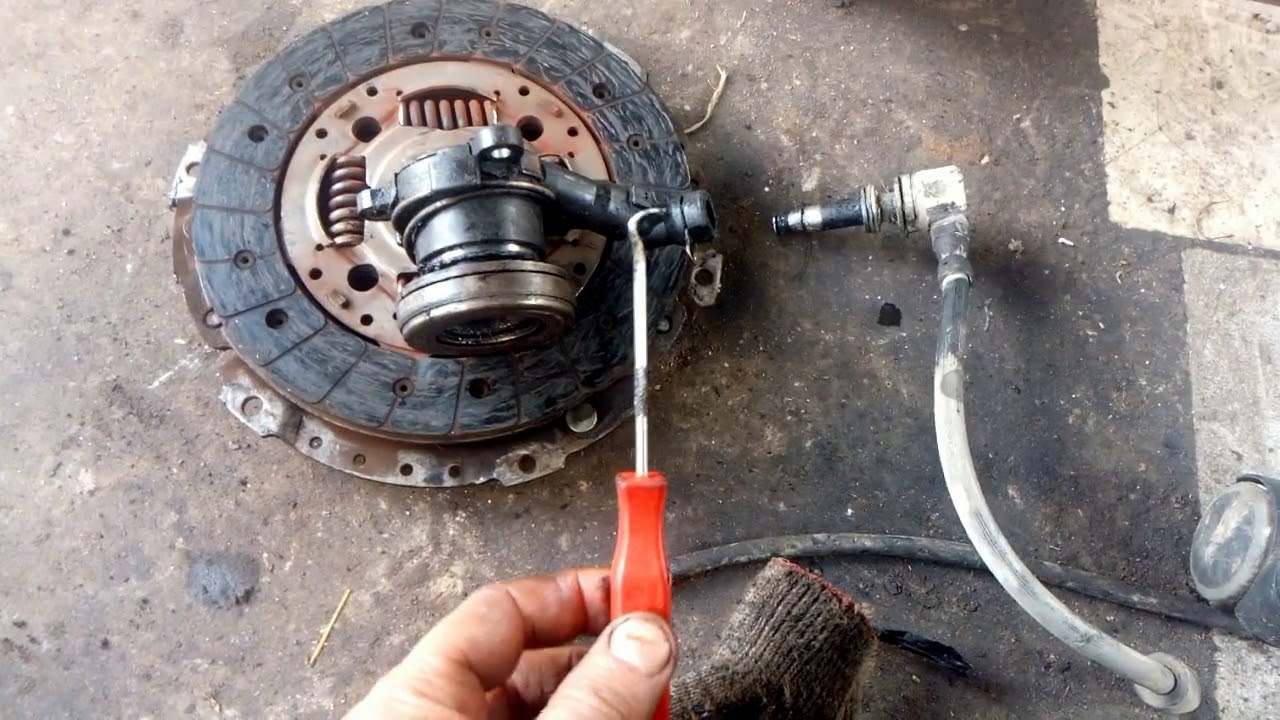
22. Remove the retainer and then disconnect the end of the hose from the intermediate tube adapter of the fluid coupling.
23. Remove the speed sensor harness gaskets and the reverse gear switch.
24. Remove the harness pads from the brackets located on the gearbox.
25. Straighten the key with pliers.
26. Take out an axis of intermediate draft of the working drive from a transmission.
27. Separate drive rod and gear shift mechanism.
28. Take out two fixing spring elements from system of levers of management and drafts of one transmission.
29. Remove the control rod and lever assembly from the gearbox supports.
30. Securely attach the lifting straps to the front and rear transport eyes of the power package, then tighten the straps.
31. Brake the car with a parking brake and install wedges under the rear wheels.
32. Loosen the front wheel mounting bolts.
Note. The wheel bolts should only be loosened and tightened with the vehicle on all wheels.
33. Raise the front of the vehicle and place secure, sturdy jacks under it.
34. Turn out fastening bolts of forward wheels, then dismantle wheels.
35. Remove the crankcase protection and remove the engine wings (see Removing the engine wings and oil pan protection).
36. Using a screwdriver, pry the front bumper wing fastening clip to the front suspension subframe.
37. Remove the mounting piston.
38. Remove two more mounting clips in the same way.
39. Dismantle a reception pipe of system of release of the fulfilled gases.
40. Measure the length of the free threaded part of the ties. This is necessary so that during assembly (on both sides of the vehicle) the camber angle remains as close as possible).
41. Slightly loosen the locknuts on the outer tie rod ends (on both sides of the vehicle).
42. On both sides of the vehicle, loosen the nuts holding the ball studs from the lugs to the tie rod arms (do not allow the fingers to turn).
43. Establish the handle of spherical hinges, and then make a press-out of fingers of stiffening ribs of rotary levers (on both parties of the car).
44. On both sides of the car, unscrew and remove the nuts from the bolts that tighten the terminal connections of the steering knuckles and ball bearings. Remove pressure bolts.
45. On both sides of the car, remove the pivots of the ball bearings from the holes in the steering knuckles.
46. Remove the cushion from the front suspension of the power unit.
47. Remove the rear suspension support pad from the power unit.
48. Cut the power steering pump harness clamp with side cutters.
Note. Be sure to replace the cut ring with a new one when reassembling.
49. Unscrew and remove the fixing nut from the connector of the power cable of the electric power steering pump.
50. Remove the terminal from the fuse box.
51. Tighten the power steering pump harness assembly fasteners.
52. Remove the engine wiring harness assembly.
53. Turn and remove the mounting bolt from the second lug of the power steering electric pump power cable to the lug of the negative battery cable.
54. Disconnect the wire terminals.
55. Unscrew and take out a bolt of fastening of coupling of an intermediate shaft of a steering column to a gear wheel of a shaft of the steering mechanism (In salon under the instrument panel).
56. Slightly unscrew the rear mount to the body, as well as the two left bolts securing the amplifier to the body.
57. Remove the amplifier.
58. Remove the right amplifier in the same way by unscrewing the rear subframe mounting bolts and the body amplifier mounting bolts.
59. Support the subframe with reliable brackets, placing them under its front and rear cross members.
60. Slightly unscrew the left front bolt of the front suspension subframe from the car body.
61. Completely remove the bolt securing the left front subframe.
62. In the same way, unscrew the right front bolt securing the front suspension subframe to the car body.
63. Slightly unscrew the left central bolt securing the subframe to the body.
64. Completely turn out a bolt of fastening of the left half.
65. In the same way, remove the right middle bolt securing the front suspension subframe to the body.
66. Remove the front suspension subframe from the car together with the front suspension arms, steering gear, electro-hydraulic steering pump and anti-roll bar, lowering it, disconnecting the intermediate shaft from the steering column and steering gear shaft.
67. Turn away and remove bolts of fastening of a case of coupling to the block of cylinders.
68. Loosen and remove the two bolts securing the oil pan to the clutch housing.
69. Support the gearbox by placing a reliable support under its crankcase.
70. Move the gearbox as far back as possible so that the input shaft disengages from the clutch disc hub.
Note: when disassembling the gearbox, it is forbidden to rest the end of the input shaft against the petals of the diaphragm spring, otherwise they may be deformed.
71. Remove the bracket and remove the gearbox from the car.
Now in front of your eyes is a basket hanging from the steering wheel, which we will change along with the wild clutch. To unscrew the clutch, unscrew the 6 screws. When installing a new clutch, lubricate the splines of the clutch disc hub with high temperature grease (usually supplied with the new clutch). A mandrel is needed to center the driven disk. Most often, this cartridge comes with a new clutch. Without centering the cartridge, it will not be possible to install the gearbox. The gearbox input shaft simply does not fit into place. The mandrel should be installed until you have fully tightened the new clutch basket. The durability of the new Opel Astra clutch directly depends on the correct tightening of the 6 bolts on the basket. Screw in the bolts that secure the pressure plate housing to the flywheel. Tighten the bolts evenly to 15 Nm, one full turn of the wrench per socket, moving diametrically from bolt to bolt (cross to cross). After tightening, you can remove the cartridge and insert the gearbox.
After installing the box and assembling everything that you unscrewed, you need to install the drive wheels and pour oil into the gearbox. The process is quite complicated, so before you start replacing the clutch with an Opel Astra, consider whether you need to contact the service.