Replacing brake discs and pads on Scenic 1, 2 and 3
Content
In Renault Scenic, for any configuration or car model, one condition is mandatory: the replacement of brake components, such as discs and pads. These two parts need to be changed at least every 10 km, maximum every 000 km, in order for the car to last longer. Replacing the rear pads on Renault Scenic 30 is especially important, since there is a slightly different system in sequence. A full wipe negatively affects the chassis and can negatively affect the mechanics.
It is also important to note that the stopping distance must be strictly monitored so that they do not reach zero at all. Duration and travel time, as well as clutch actuation, may vary depending on the type of mechanisms and parts, as well as variations in the supply of spare parts.
Cylinders and pads - repair "shoes" when worn
To prepare for the repair of the cylinder, it is necessary to prepare a number of tools. To get started you will need:
- Deepening tool;
- Key at 15;
- Heads for 13 and E16 (if possible). Instead, you can take 30.
- Heads on 17;
- Hammers;
- Flat type screwdrivers;
- Lever nut;
- Micrometer;
- Brass or iron brushes, as well as nylon;
- Rags to absorb moisture;
- Jack, if you work in a garage;
- Details and improvised means for the substrate of the machine;
- Machine anti-reverse devices.
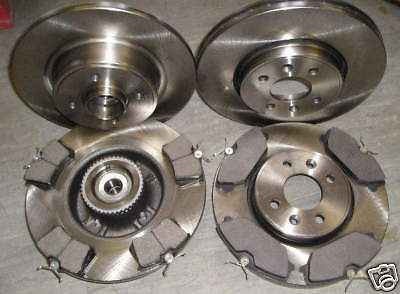
Brake discs are best bought at a service store or specialized salon. Metal discs and pads for Scenic 2 will cost almost 12 thousand rubles. These are original spare parts, you should not save on them. Next, you will need a system cleaner, lubricant, and medium thread lockers. In the future, you will need to have a can of compressed air with you. It is equipped with a tube.
How is the work on stages 1, 2 and 3 going? We prepare every car before work. You need to process the nodes in advance. Place tools under the front wheels to prevent the vehicle from rolling forward or backward. There are special parts, you can take improvised means. Engine off, screen off, steering wheel locked. At the same time, open the driver's door.
Important: the card must be in the slot.
As soon as the first conditions are met, we press "start" so that the dashboard lights up and the radio turns on. Press and hold the button for 5 seconds until you hear a click indicating that the steering wheel is unlocked. These are precautions that must be observed on any machine. Therefore, the machine is in repair mode. Scenic has it too.
After that, you can release the parking brake and start the car. Open the hood and see the brake fluid reservoir cap. Open the lid slightly to allow air to circulate. The liquid level should be below average, otherwise we remove the excess with a syringe.
In addition, we noted that the wheels on the Scenic are easy to remove: we unscrewed the bolts everywhere, while directing the brushes to clean the dirt. We cleaned everything we saw, but not with a wire brush. This can damage rubber boots. We also dry clean all mud bolts to ensure they are free of water. Then remove the brake cable. If you have prepared the car correctly, the on-board computer will not remember the errors. Otherwise, after turning on the normal mode, errors will appear on the panel.
For Scenic 1 and 2
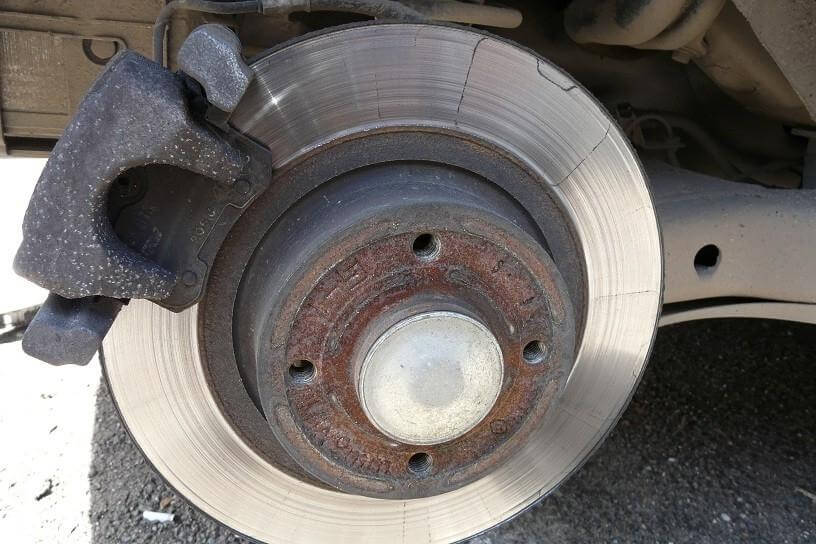
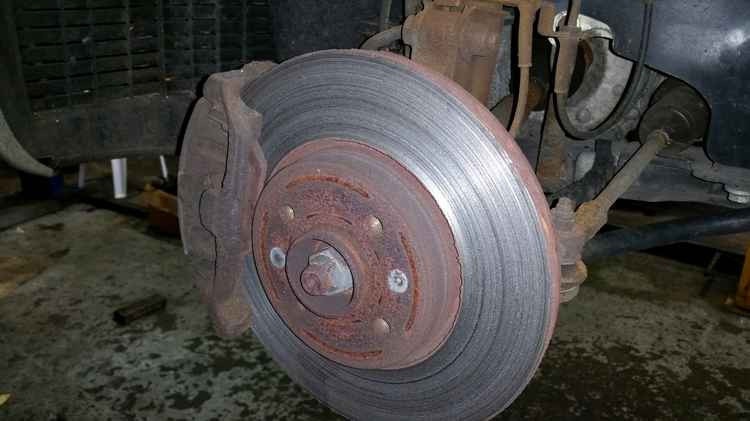
To remove the discs, you must carefully remove the caliper. It is important not to overdo it with the brake hose. You need to move your hand a little more, move it so that the hose comes out normally. The cylinder will also be convenient to drown later. We remove the wire and get to work “decorations.
We take an ordinary wire and make the letter C (“this” in English). We hook the spring with a bracket. The wire can be removed from the hook in advance, because you can accidentally touch the letter. We remove the old cylinder with a screwdriver and a hammer. Just hit the metal and the cylinder head. Replace cap. Using a pry bar, remove the bearing nuts and you can now completely remove the block. We clean with a brush along the entire axis and rinse with brake cleaner.
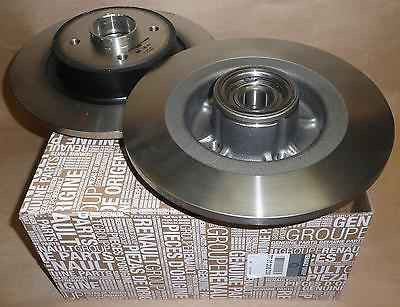
For Scenic 3, it is necessary to additionally protect the caliper shaft. Here you will also have to remove the brackets with a mount using the E16 head. We take out two screwed bolts. Clean the caliper, replace the boot if necessary. The balloon needs to be drowned out, this also applies to other Scenics. The metal disk should be flush with the cylinder. Lubricate it. We examine the faults, and then we take the pads.
Installation of pads and spare parts after repair
Before installation, clean the pads. I'm sure you should change them too. To do this, remove the axle protection and remove grease and dirt with a cleaner. The thread does not need to be lubricated. Choose a lubricant that protects against moisture. Then we apply a fixer. Since the caliper has already been repaired, you can continue to work with the pads. For Scenic 1 and 2 you need to do the following:
- Clean all threads and bolts with brushes. Install the brackets in place, then tighten the bolts;
- The bolts at the top must have play. If this is not the case, we change everything, as a result of an error when assembling the support;
- We remove the pads and carefully inspect them.
Next, install the caliper and pads for Scenic 3. We put the caliper on the brake and put it on the hook, from where we remove it. We bring the pads closer to the brake disc and hook the caliper to them from above.
Tighten the top bolt first, then move on to the bottom bolt. Important! Choose a medium key so as not to break the bolts. Very carefully manually lay the brake cable and check all work.
The pads fit almost exactly the same. The main thing is not to skip the verification steps after installation and installation.
- Without starting the engine, press the brake;
- We check the parking brake at least 4-5 times;
- Then manually move the cylinders. If they spin a lot, the pads are too tight. To do this, remove the grip and move the guide pins;
- If everything is normal, return the wheel to its place.
After that, you need to check the fluid level in the reservoir. Next is the second wheel. After completing all the documents, we check all the work done. For each model, the scenario is the same:
- We start the car and check the brake pedal. You must come and go;
- We leave for 5 minutes in the city or the surrounding area;
- The first 200 km sharply on the brakes do not put pressure.
If after checking that the metal is not hot, then everything is in order. If there were knocks, squeaks, bad. Sometimes, when you hear the creak of the pads, you should not be afraid. This is normal due to the friction of the new material on the old "tried" parts. Better to replace the whole set. It will be a little more expensive, but it will not disassemble the car at the first malfunction along the way.