Instructions on how to properly sew a car bumper
Prepare yourself in advance that this type of repair is considered temporary and does not have aesthetics. But if you do everything carefully, then the repaired damage will look with some charm. You can ride with such a bumper for some time, for example, until the master undertakes to eliminate the defect thoroughly, using professional painting.
Automotive plastic buffer bursts easily when it hits a curb or other obstacle. Parts made of polymers are especially vulnerable in the cold. To hide the defect a little, you can sew up the bumper on the car. It's easy to do it yourself.
Required Tools
When driving in or out of the garage, you can damage the lower part of the bumper, the so-called skirt (lip). In some cars, it hangs low, so it often touches the base of the gate opening. Part of the torn off "skirt" falls to the ground, so it is impossible to drive with a dragging bumper part. In this case, it is recommended to quickly stitch the damaged area.
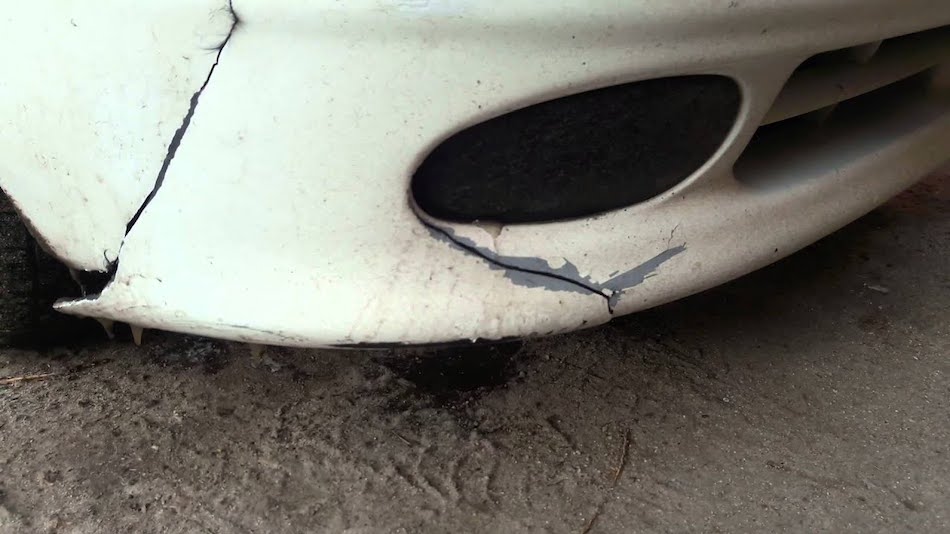
Damaged bumper
This will require:
- nippers;
- marker;
- drill 4-5 mm;
- screwdriver (awl);
- mounting ties (wire).
Bumper stitching work
Prepare yourself in advance that this type of repair is considered temporary and does not have aesthetics. But if you do everything carefully, then the repaired damage will look with some charm. You can ride with such a bumper for some time, for example, until the master undertakes to eliminate the defect thoroughly, using professional painting. In the meantime, the procedure for self-restoration looks like this:
- Wash or clean the damaged area so that you can clearly see the edges of the crack.
- Use a marker to mark the points where the holes will appear.
- Using a screwdriver with a 4-5 mm drill, drill holes according to the marks.
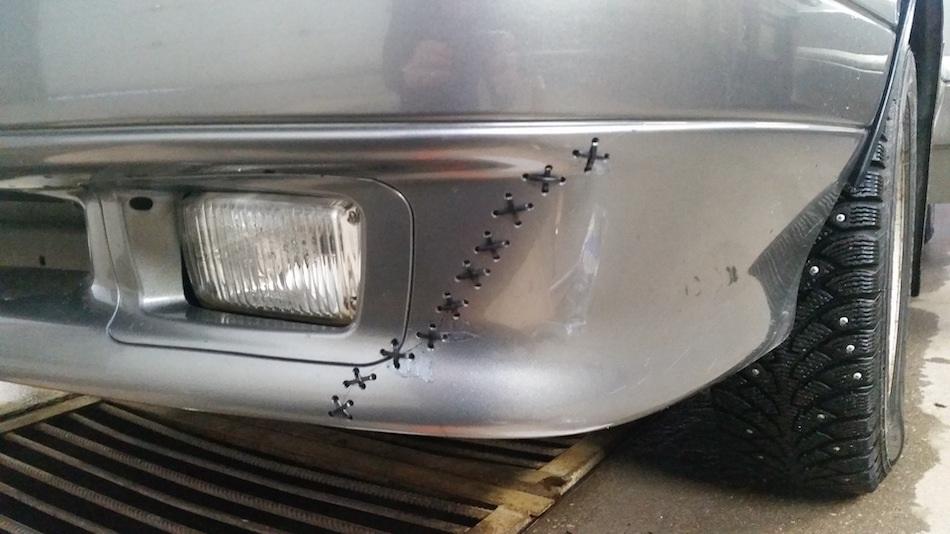
- From the point where the crack ends, start stitching the bumper with mounting ties in parallel or crosswise (wire can be used).
- Bite off excess tails or twists with wire cutters.
In other cases, thick fishing line can be used instead of ties or wire. If fragments appear when the bumper is damaged, then they must also be sewn into place. There is no need to throw anything away, even the smallest fragments will be useful to the body shop master for a major restoration of the buffer.
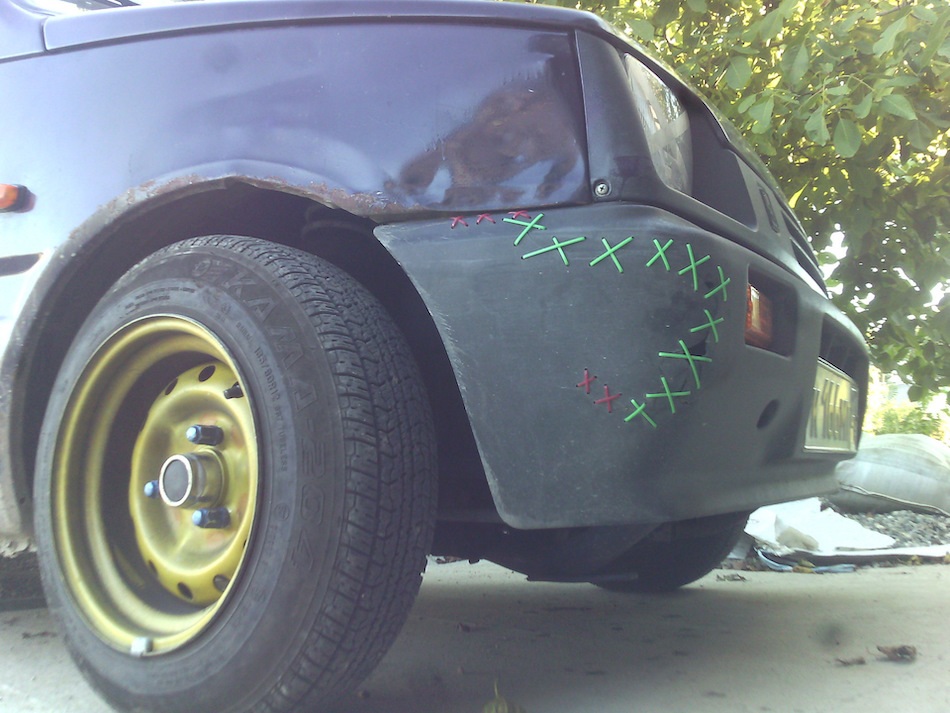
Wired bumper
Thus, it is possible to sew not only the “skirt”, but also the central, lateral, upper part of the bumper. And in most cases, the owner does not have to remove the buffer, since all work is easy to do right on the car. The amount of time spent depends on the complexity of the damage. Simple cracks are eliminated in 5-10 minutes. You have to sit over a large-scale breakdown for 30-60 minutes.
Plastic buffers are brittle and often burst when the car collides with an obstacle. Any owner of the vehicle can make a temporary repair - sew the bumper on the car, without dismantling. To do this, you need a simple set of tools - couplers (wire), an awl and wire cutters. The restored buffer will serve for some time until the car is taken to a car service for repairs.