How to replace the coolant temperature sensor in the cylinder head
Symptoms of a bad coolant temperature sensor include sluggish acceleration, difficult starting, and a Check Engine or Service Engine Soon light.
The coolant temperature sensor in your car's cylinder head plays a key role in engine performance. It sends a signal to the electronic control unit (ECU), which provides information about the coolant temperature and sends a signal to the temperature sensor on the dashboard.
Engine coolant temperature sensor failures are typically accompanied by engine performance issues such as sluggish acceleration, difficult hot or cold starts, and the Check Engine or Service Engine Soon light coming on in possible overheating conditions. If the Check Engine light is on, diagnosis is usually done simply by plugging a scan tool into the on-board diagnostic port and reading the DTC.
Part 1 of 1: Replacing the temperature sensor
Necessary materials
- Engine coolant (if required)
- New replacement coolant temperature sensor
- On-board diagnostic system (scanner)
- Open end wrench or transducer socket
- pocket screwdriver
Step 1: Make sure the engine is cold. Locate the main pressure cap of the cooling system and open it just enough to depressurize the cooling system, then replace the cap so that it closes tightly.
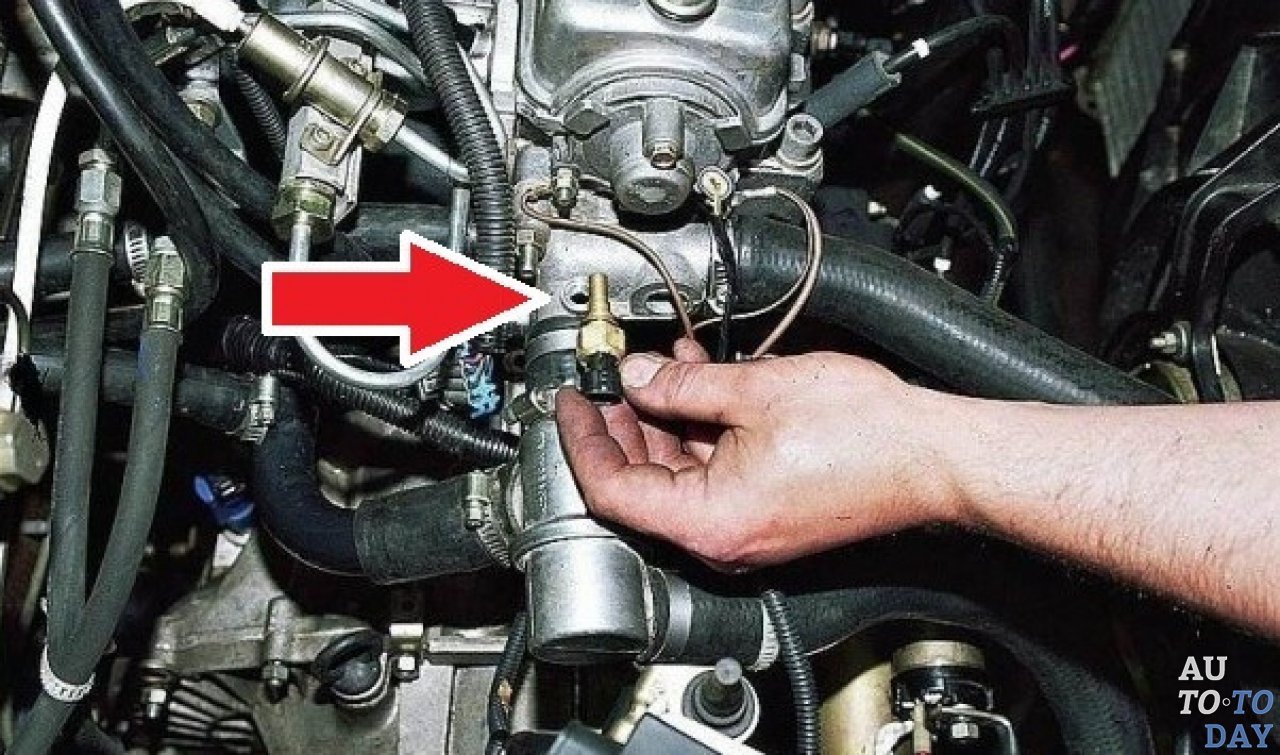
Step 2: Locate the coolant temperature sensor. Many engines have multiple sensors that look similar, so investing in a paper version or an online subscription to your vehicle's repair manual will pay off in faster repairs and reduce guesswork by pinpointing the exact part and location.
ALLDATA is a good online source that has repair manuals for most manufacturers.
See connector images below. The tab that needs to be lifted up to release the connector is at the top towards the back of the connector on the left, the tab it hooks on is at the top front on the right.
Step 3 Disconnect the electrical connector. The connector can be connected to the sensor itself, or “pigtails” with a connector at the end of the wires can come from the sensor. These connectors have a locking tab so the connection remains secure. Using a pocket screwdriver (if necessary), pry up on the tab just enough to release the locking tab on the mating side, then disconnect the connection.
- FunctionsNote: If you are working on an older vehicle, be aware that the plastic on the connector may become brittle from heat and the tab may break, so use sufficient force to lift the tab just enough to release the connector.
Step 4. Unscrew the temperature sensor using a wrench or socket of the appropriate size.. Be aware that coolant leaks from the cylinder head bore can occur when the sensor is removed, so be prepared to screw in a new sensor to try and keep the loss to a minimum.
If available, use a new seal, usually a copper or aluminum washer, with the new sensor.
Step 5: Press the new sensor in firmly. Use a wrench and tighten just enough to ensure a good fit on the cylinder head.
- A warning: Do not overtighten the sensor! Too much pressure can cause the sensor to break and be difficult to remove or strip the threads on the cylinder head, which may require a new cylinder head, a very expensive repair.
Step 6: Reconnect the wiring. Make sure the wires are not damaged or touching any moving parts such as the drive belt or engine pulleys, or any high temperature parts such as the exhaust manifold.
Step 7: Make sure the engine coolant is at the correct level.. Erase any OBD error codes with a scan tool that have not corrected themselves now that there is a valid signal from the temperature sensor.
Get a calculation of the cost of the service: if you are not comfortable diagnosing and changing the coolant temperature sensor yourself, a professional mechanic, for example, from AvtoTachki, will be happy to do it for you at your home or office.