Valve seal. Valve cover gasket - signs of damage and replacement.
Content
- Valve cover gasket - what is it for and how is it arranged?
- Symptoms of damaged valve cover gasket
- Causes of valve cover gasket wear
- When should this gasket be replaced?
- Valve Cover Gasket Replacement and Poor Valve Cover Problems
- What should be remembered before replacing the valve cover gasket?
- DIY: replacing the valve seal
A valve cover gasket (also known as a valve seal) seals the connection between the valve cover and the cylinder head. Its damage is one of the common causes of engine oil leaks in older cars.
What are the reasons for its damage? We asked an expert about it. We also checked what solutions mechanics use to "help" a gasket that won't seal.
Engine oil leaks are extremely dangerous. They can lead to accelerated wear or jamming of the drive unit . Especially when we're dealing with a customer who only looks under the hood when the oil level indicator on the car's dashboard lights up.
Valve cover gasket - what is it for and how is it arranged?
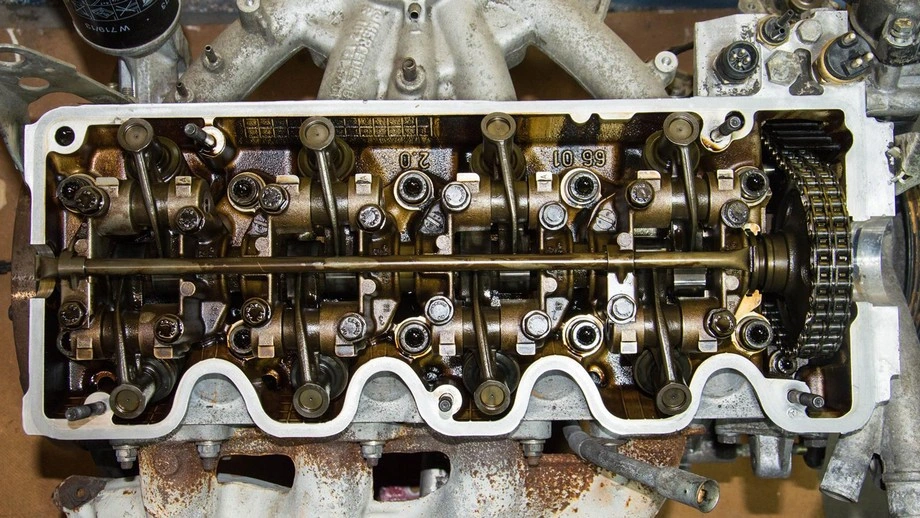
The valve cover is designed for protection of camshafts, valves and additional components of the gas distribution system, installed in the cylinder head. Valve cover gasket seals the connection between the valve cover and cylinder head. Thereby prevent engine oil leakage .
Valve cover gaskets are usually made of fairly durable rubber. Older cars used cork valve cover gaskets.
Older cars and many modern cars still use metal valve covers, often aluminum. Below is a rubber gasket (less often a cork gasket). In this case, in the event of a leak, only the damaged seal is replaced.
But in recent years, a new solution has appeared, which is used quite often. it plastic valve covers (duroplast or thermoplastic, with fiberglass reinforcement). The valve cover gasket is integrated with them. Thus, in the event of a leak, it remains to replace the entire cap with an integrated gasket.
Symptoms of damaged valve cover gasket
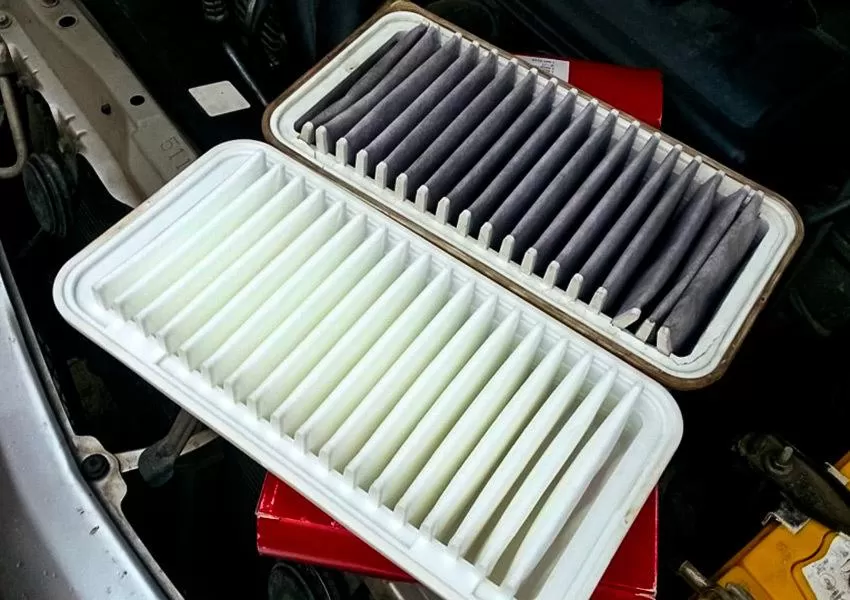
Symptoms visible to the naked eye - traces of engine oil on the top of the engine . In colloquial speech, it is often said that "the engine is sweating." The second symptom is, of course, constantly decreasing engine oil level . Third - (maybe) burning oil smell , which drips and heats up on a hot engine block.
Oil leaking from a damaged valve cover gasket can get on the V-ribbed belt or timing belt (on vehicles without a belt cover). And thus can lead to the destruction of the V-ribbed belt or timing belt .
Causes of valve cover gasket wear
Why is oil leaking from under the valve cover gasket? What affects valve cover gasket aging? We asked the expert about it
Stefan Wujcik, a specialist from Dr Motor Automotive, a well-known manufacturer of automotive gaskets, including gaskets under the cylinder head cover, pointed out to us the most important reasons for the aging of cylinder head gaskets. It:
- Export The seals just get old. Even the best ones produced by branded manufacturers. That is why leaks most often occur in cars that are several years old. Even those that have been properly serviced.
- Low quality – failure may occur earlier if a very poor quality gasket is used in the car. This could have been a manufacturer's error and the use of a poor-quality gasket during the first assembly. Or a locksmith who installs a very cheap gasket during repairs and ... another failure of the gasket, even after a few months.
- Faulty cooling system – The valve cover gasket can also be subject to accelerated wear if the car's cooling system is faulty. Too high engine operating temperature accelerates wear of the valve cover gasket. The reason may be, for example, the failure of the thermostat (jamming in the closed position), too low coolant level, fan failure, the use of water instead of coolant.
- Engine oil - use of low-quality engine oil and too infrequent oil changes.
- Poor condition of the drive unit - A worn engine accelerates the degeneration of the gasket under the valve cover.
The failure may also be caused by incorrect seal placement . There are many guides on the Internet (including tutorial videos) that show you step by step how to repair a part yourself. Some customers may have unprofessionally replaced the valve cover gasket themselves, causing a number of errors associated with insufficient preparation of adjacent surfaces or improper tightening of the mounting bolts.
When should this gasket be replaced?
The prevailing high temperature in the motor has a negative effect on the life of the seal. Over time, it becomes hard, cracks and ceases to seal well. . This will be manifested by oil leakage from the valve cover area, which will begin to flow through the engine, and in some engines will also appear in the spark plug wells. The basis for observing such a phenomenon is the appropriate diagnosis and determination of whether the leak actually comes directly from the valve cover.
Valve Cover Gasket Replacement and Poor Valve Cover Problems
Sometimes installing a new valve cover gasket does not help. Why? Leaks may be caused by problems with the correct fit of the valve cover to the top of the engine . The valve cover may be bent, twisted, or otherwise damaged. In this case, there is nothing left but to use a new cover.
Mechanics sometimes use alternative solutions, but talking about professional repair and long-term effect is difficult. One of them could be the use of additional high temperature silicone, which (theoretically) should compensate for the leakage caused by a poor fit of the cover to the top of the engine.
What should be remembered before replacing the valve cover gasket?
Here are some helpful tips:
- Differences in pad prices between quality branded products and cheap non-branded products are negligible. It is better to choose a good gasket that will ensure durability and a good repair result.
- Required remove the remnants of the old gasket with cylinder head and valve cover.
- Worth using new fixing screws .
- Tighten the valve cover bolts with torque wrench with the required moment. The order in which the screws are tightened is also important.
- After replacing seal top up the engine oil level .
DIY: replacing the valve seal
When you experience oil leaks around the valve cover, you will most likely need to replace the valve cover gasket. This is not a very difficult activity that we can carry out if we only have the basic tools. In this guide, you will learn where this seal is located, when to replace it, and how to complete the entire operation.
The first step is to order the appropriate gasket . If you want to buy it on Allegro, search for the make and model of your car and the power of your engine, for example, "Mercedes 190 2.0 valve cover gasket". If, after reading the description of the product, we are not sure if the gasket will fit our engine, it is worth contacting the seller for this purpose, so by checking the VIN number, we will be sure that the gasket is suitable for our engine.

Then let's complete all the tools and aids that will enable and facilitate the whole operation. Tools such as:
- set of socket wrenches, hex keys, Torx wrenches with ratchet and extensions (e.g. YATO),
- a torque wrench with a range that allows tightening with a torque of 8 to 20 Nm (for example, PROXXON),
- universal pliers,
- Phillips and flathead screwdrivers
- gasket/glue scraper , wire brush ,
- paper towel or cloth and extractive gasoline,
- rubber mallet.
The next step will be the dismantling of parts that interfere with the removal of the valve cover . Depending on the specific model and type of engine and the number of cylinders, this will be more or less laborious (in V-engines, there are at least two gaskets). The most common is the four-cylinder in-line unit. As a rule, we will need to remove the plastic engine cover, spark plug wires or coils (in a gasoline engine), as well as wires and plugs from some sensors . Sometimes it will also be necessary to remove the intake manifold and air filter housing.

When removing wires from spark plugs or spark plugs from ignition coils, pay attention to where the wire comes from (we are talking about the ignition order). To remember this, it is good to stick a piece of adhesive tape with a number on each of the wires (for example, in order from the front of the engine).
After dismantling everything that blocked our access, the next step is to remove the valve cover . Before you do this, it is worth blowing out the engine with compressed air to make sure that nothing got inside. The cover is most often held on with several 8 or 10 mm bolts or nuts, so use a 13 or 17 socket wrench. with holes in which we will insert screws. If there is a problem removing the valve cover, we can tap it with a rubber mallet. We will also try to cut the old gasket with a sharp knife (after a long time it can stick to the head or cover).

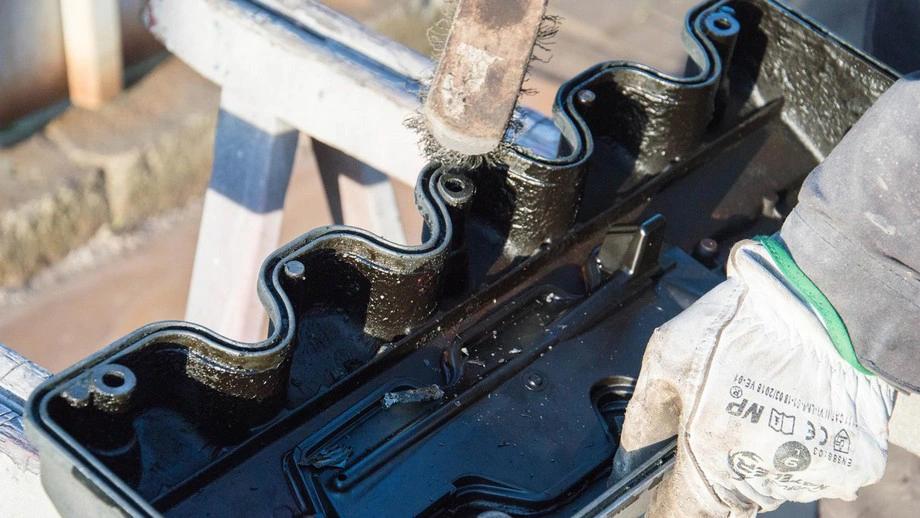
Now remove the old gasket and all its remnants . We will use a suitable scraper for sealing (preferably plastic). It is best not to attempt to clean with a regular screwdriver or other hard metal tool, as this may damage the surface of the cap or head.

For this, we can help with a soft wire brush, paper towel and extraction gasoline. The contact surface must be clean and even.
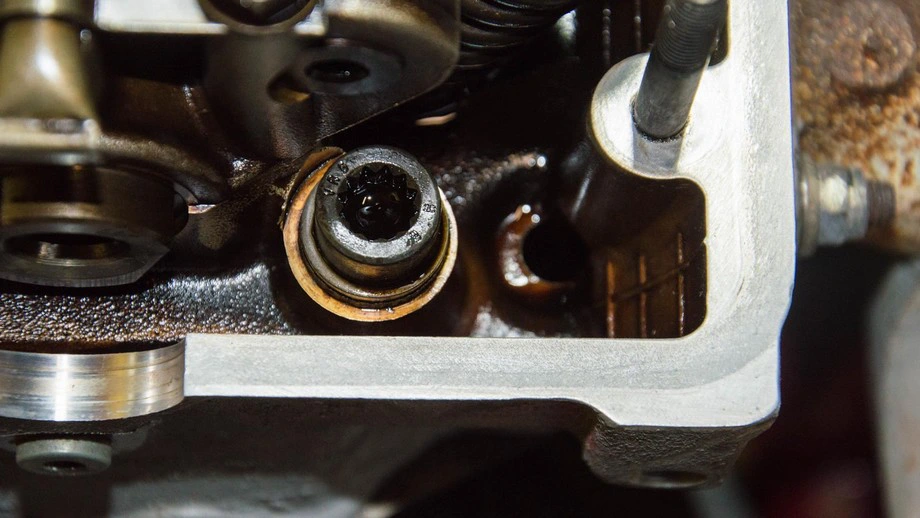
Depending on the engine model, it is sometimes possible to replace the spark plug o-rings. . If they are worn, oil can get into the spark plug sockets, causing the ignition system to malfunction. On some engine models, these seals are built into the valve cover. This means that if one of them is worn and oil is leaking, we will have to replace the entire cap.
The next step is to install a new gasket . Sometimes a tube of silicone motor sealant may be required to provide additional sealing around corners and curved edges. Whether it is needed depends on the manufacturer. After installing the gasket, make sure 3 times that it holds well and does not slip off after being put on the head.

The penultimate step is to install the cylinder head gasket cover and tighten the screws in the correct order. - crosswise, starting from the center. When tightening the valve cover bolts, the correct torque is important, so we will use a torque wrench here. The tightening torque is usually between 8 and 20 Nm.

The last step is to assemble all the parts that we took apart at the beginning. . Immediately after starting the engine, watch for engine oil to leak from the cover area.