We independently change the thresholds on the VAZ 2107
Content
The body of the VAZ 2107 has never been distinguished by increased corrosion resistance, and every owner of the "seven" sooner or later is convinced of this from personal experience. Especially many problems are caused to the owners of the "sevens" by the so-called thresholds, which have to be treated with anti-corrosion compounds at best, and changed at worst. Let's try to figure out how it's done.
Description and purpose of thresholds on the VAZ 2107
The body of the VAZ 2107 is frameless, that is, the total rigidity of the body is provided only by its parts. Conventionally, these details can be divided into three parts:
- front elements: hood, fenders, bumper and grille;
- rear elements: rear apron, trunk lid and rear fenders;
- middle part: roof, doors and sills.
Thresholds are an integral element of the side of the body of the "seven".
These are long, c-shaped steel plates located under the lower edge of the doors and adjacent to the fenders of the car. The thresholds are attached to the body by spot welding. And if the driver decides to change them, he will have to cut them off.
Assignment of thresholds
Novice motorists often think that the functions of the thresholds on the VAZ 2107 are exclusively decorative, and thresholds are needed only to give the car body a presentable appearance. This is mistake. Thresholds have other functions besides purely decorative ones:
- reinforcement of the car body. As already emphasized above, the VAZ 2107 does not have a frame. Thresholds welded to the body and wings form a kind of power frame. Moreover, it is quite strong, since its side elements have their own stiffeners (which is why the threshold plates have a C-shaped section);
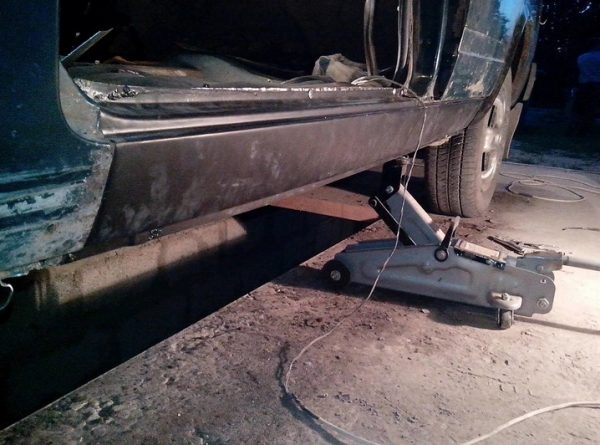
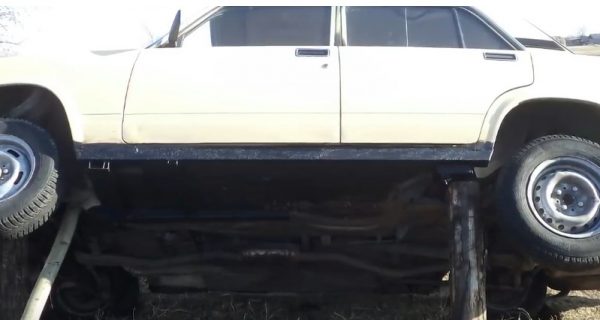
- providing support for the jack. If the driver of the "seven" has a need to urgently raise the car with a jack, then for this he will have to use one of the jack nests located under the bottom of the car. These nests are pieces of square pipe welded directly to the sills of the machine. If the “seven” did not have thresholds, then any attempt to raise the car with a jack would lead to deformation first of the bottom, and then of the car door. A jack would easily crush it all;
 Jack sockets are welded to the thresholds of the "seven", without which the car cannot be raised
 - protective function. Thresholds protect car doors from stones and dirt flying from below. And they are also used for their intended purpose: they serve as a support for passengers getting into the car.
Reasons for changing thresholds
The thresholds of the "seven", like any other detail, eventually become unusable. Here's why it's happening:
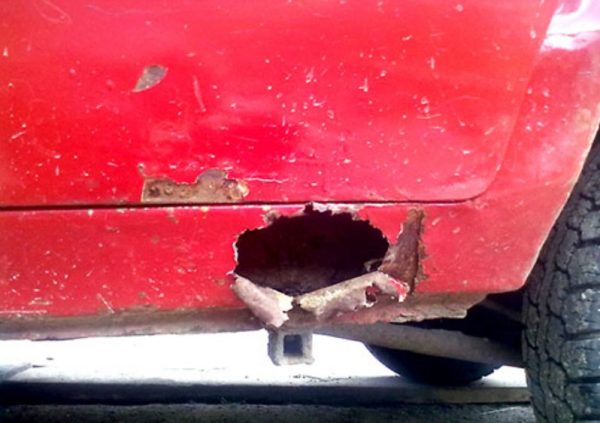
- corrosion. Since the thresholds are located close to the ground, it is they who take on the dirt, moisture and chemicals that are sprinkled on the roads in ice. All these things negatively affect the state of the thresholds. Their design is such that moisture that has got inside cannot evaporate for a very long time. Therefore, pits of corrosion first appear in the thresholds, and then it spreads over the entire inner surface of the threshold. Over time, the threshold may rust through;Due to road reagents, the threshold of the "seven" is rusted through
- mechanical damage. The driver may accidentally touch the threshold for a high curb or other obstacle. A stone or something else may hit the threshold. As a result, the threshold is deformed, which leads to a serious violation of not only the geometry of the body, but also its rigidity.
If the owner of the "seven" is faced with one of the above, then he has only one way out: change the thresholds.
About local repair thresholds
The need for such repairs arises when the threshold has not rusted, but simply deformed due to the impact so much that a hole has appeared in it. In this case, the car owner can resort to local repair of the thresholds, which consists in straightening the deformed area with its subsequent welding.
To some, this task may seem simple, but it is not. Because local repair of thresholds requires special equipment and extensive experience with a welding machine. A novice driver usually has neither the first nor the second. So there is only one way out: seek qualified help from a car service.
Local Repair Sequence
Let us consider in general terms what exactly auto mechanics do when they are fitted with a “seven” with crumpled and torn thresholds.
- Through the hole in the threshold are inserted hoses with small hydraulic devices. Then pressure is applied to these mini-jacks from the compressor, and they begin to squeeze the crumpled section of the threshold outward, straightening it.
- Then, one or more small anvils are placed under the raised section of the threshold, and careful manual editing of the threshold begins with a special hammer. This is a very long and painstaking procedure.
- After complete alignment of the deformed area, the hole in the threshold is welded. This can be either welding the torn edges of the threshold, or applying a patch if too large a piece is torn out of the threshold and it is impossible to weld the edges.
Replacing thresholds on a VAZ 2107
Paradoxically, but unlike local repairs, the car owner can change the thresholds on his "seven" on his own. But provided that he has at least minimal skills in working with a welding machine. Here's what you need to get it going:
- electric drill;
- Bulgarian;
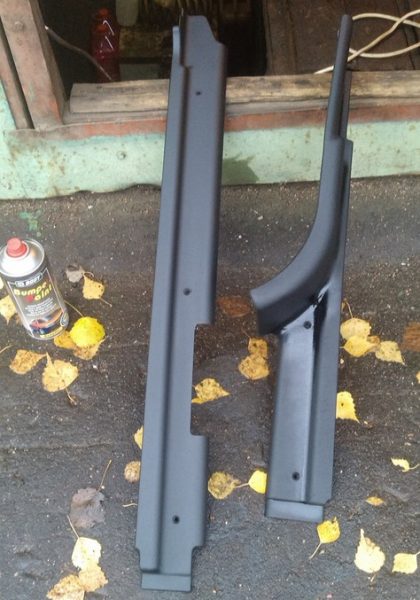
- set of new thresholds;
- a can of black primer;
- can of paint, the color of the car;
- welding machine.
Sequencing
First you need to say something about welding. The best option when replacing thresholds is to cook them with a semi-automatic machine while supplying carbon dioxide.
- All doors are removed from the car. You can’t do without this preparatory operation, since in the future they will greatly interfere.
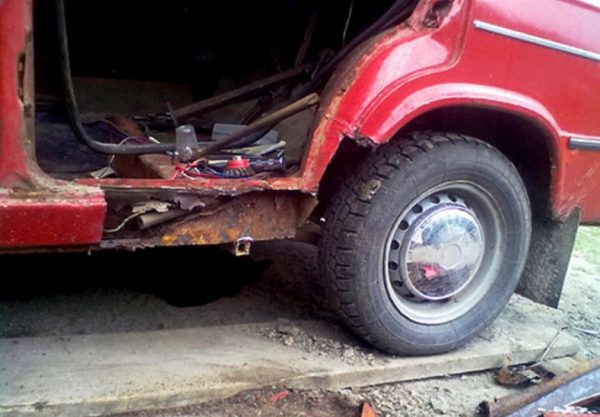
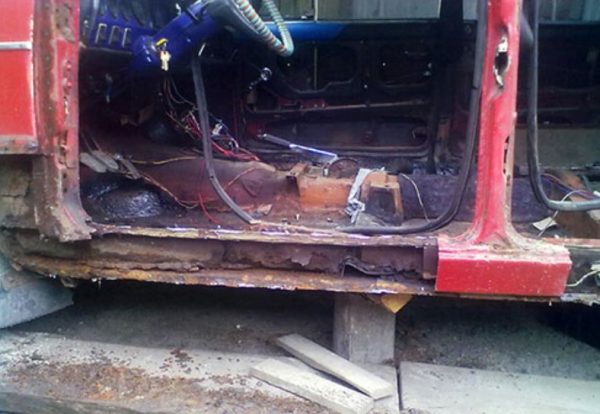
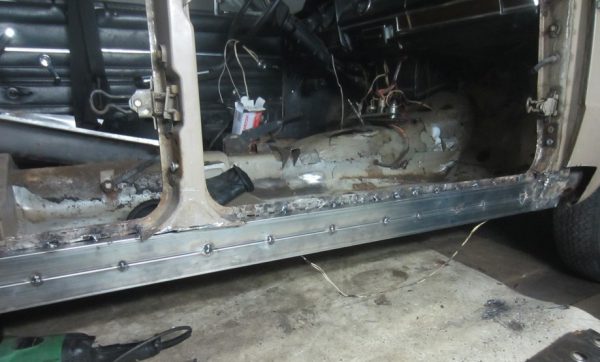
- Rotten thresholds are cut with a grinder. The level of cut depends on how rotted the sills are. In especially severe cases, along with the thresholds, it is necessary to cut off part of the wings.Sometimes, along with the threshold, the owner is forced to cut off part of the wing of the "seven"
- After cutting off the rusted parts of the thresholds, carefully clean the place of their installation. It is best to do this with an electric drill, after placing a grinding nozzle with a metal brush on it.When cutting thresholds, the B-pillar, as a rule, remains intact
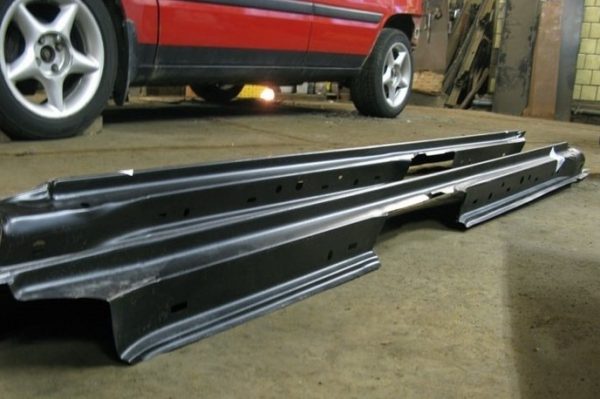
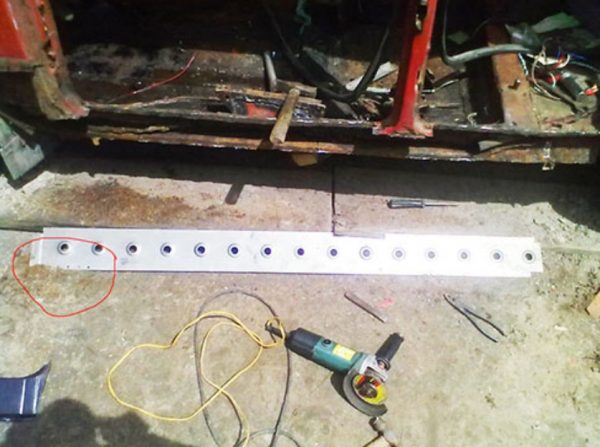
- A threshold amplifier is applied to the cleaned surface and it is marked for subsequent trimming.The plate with holes lying on the floor is an amplifier installed under the new thresholds
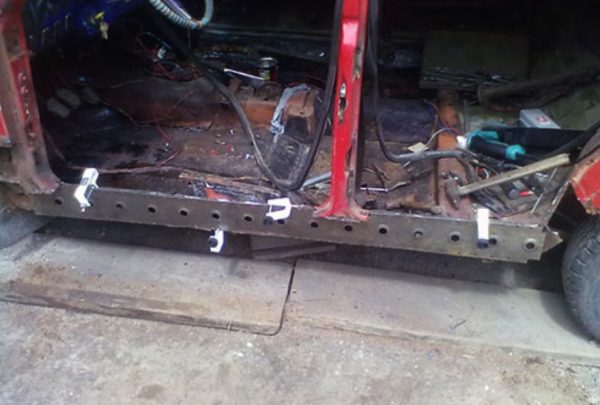
- The tailor-made sill reinforcement is welded to the body. To facilitate the welding process, you can use a set of small clamps and fix the amplifier with them before welding.It is best to fix the threshold amplifier with small metal clamps.
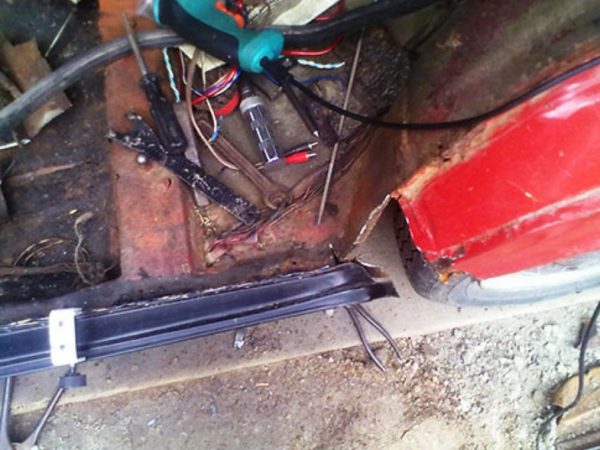
- A threshold is imposed on the welded amplifier. It should also be carefully tried on, and trimmed if necessary. In addition, thresholds can be covered with a layer of transport primer. It should be removed with a rag.
- The upper edge of the threshold is attached to the body with self-tapping screws. After fixing the edges, it is necessary to put the doors in place and see if there is a gap between the door and the new threshold. The width of the gap between the door and the threshold should be the same along the entire length of the threshold, it should be in the same plane with the door, that is, it should not protrude too much or fall through.Threshold fixed with clamps and ready for welding
- If the threshold setting does not raise questions, then you can start welding. Welding should be spot, and it is necessary to start cooking from the central rack, moving towards the wings of the machine.
- Upon completion of welding, the surface of the thresholds in the places of welding is carefully cleaned, then coated with a primer and painted.
Video: change the thresholds on the VAZ 2107

About homemade thresholds
If for some reason the car owner is not satisfied with the quality of the factory thresholds, he makes the thresholds with his own hands. However, it is worth noting that in the vast majority of cases there is no need to make thresholds yourself, and here's why:
- Today, the range of ready-made VAZ thresholds in stores is very wide. They can be different both in the type of anti-corrosion coating and in thickness. All a car enthusiast needs to do is search properly;
- making a high-quality threshold on your own is not an easy task, despite the seeming simplicity of this detail. This task is unlikely to be up to the novice motorist, since it will require not only the skills of a welder, but also the serious skills of a locksmith and a tinsmith.
Nevertheless, there are car owners who are not stopped by the above difficulties, and they begin to invent. Here's how it goes:
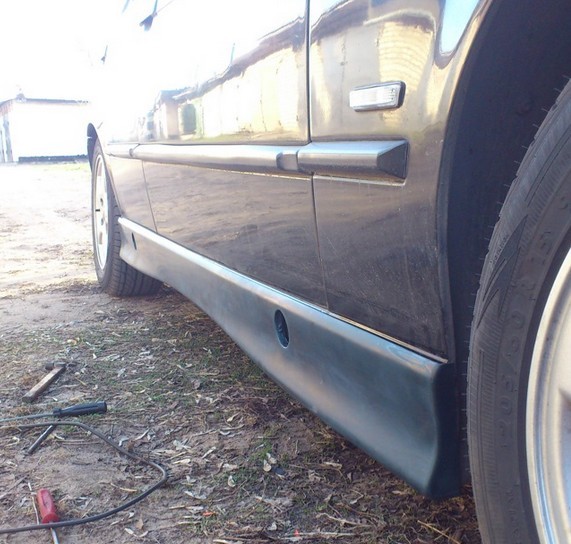
- homemade thresholds are made from square steel pipes, carefully cutting them along;
- after cutting, the pipe is given the appropriate shape. The pipe is cut and fitted to the cut out part of the threshold. This is a very lengthy procedure, as the pipes are usually the thickest. And to give them the desired shape, considerable effort is required;The threshold on this "seven" is made of a square steel pipe, cut along
- at the end of the fitting, the threshold is welded to the body in the same way as already mentioned above.
Plastic thresholds
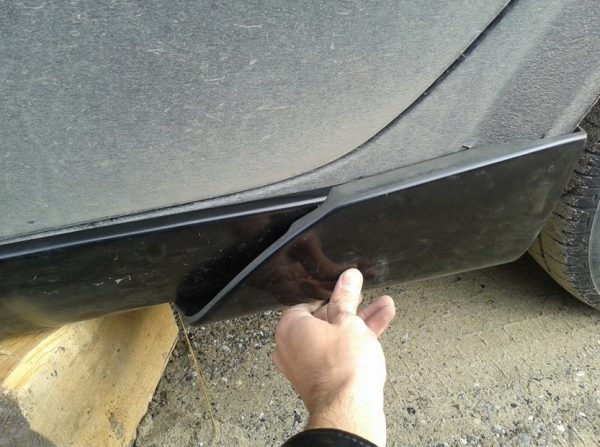
VAZ 2107 is a rather old car, which is no longer produced by now. Nevertheless, the "seven" in our country is popular to this day, and many drivers want to somehow distinguish their car from the crowd. Very often, the so-called body kit is used for this, which includes plastic thresholds (sometimes these parts are called threshold moldings, sometimes plastic lining, it's all the same). The function of plastic thresholds is purely decorative; these details do not solve any practical problem.

Particularly advanced drivers make plastic thresholds on their own. But for this it is necessary to have special equipment for working with polymeric material, plus you need to get the industrial polymer itself somewhere, which is not so simple. Therefore, car owners go the easier way and simply buy plastic thresholds, fortunately, now there is no shortage of them. But when choosing pads in the store, you should consider a few nuances:
- in addition to purely aesthetic qualities, it is necessary to pay attention to the mechanical properties of the thresholds. Purchased pads should not be too hard, because such products crack quickly, especially if the machine is operated in cold regions of the country. For this reason, fiberglass overlays should be abandoned;
- the best choice for the "seven" will be plastic lining with the addition of synthetic resins. These overlays are plastic, do not crack from temperature changes and from the impact of road reagents.
As you might guess, plastic thresholds are installed on top of regular steel thresholds. Here's what you need to install them:
- paint matched to the color of the car;
- black primer for plastic;
- electric drill;
- a set of self-tapping screws;
- marker;
- set of plastic thresholds.
Sequencing
The most important point: at the initial stage, accurate marking for self-tapping screws is extremely important. The success of the entire installation of linings depends on it.
- The overlay is applied to the standard threshold, with the help of a marker, holes for self-tapping screws are marked. It is necessary to ensure that the overlay is firmly pressed against the standard threshold during the marking process. The help of a partner will be very helpful. If there is no partner, you can fix the pad with several clamps for the tightest possible fit.Before installation, the overlay should be carefully tried on and assessed for cracks and distortions.
- After marking, the lining is removed, holes for self-tapping screws are drilled in the standard threshold.
- The standard threshold is carefully cleaned of old paint. A layer of a new primer is applied to the cleaned surface. After the soil has dried, the threshold is painted.
- When the paint dries, the plastic overlay is screwed with screws to the standard threshold.
- If the paint on the surface of the standard thresholds is not damaged, then you can do without stripping them and subsequent repainting. Simply drill the marked holes and then prime them.The plastic door sill is carefully fitted and seated on self-tapping screws.
- Before screwing the lining to the threshold, some drivers apply a thin layer of lithol on it. This helps prevent rust under the overlay and preserves the integrity of the paintwork. The same lithol is applied to the self-tapping screws before they are screwed into the thresholds.
Anti-corrosion treatment of thresholds
Treating thresholds with special compounds can significantly extend their service life. Here is what is required for such processing:
- goggles, rubber gloves and a respirator;
- electric drill with a metal brush;
- fine sandpaper;
- water;
- degreasing composition (usually white spirit is used);
- clean rags;
- hair dryer for construction;
- bottle with anti-gravity.
Sequence of operations
The anti-corrosion treatment itself does not take too much time. Much more time is required for the preliminary preparation of the machine.
- The car is washed, special attention is paid to thresholds during washing.
- After complete drying, the machine is installed on a pit or on a flyover (a flyover is preferable, since you can do without a flashlight there, but when working in a pit, you will definitely need lighting).
- A drill with a metal brush removes all pockets of rust from the thresholds. The thresholds are then cleaned with sandpaper, after which a thin layer of rust converter is applied to them.
- After drying, the surface of the thresholds is degreased with white spirit and dried.
- All parts of the body adjacent to the thresholds and not requiring anti-corrosion treatment are sealed with a masking tape.
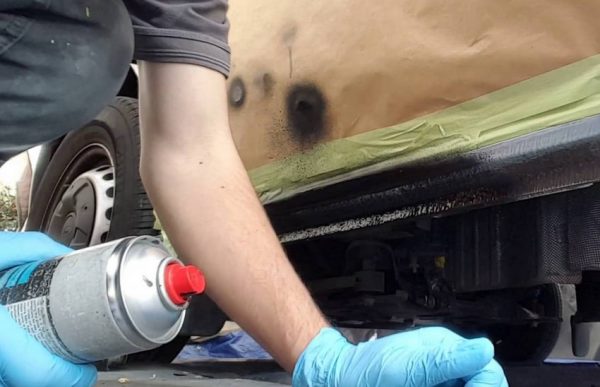
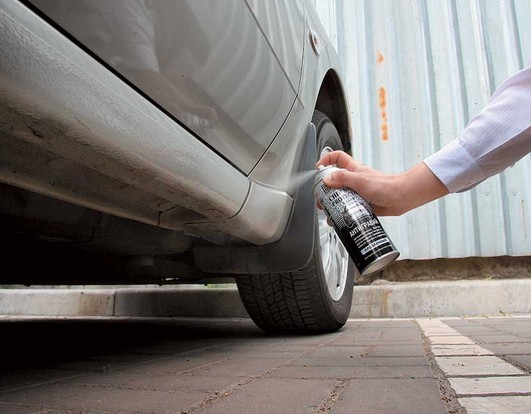
- Several layers of anti-gravity (at least three) from a spray can are applied to the thresholds. At the same time, the can must be periodically shaken and kept at a distance of 30 cm from the surface to be treated.Anti-gravel spray should be kept thirty centimeters from the threshold
- The applied coating is dried with a building hair dryer. The heating temperature should not exceed 40°C.
- Once the thresholds are dry, the masking tape around them is removed. You can drive a car no earlier than after 3 hours.
Threshold boost
When buying thresholds for the "seven", the driver receives a couple of amplifiers for them. This is a pair of long rectangular plates installed under the thresholds. There are a number of holes in the center of each plate. The diameter of each of them is about 2 cm (sometimes more). The thickness of the amplifier itself rarely exceeds 5 mm. It is clear that such a structure cannot be called durable. It is for this reason that many motorists prefer to install new, home-made amplifiers that are more in line with their name when replacing rotten thresholds. In this case, any improvised material is used. The most commonly used steel tubes are rectangular. That is, the narrow edges of two identical pipe sections are welded, resulting in a design shown in the photo below.
This pair of pipes is welded to the body instead of the standard amplifier, after which the thresholds are set according to the standard method described above.
Chrome plated door sills
Despite the fact that the door sills themselves are decorative elements to decorate the car, this does not stop some drivers. They go further and strive to give the overlays a more presentable look (but car owners almost never decorate the thresholds themselves).
The most common option for decorating linings is their chrome plating. In a garage, this can be done in two ways:
- pasting with a vinyl film with a coating "under chrome";
- coating of overlays with special enamel with the addition of chromium.
The first method is used extremely rarely, which is understandable: the pads are located near the ground, they are subjected to both chemical and mechanical stress. In such conditions, even the highest quality vinyl film will not live very long.
But the coloring of the overlays with special enamel is often used. Here's what you need for this:
- set of plastic pads for VAZ 2107;
- white spirit;
- primer (preferably black);
- a can of enamel with the addition of chromium;
- can of car varnish;
- polishing wipes;
- spray gun;
- fine sandpaper.
Sequence of work
Preparing the surface of the pads is the most important step that many motorists neglect. This is a big mistake.
- The pads are carefully cleaned with sandpaper. This is necessary so that their surface becomes matte.Door sills finished with very fine sandpaper
- White spirit is applied to the surface of the pads. Then you need to let it dry (this will take at least 20 minutes).
- A layer of primer is applied to the pads.
- After the primer dries, chrome enamel is applied with a spray gun, and there should be at least three layers of enamel.Enamel on the sill plates is applied in at least three layers
- It usually takes about an hour for the enamel to dry (but it depends on the brand of enamel, the exact drying time can be found on the jar).
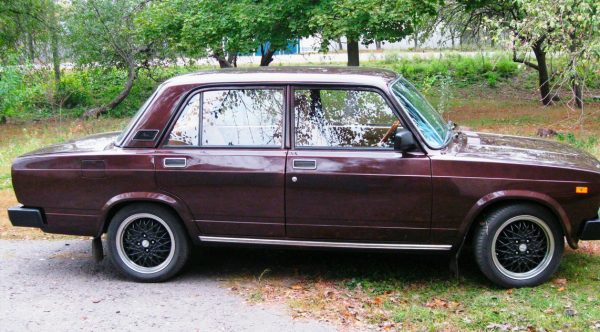
- Dried overlays are treated with polishing cloths to give shine.With chrome sills, the usual "seven" looks much better
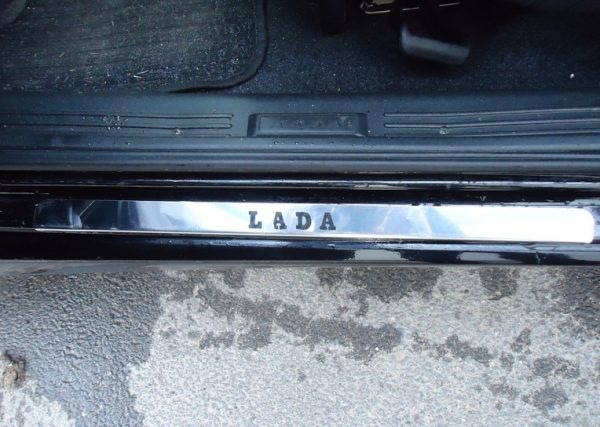
Internal chrome lining
Door sills are installed not only outside, but also inside the cabin. Internal pads are a set of four chrome-plated plates with mounting holes for self-tapping screws. In some cases, there may be no holes, and then the linings are simply glued to the threshold.
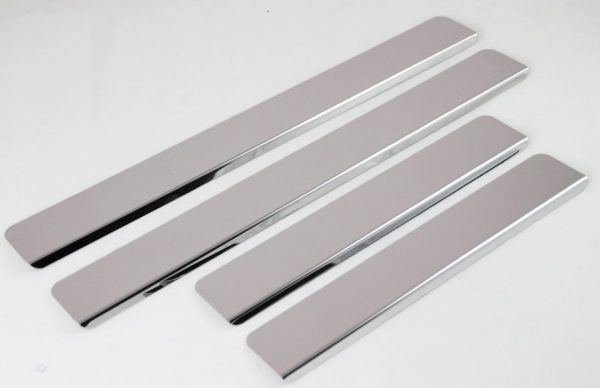
In addition, there is a car logo on some of the overlays. All this is in great demand among drivers who decide to additionally decorate their car. Installing the overlays is not particularly difficult: the overlay is installed on the threshold, marked with a marker, then holes for self-tapping screws are drilled and the overlay is screwed on. If the overlay is installed on glue, then everything is even simpler: the surface of the thresholds and overlays is degreased, a thin layer of glue is applied to it, the overlays are pressed down. After that, the glue just needs to be allowed to dry.
So, it is quite possible to change the thresholds on the VAZ 2107 on your own. All that is needed for this is to have minimal skills in handling a welding machine and a grinder. But to perform local repair of thresholds, a car owner, alas, will not be able to do without the help of a qualified auto mechanic.

