Tuning the interior of the VAZ "four": what is possible and what is not
Content
VAZ 2104 today is not so often seen on the roads, but this does not reduce the popularity of this model. Since the “four” cannot boast of a comfortable interior and a high level of safety, this prompts many car owners to think about improving the interior of their car in order to improve ergonomics, improve design and performance.
Salon VAZ 2104 - description
Salon VAZ "four" in the factory version does not have any frills and frills. The designers did not have the task of making the interior comfortable and attractive. Therefore, all devices and elements perform strictly assigned functions and there is not even the slightest hint of design solutions. The main goal pursued by the designers of this model was to make a working car for passenger and freight traffic and nothing more. Since the VAZ 2104 is still operated by many owners, it is worth considering possible improvements to the interior of this car in order to make it more attractive and comfortable.
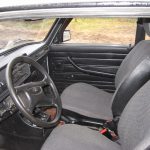
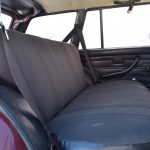
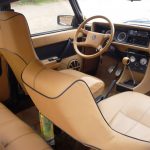
Photo gallery: salon VAZ 2104
-

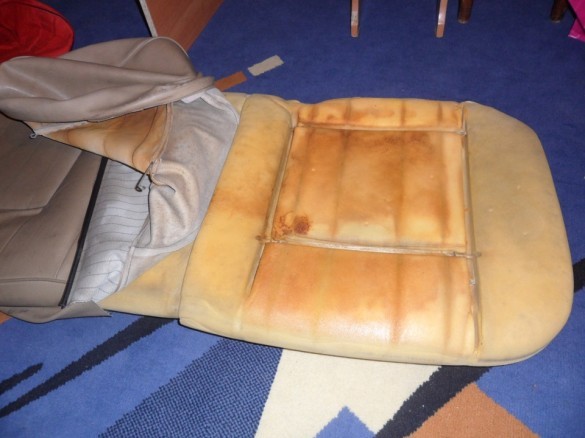
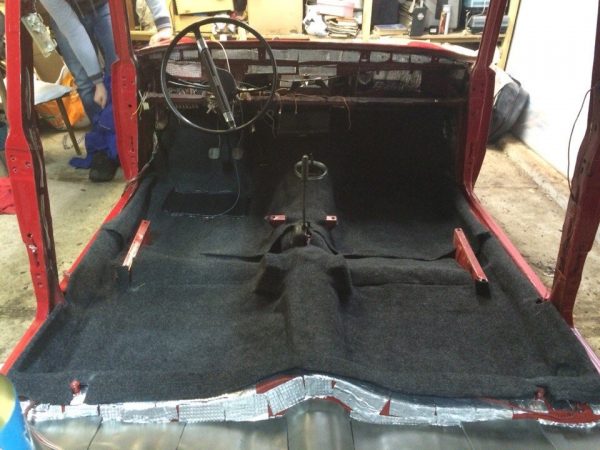
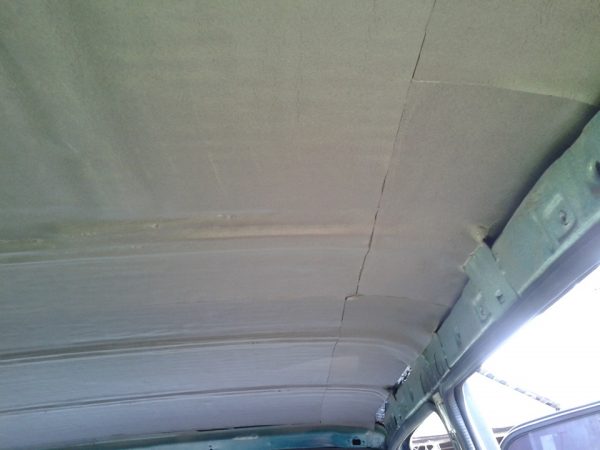
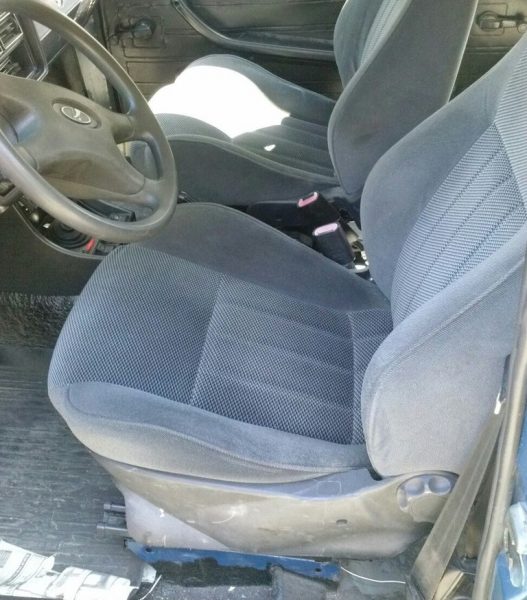
- When designing the VAZ 2104, the goals were to make a car for the transport of passengers and goods without a hint of any comfort
-
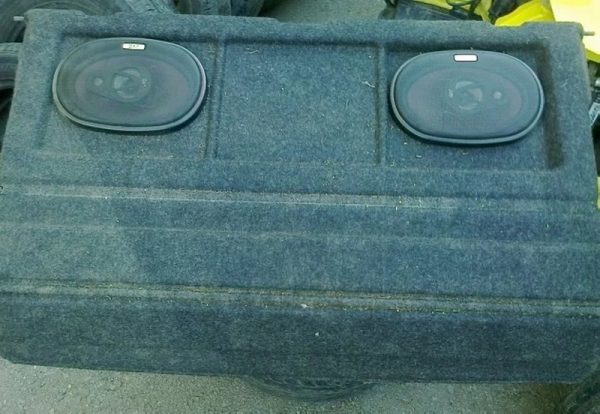
- The rear seat of the VAZ 2104 can be folded, thereby increasing the volume of the luggage compartment
-
- Improvements and improvements to the interior make it possible to increase the comfort of the VAZ 2104 for both the driver and passengers
Interior trim
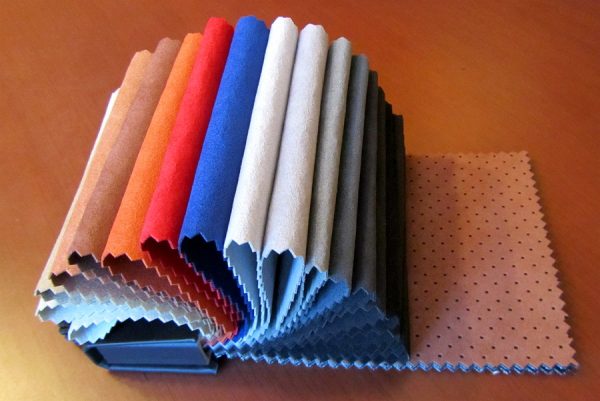
Initially, the fourth model of the Zhiguli used traditional upholstery with wear-resistant fabric and artificial leather on the seats. But no matter how reverently the driver treats the car, over time, the finish fades in the sun and becomes unusable, which requires its replacement. Today, the most popular materials for interior upholstery are:
- leather;
- velours;
- alcantara;
- carpet;
- dermatin.
Seat upholstery
In order for the interior elements to be combined with each other, you need to decide in advance on the materials and colors. It is worth considering that several colors in the interior will give it exclusivity. The stretching consists of the following:
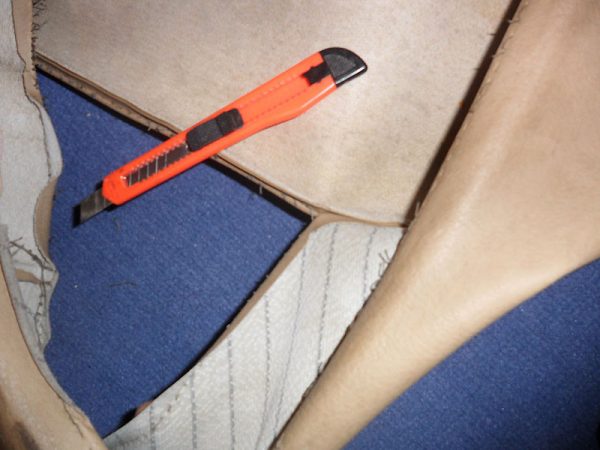
- We remove the seats from the car and tighten the old skin material.We remove the old trim from the seats and backs of the chairs
- We separate the cover into pieces at the seams with a knife or scissors.We divide the old skin into elements at the seams
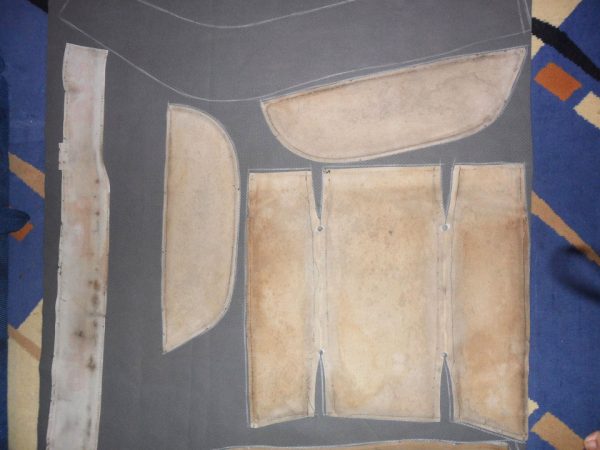
- We apply the resulting pieces from the cover to the new material, press them and circle them with a marker or chalk, then cut them out.We apply the skin elements and circle them with a marker on the new material
- We apply glue on the inside of the material and fix the foam rubber, after which we sew the elements.
- We glue the seams and cut off the excess.
- We beat off the seams with a hammer (leather or leatherette).
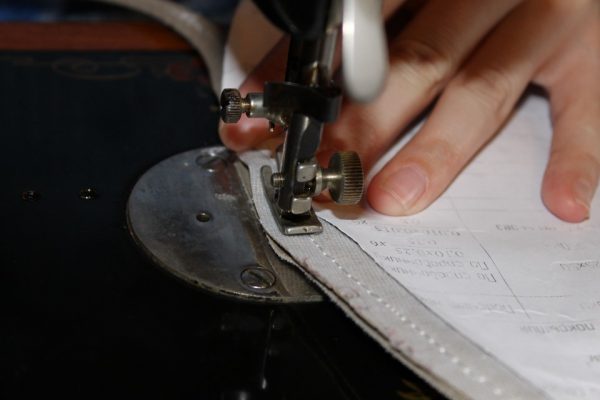
- We pass the lapels with a line for finishing.We sew lapels on a sewing machine
- We pull new seat covers, starting from the back.
Video: reupholstering Zhiguli seats

Door trim
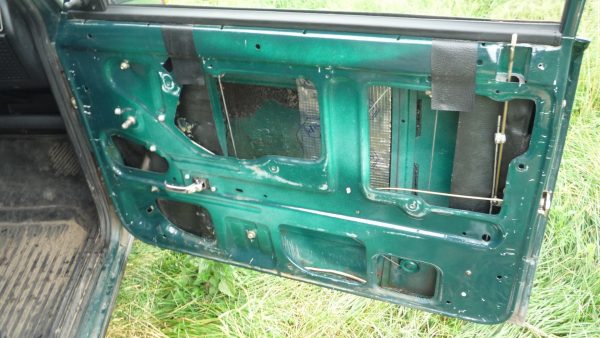
To update the door trim of the VAZ 2104, you will have to dismantle the standard door card and make a new part from plywood, and then sheathe it with finishing material. This is done as follows:
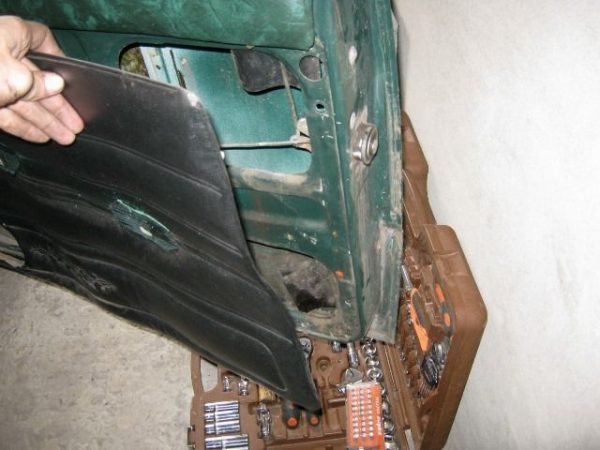
- We remove all the door elements from the passenger compartment, and then the upholstery itself.The old trim is removed from the doors to make a new card
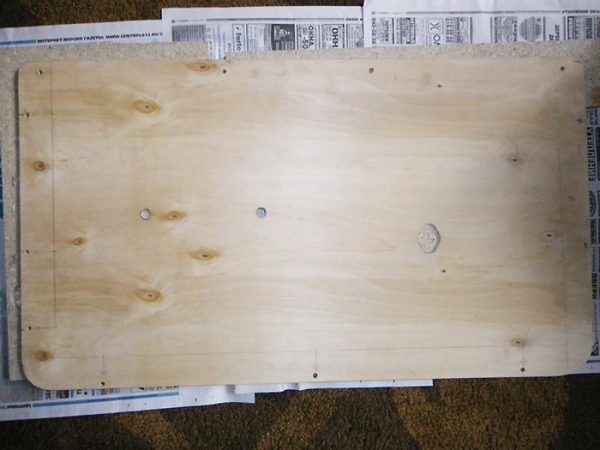
- We apply the door card to a sheet of plywood 4 mm thick and draw a marker around the contour.
- We cut the workpiece with an electric jigsaw, after which we process the edges with sandpaper.The basis of the door card is plywood of the appropriate size and shape
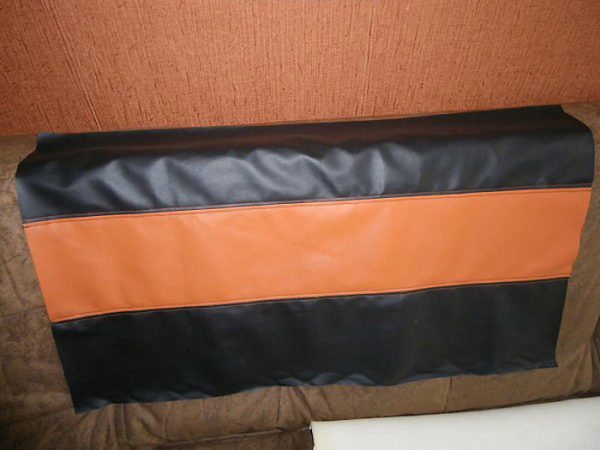
- From the selected material on the sewing machine we make the skin.According to the given templates, the finishing material is made and sewn together
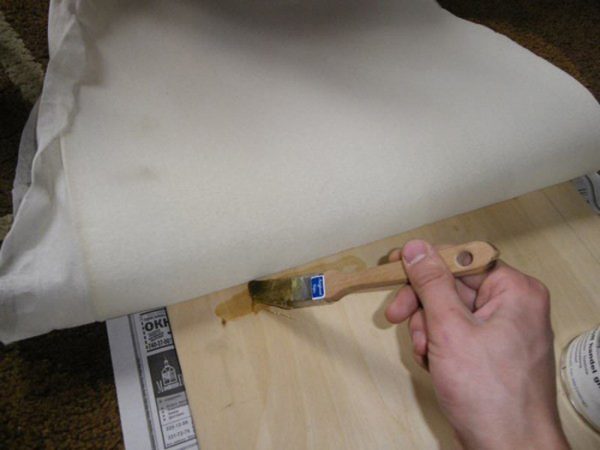
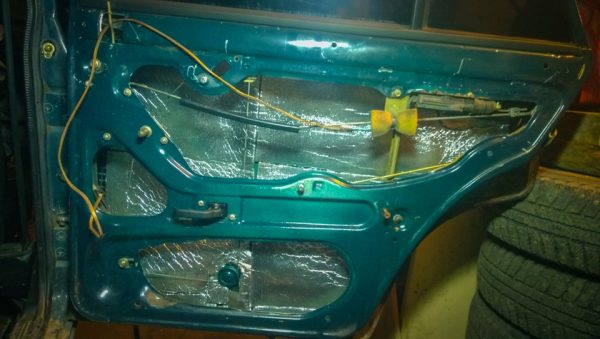
- We glue a layer of foam rubber onto the plywood, and on top of it is a finishing material. Before installing a new upholstery, we make holes for the door elements.As a substrate, thin foam rubber is used, which is glued to plywood.
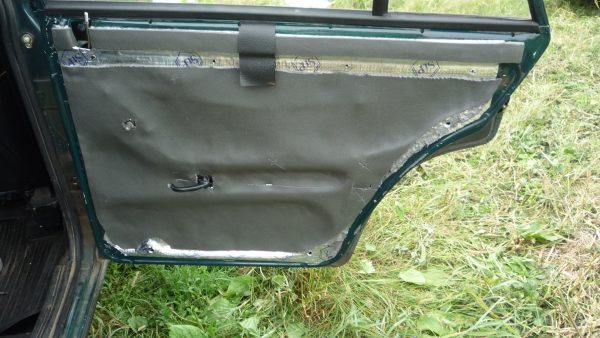
- Fasten the card with decorative bolts.
Video: do-it-yourself door upholstery replacement

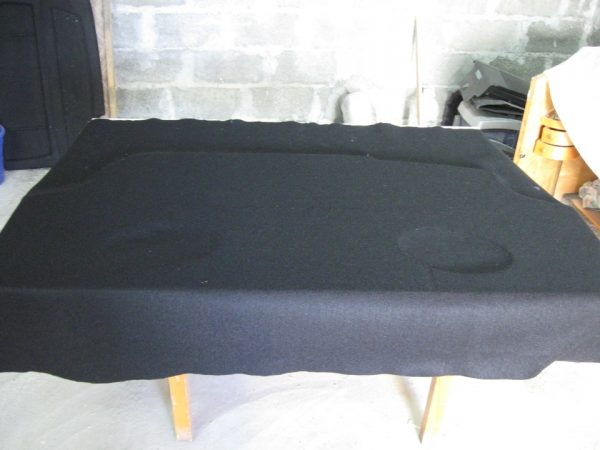
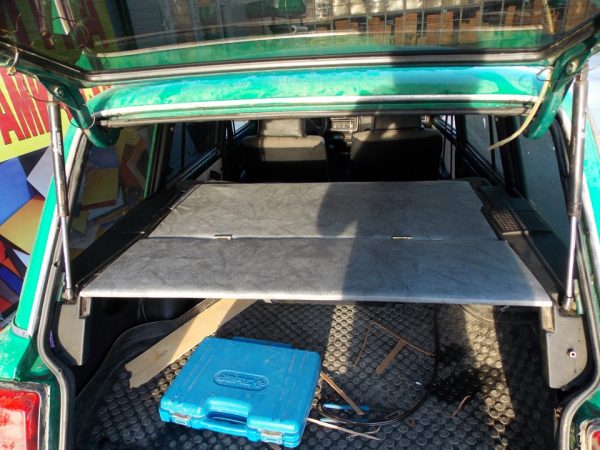
Rear shelf lining
Before proceeding with the hauling of the rear shelf on the VAZ 2104, it should be noted that the product has irregularities and it is best to use materials that stretch well for sheathing. Working with a shelf consists of the following actions:
- We dismantle the panel and clean it of dirt, which will improve adhesion with the finishing material.We dismantle the rear shelf from the car and clean it from dirt
- We cut off the required piece of material according to the size of the shelf with some margin at the edges.
- We apply a two-component adhesive to the part and material in accordance with the instructions.
- We apply the finish and smooth from the middle to the edges.We lay the material on the shelf and smooth it from the middle to the edges.
- We let the shelf dry for a day, cut off the excess, after which we install it.After tightening, we install the shelf in its place
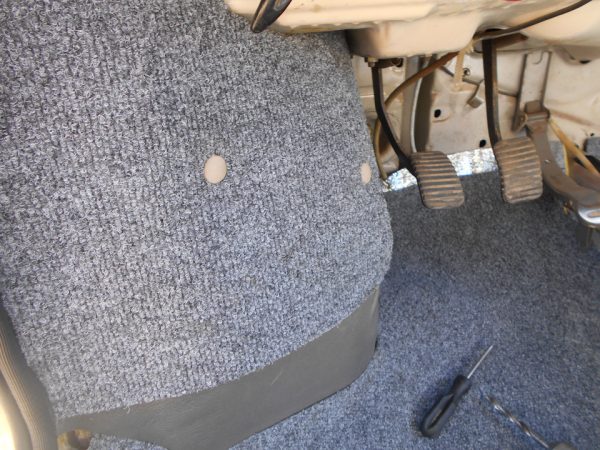
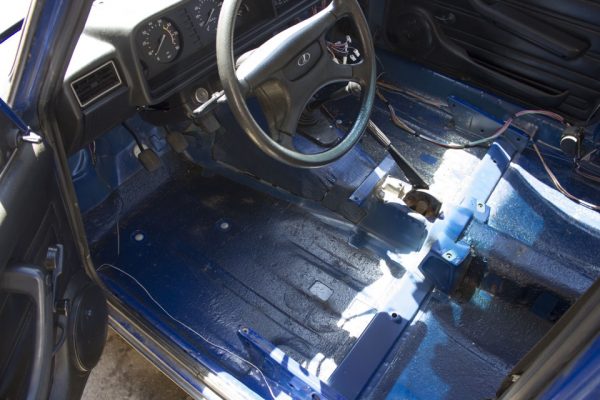
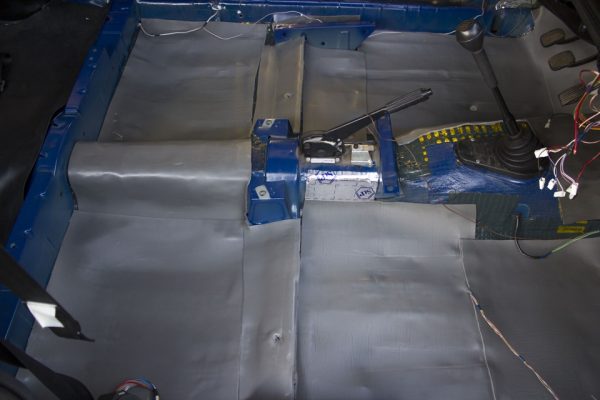
Floor sheathing
Quite often there are "Lada", which have linoleum on the floor. If you look, then this material is not suitable as a floor covering, because if moisture gets under it, it will be there for a long time, which will lead to rotting of the body. Linoleum can only be used for a short time. Often, carpet is used as a floor covering, since this material is highly wear resistant.. The floor is sheathed as follows:
- We remove the seats and remove the old cover.
- We process the floor with mastic based on bitumen.Before applying the floor covering, it is desirable to treat the floor with bituminous mastic.
- We customize a piece of carpet to fit the floor, make cutouts in the material.We adjust the carpet on the floor, cutting holes in the right places
- To give the material a shape, we wet it and stretch it in the right places.
- We take the carpet out of the cabin to dry, and then put it back.
- For fixing, we use decorative fasteners or glue brand "88". It is especially important to apply it to the arches.We fix the carpet on the arches with glue or decorative fasteners
- We assemble the interior in the reverse order.
Video: laying a salon carpet on the floor of a classic Zhiguli

Sound insulation of the cabin
On the VAZ 2104, as well as on other classic Zhiguli, there is no sound insulation from the factory as such. However, today many car owners want not only to move around in their cars, but also to feel comfortable in the cabin. Therefore, the issue of sound insulation should be considered in more detail. First you need to decide what materials and tools you will need:
- a set of screwdrivers and wrenches;
- knife and scissors;
- solvent;
- roller for packing insulation;
- rags;
- vibration absorber, for example, "Vibroplast";
- noise absorber (felt, "Accent");
- sound reflector ("Splen");
- antiscrip ("Madelin", "Bitoplast").
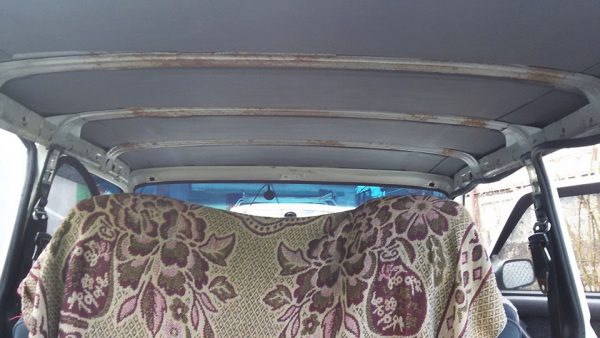
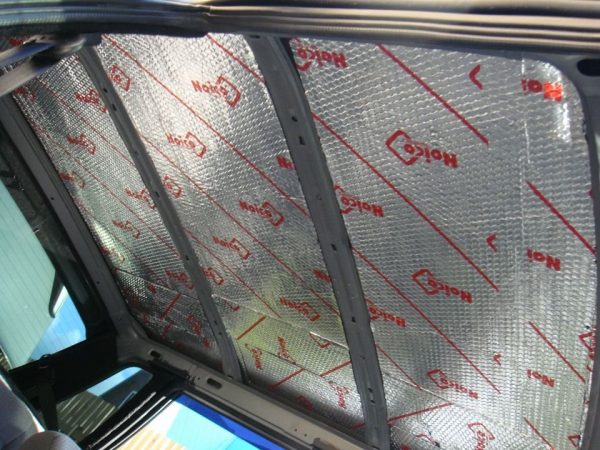
Soundproofing ceiling
The ceiling of the car is processed in order to reduce external noise during rain, as well as to eliminate squeaks.
For vibration isolation of the ceiling, it is recommended to use a material with a thickness of no more than 2–3 mm and sound insulation up to 5 mm.
The process consists of the following steps:
- We dismantle the ceiling lining.We remove finishing material from the ceiling
- If the ceiling is pasted over with any materials, remove them.
- We wash the surface and degrease.
- If areas with rust are found, we clean them with sandpaper, primer and tint.
- We adjust the vibration isolation sheets for laying between the roof reinforcements and glue them. This procedure is more convenient to perform with an assistant. To prevent the formation of rust under the material, carefully roll it with a roller, expelling air bubbles.We apply vibration-absorbing material between the roof amplifiers
- We apply a layer of sound-absorbing material on top of the vibration isolation, after which we install the casing in place.We glue a layer of soundproofing material on top of the vibration isolation
Soundproofing doors
The main goals that are pursued when soundproofing doors on the "four" and other cars are as follows:
- eliminate extraneous noise that penetrates from the outside;
- improve the sound of acoustics, if installed.
Before applying the material, the doors are prepared, for which the handles and upholstery are removed, the surface is cleaned by analogy with the ceiling. The material is applied in the following order:
- Through the technological holes in the doors, we wind up and stick the vibration isolation (“Vibroplast”), launching the pieces with a slight overlap on each other.A layer of "Vibroplast" or a similar material is applied to the inner surface of the doors
- The second layer is applied "Accent".A soundproofing layer is applied on top of the vibration isolation
- So that nothing rattles inside the doors, we wrap the lock rods with Madeleine.
- We seal the technological holes with "Bitoplast" so that the acoustics are in a closed box.
- On the inside of the door we apply "Accent" to improve sound insulation.“Accent” is applied to the salon side of the door, which will improve the fit of the skin
- We install all the door elements in place.
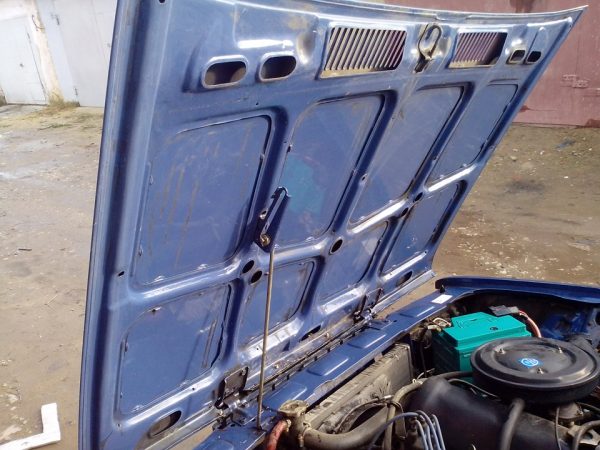
Soundproofing the hood and engine shield
Some car owners have the misconception that the engine compartment is soundproofed to reduce engine noise radiated into the environment. In fact, such a procedure has slightly different goals:
- reduce body vibrations;
- reduce the level of noise penetrating from the engine into the cabin;
- increase the thermal insulation properties of the engine compartment, eliminating rapid cooling in winter.
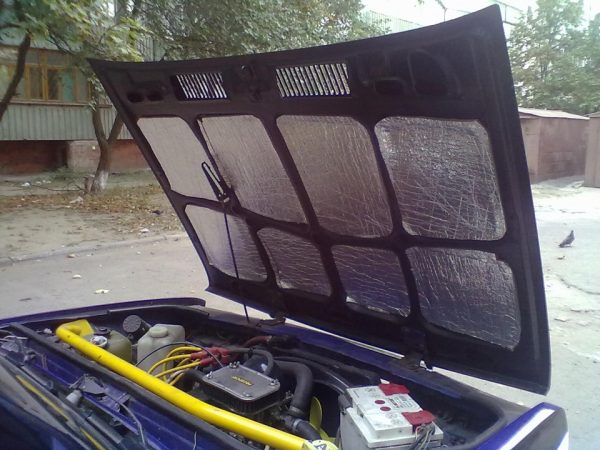
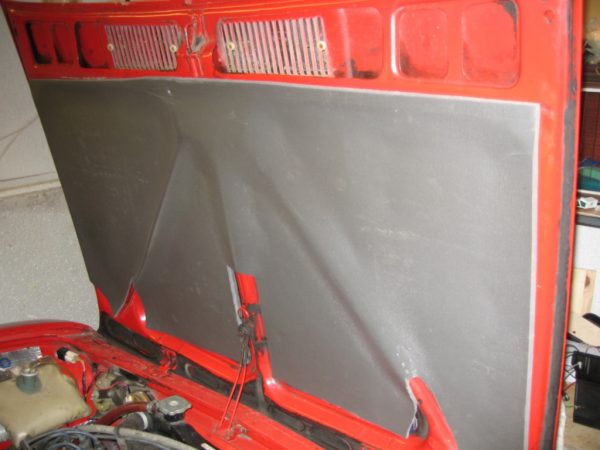
The hood is processed as follows:
- We prepare the surface in the same way as when soundproofing doors or ceilings.Before applying soundproofing, we clean the hood from dirt
- From cardboard, cut out templates corresponding to the depressions on the hood.
- We cut out the "Vibroplast" according to the templates and apply it to the hood.We apply vibration isolation in the hollows of the hood
- On top of the vibration isolation, we apply sound insulation in a continuous piece.We cover the entire inner surface of the hood with soundproofing
To process the motor partition, you will need to perform the following steps:
- We dismantle the torpedo.
- We prepare the surface.
- We cover the shield with a layer of "Bimast Bombs". The same material is applied to the front wheel arches and technological holes.
- As the second layer, we use "Accent" with a thickness of 10-15 mm.
- We glue the side parts and the top of the motor partition with 10 mm Bitoplast.
- We cover the torpedo with a layer of "Accent".
- From the side of the engine compartment, we process the partition with a vibrating material, on top of which we paste “Splen”.
Video: soundproofing the motor partition

Soundproofing trunk and floor
It is more logical and more convenient to perform vibration and sound insulation of the cabin floor and trunk at the same time. To do this, you will need to dismantle all interfering elements (seats, seat belts, carpet, etc.) and clean the surface of dirt.
Both mastics and sheet noise and sound insulators can be used as materials. The choice depends only on your wishes and financial capabilities. On the floor of the classic Zhiguli, it is recommended to use Bimast Bomb as vibration isolation, and Splen for noise isolation. In particular, attention should be paid to the wheel arches and apply the material in several layers.
The trunk lid is processed by analogy with the hood.
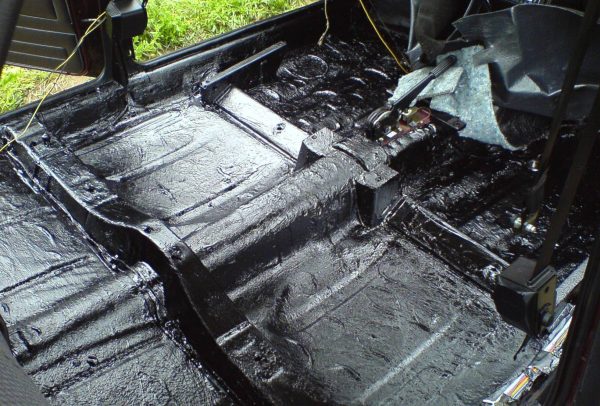
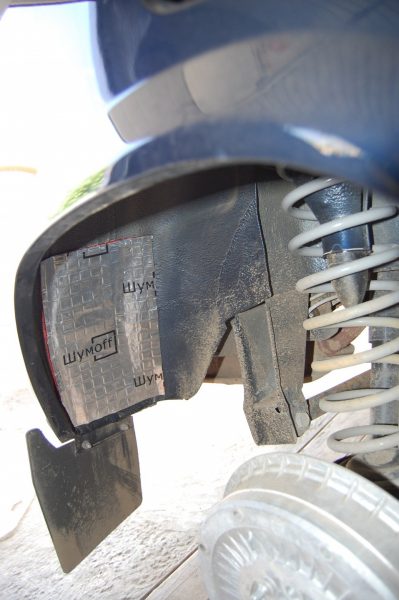
Soundproofing underbody and wheel arches
An important step in soundproofing the VAZ 2104 is the processing of the bottom and wheel arches. It is the arches that are the source of increased noise in the cabin, since noise from tires, stone impacts, suspension rumble, etc. is heard through them. Outside, the bottom and body are treated with liquid rubber-bitumen mastics, for example, Dugla MRB 3003. The material is applied to a pre-washed and dry surface with a brush or sprayer.
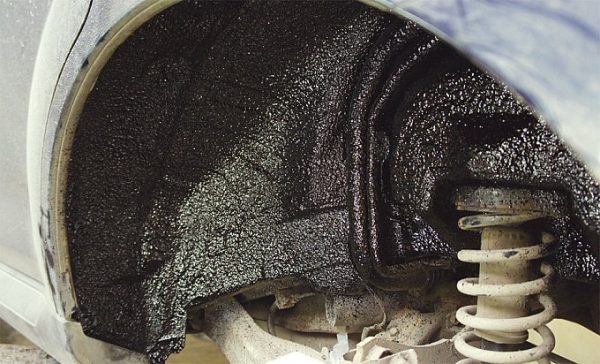
For outdoor work, it is better to use liquid soundproofing materials, since sheet materials do not withstand the effects of the environment. The only place where you can use the material in the sheets is the inner surface of the fender liner, and then only if protection is installed. Then "Vibroplast" is used as the first layer, and "Splen" is applied on top of it.
Front Panel
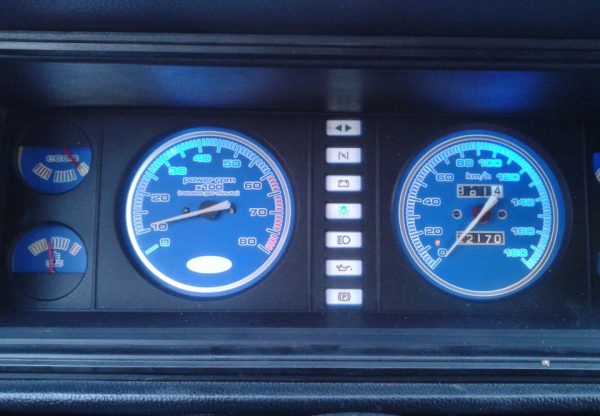
Some owners of the "fours" are finalizing and improving the dashboard, since the standard product has poor lighting for the instruments, the glove box and, in general, does not attract attention.
Dashboard
To improve the illumination of devices or change the color of the glow, you can use LED elements instead of light bulbs.
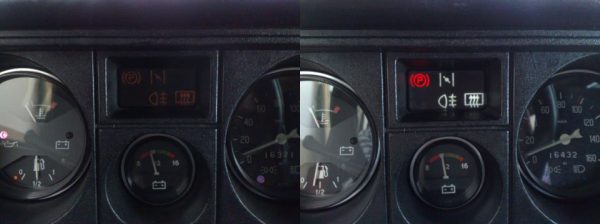
In addition, modern scales are often installed to make the tidy more attractive and readable. For such improvements, the panel will need to be removed from the car and disassembled, avoiding damage to the pointers, and then sticking new scales.
Glove box
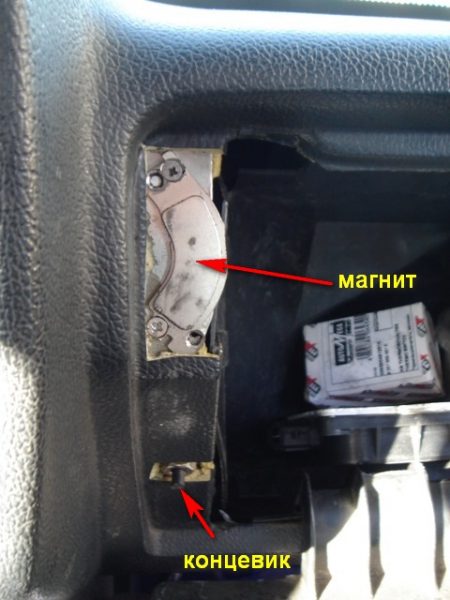
All owners of the car in question know the problem with the glove box lock, which creaks, cracks and opens when hitting bumps. To solve this nuance, you can install magnets from computer hard drives instead of a regular lock and make control through a limit switch.
backlight
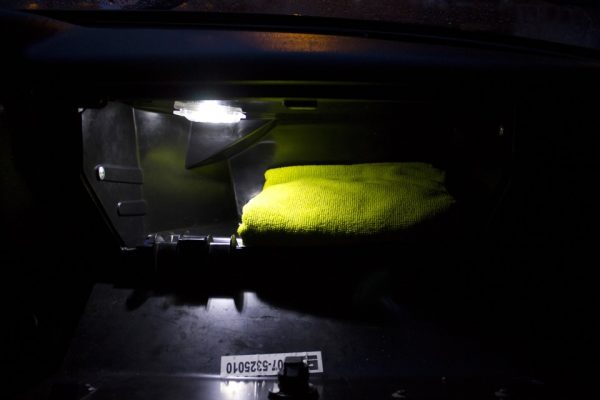
Another nuance of the front panel is the illumination of the glove box. On later models of the VAZ 2104, although it is provided from the factory, it has such poor lighting that there is practically no sense from it. To improve the situation, it is necessary to purchase a ceiling lamp of a suitable size (VAZ 2110 glove box illumination) and an LED.
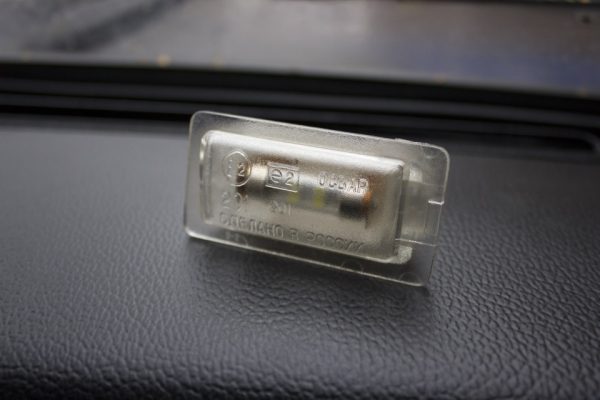
To install a new part, the glove box itself is removed and the ceiling is built into it, connecting the wires to the limit switch and to the regular positive wire.
Seats
Comfortable driving largely depends on the comfort of the seats. If the car is old, then the seats willy-nilly are in a deplorable state. Therefore, many owners of the VAZ 2104 are thinking about installing more comfortable seats. There are many options, ranging from "sevens" to foreign brands (Mercedes W210, Toyota Corolla 1993, SKODA, Fiat, etc.).
Seats from the VAZ 2107 will fit with minimal modifications. To introduce any other chairs, you first need to try them on, whether they will fit into the “four” salon. The rest of the process comes down to fitting new products, welding and rearranging standard fasteners. If it becomes necessary to replace the rear seat, then the procedure is carried out in a similar way.
Video: installing seats from a foreign car using the VAZ 2106 as an example

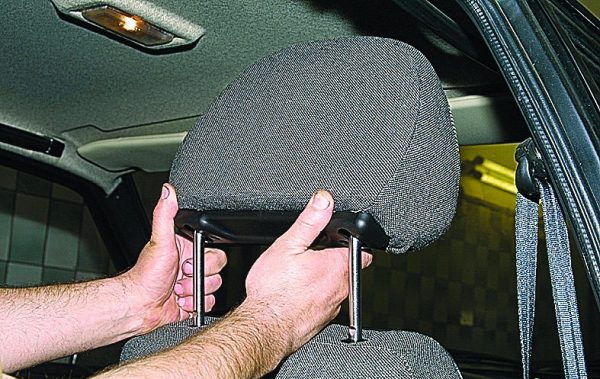
How to remove the head restraints
There are versions of the VAZ 2104, the seats of which are equipped with head restraints. They can be removed if necessary, for example, for repair in case of damage or for cleaning. This is done quite simply: just pull the headrest up, as the product will completely come out of the corresponding grooves in the back of the seat. Installation is carried out in the reverse order.
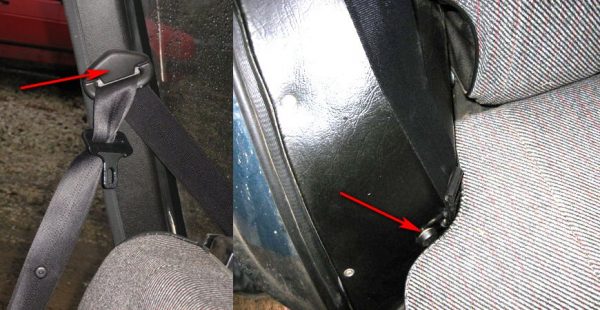
Seat belts
On the early Zhiguli models of the fourth model, there are no rear seat belts, although mounting holes are provided for them. But sometimes it becomes necessary to install them:
- for the safety of rear passengers;
- to install a child seat.
To perform such a refinement, you will need classic belts (VAZ 2101), which are attached in the appropriate places: to the pillar behind the rear seat, at the bottom of the wheel arch and under the back of the rear seat.
Interior lighting VAZ 2104
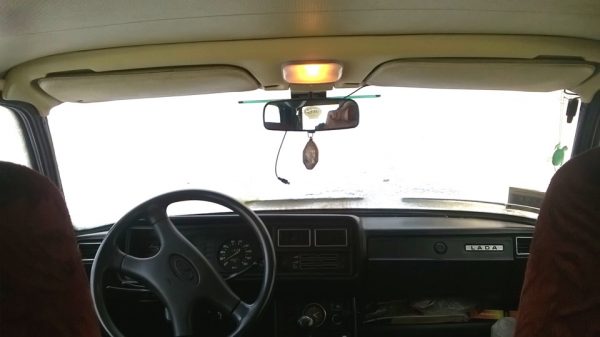
The regular interior lighting of the VAZ 2104 leaves much to be desired, because at night in the car with the lamps on the side pillars on, little is visible. To improve the situation, you can install a modern ceiling, for example, from Kalina or Lanos.
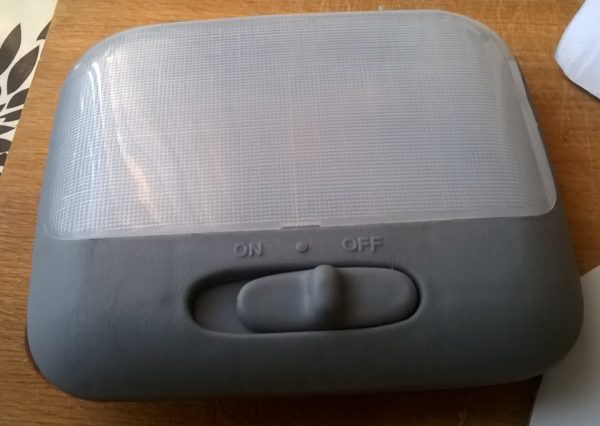
The essence of the refinement boils down to the fact that it is necessary to mount the purchased ceiling lamp into the ceiling panel near the windshield. Power can be supplied at your discretion, for example, connect the ground to the rear-view mirror mount, and take the plus from the alarm button.
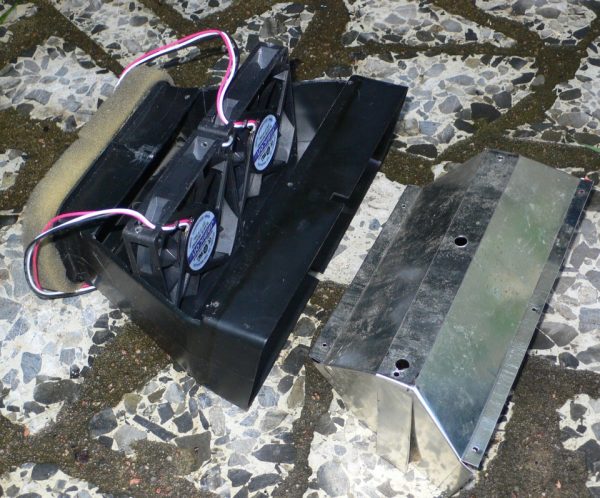
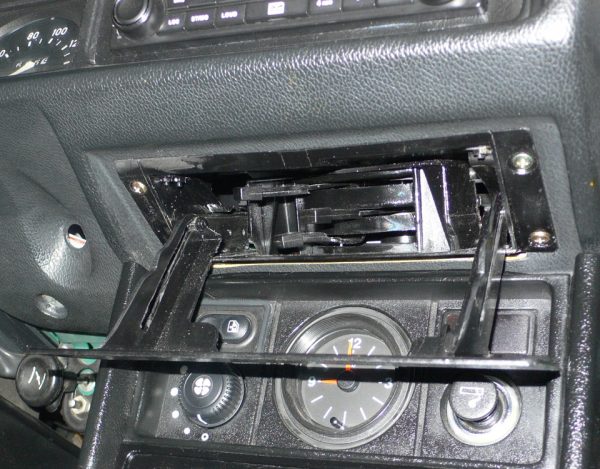
Interior airflow and heating
In the cabin of the "four" there is no fan that could be used in the summer for blowing. As a result, being in a car is sometimes simply unbearable. To increase comfort, you can use a device from the VAZ 2107, which provides ventilation from incoming air flows. Additionally, it must be equipped with a pair of fans, which will allow you to use the mechanism during downtime in traffic jams.
To install such a product, you will need to move the block of heater control levers a little lower, for example, into an ashtray.
In addition, some owners are not satisfied with the air supply to the side windows. Therefore, by analogy with the central airflow, you can install fans in the side air ducts.
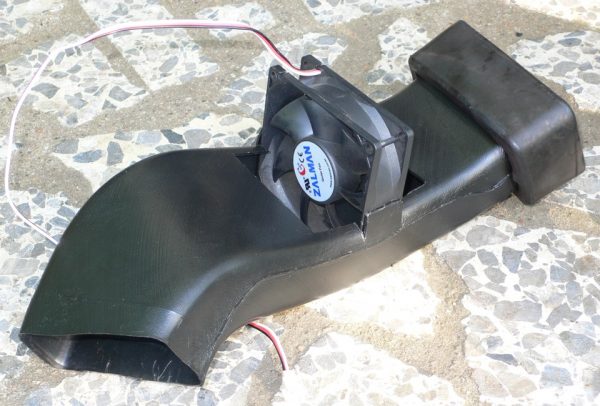
Fan control buttons are located in a convenient place. Additionally, you can improve the VAZ 2104 interior heating system by installing a stove fan from the GXNUMX. This electric motor is characterized by more power and higher speed. To install the mechanism, you will need to slightly modify the heater housing.
Any modifications to the interior require financial investments, time and effort. However, with a competent approach, it is possible to make a car out of inconspicuous classic Zhiguli in which it will not only be pleasant to be in, but also comfortable to drive. In addition, any improvements can be done with your own hands, after reading the step-by-step instructions.

