Replacing a rear-view mirror with your own hands: how to remove, disassemble and glue a new one
Content
The circumstances under which you will need to dismantle the rear-view mirrors can be varied. For example, repairing or replacing cracked glass, buying new modified models, and even regular window tinting. In addition, you can install a heater in your car, as well as a monitor and a rear view camera. Removing a damaged mirror, disassembling it and gluing a new one with your own hands is not so difficult, as well as installing devices that are more convenient than a conventional reflector. To do this, arm yourself with the instruction manual for your machine and our instructions.
Content
- 1 How to remove a rearview mirror
- 1.1 Required Tools
- 1.2 Mirror removal process
- 1.2.1 Salon
- 1.2.2 Video: separating the interior mirror bracket from the holder platform
- 1.2.3 Side left and right
- 1.2.4 Video: dismantling the side mirror
- 2 Dismantling the rear view mirror
- 2.0.1 Salon
- 2.0.2 Video disassembly process
- 2.0.3 Lateral
- 2.0.4 Video: side mirror disassembly process
- 3 How to fix and how to glue a new one
- 3.1 Selection of glue
- 3.2 How to stick to windshield
- 3.3 How to install on the bracket
- 4 Installation of mirrors with additional functions
- 4.1 Heated
- 4.1.1 Video: the process of installing a mirror with a heater
- 4.2 with monitor
- 4.3 Video: do-it-yourself monitor and rear-view camera installation
- 4.4 With a camera
- 5 Possible malfunctions and their elimination
- 5.1 What to do if the mirror peels off
- 5.2 What to do if it cracked
- 5.3 Video: replacing the mirror sheet
How to remove a rearview mirror
Mirrors of this type are intended for studying the situation on the road behind the car. They can be divided into two categories:
- salon - installed inside the car;
- side - located on both sides on the front door racks.
the salon mirror is located inside the car

side mirrors are located on both sides of the car
It seems that it could be easier than dismantling the mirror? In fact, this is not so easy to do, moreover, the principle of dismantling for different brands and models can vary significantly. We will talk about the most versatile ways to remove, disassemble and install internal and external. However, if any of the methods described here do not work for you, take a look at the owner's manual for your machine. Today, many car companies make all these processes much easier: perhaps, instead of unscrewing the bolts and bending the terminals, you will only need to press a small button or pedal.
Required Tools
In order to remove the mirror, you do not need any specific and hard-to-find tools. As a rule, everything you need can be found in the garage of any motorist.
- a set of screwdrivers (most likely, only curly and flat ones are useful);
- a wrench depending on the size of the bolts;
- household hair dryer for removing the mirror element.
Add to this set of skillful hands and the desire to do everything efficiently, and you can get down to business.
Mirror removal process
Salon
The interior mirrors can be installed in different ways depending on the make, model and year of the vehicle. There are two methods that are most commonly used.
- Installation in the vehicle ceiling using screws or self-tapping screws.
- On the windshield with glue or suction cups.
So, on many domestic cars, the assistant device is installed using ordinary bolts, which greatly simplifies the dismantling process. To do this, you just need to unscrew the bolts, after removing the plug.
in order to remove such a mirror, you just need to unscrew the bolts
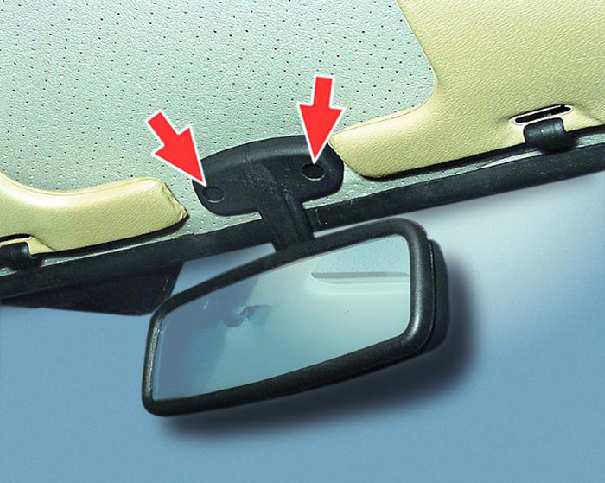
The situation can become more complicated if the mirror is mounted on a bracket glued to the glass. First of all, check if it is possible to separate the bracket itself and the platform glued to the glass. On most cars, they are separated by pushing the latches or turning in a certain direction.
if the mirror is glued to the glass, try to separate the bracket from the holder platform
If this is not possible, you will have to resort to a radical method and remove the bracket along with the windshield. The fact is that the glue holds the elements very firmly, so when you try to separate the mirror, you can accidentally damage the glass.
Before starting this process, take a look at the manual for your car: it should describe in detail the process of dismantling some of the elements. Remember that buying a new windshield is expensive.
Most likely, you will not be able to separate the bracket platform from the mirror on your own, so it is better not to risk it and contact a special salon. Moreover, if you are dismantling for the sake of future tinting. However, if you do decide to do it yourself, be prepared that there will be a trace of glue on the glass.

Video: separating the interior mirror bracket from the holder platform
Side left and right
Side mirrors are divided into two categories:
- with a mechanical drive;
- with an electric drive.
In almost all vehicles, you will need to remove the door trim to get to the mounting screws. You can find out how this can be done on your model from the instruction manual.
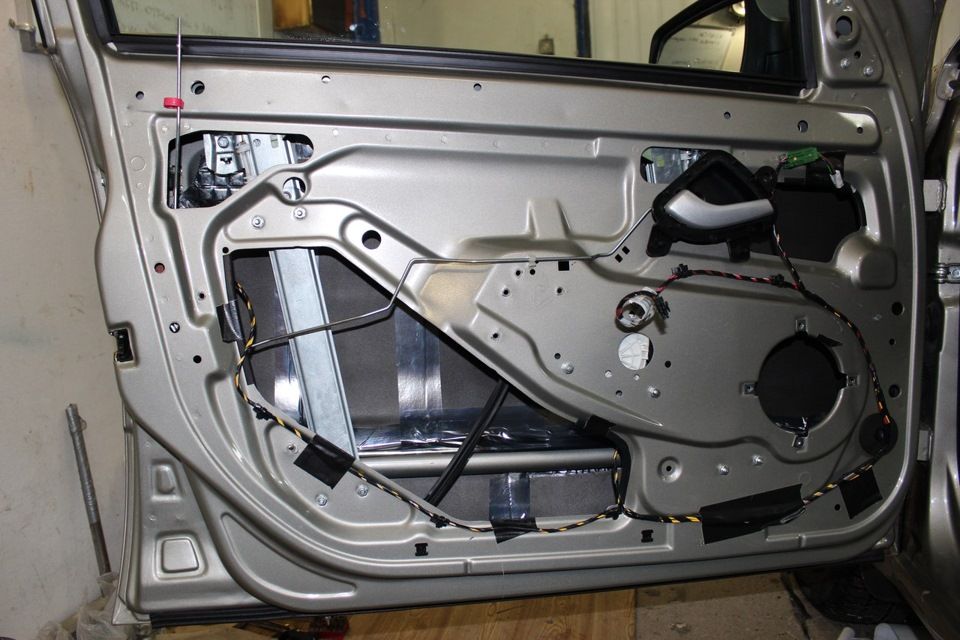
it looks like a car door with the trim removed
Further, in order to remove a part with a mechanical drive, you need to follow a certain procedure.
- Remove the regulator retaining bracket.
- Unscrew the fastening screws on the inside of the door.
- Dismantle the mirror.

Video: dismantling the side mirror
If the mirrors are powered, the procedure will be slightly different.
- Disconnect the negative terminal from the battery.
- Disconnect the connector with wires.
- Unscrew the fastening screws on the inside of the door
- Dismantle.
Dismantling the rear view mirror
Salon
In order to disassemble the internal, you will need special picks and wringers. The case is divided according to the same principle as a mobile phone or a remote control for battery replacement.
- Find the place where the case and the mirror part meet.
- Insert the wringer here and push firmly. A gap should form on the case.
- Carefully run your pick along the entire gap and split the body into two.
- Remove the mirror. All the elements you need will be under it.
Video disassembly process

Lateral
After you have separated the side mirror housing from the car body, it should be disassembled. First of all, you need to remove the mirror element. This process may not be the same for different brands, however, the following procedure is most often followed.
- Warm up thoroughly the junction of the reflective element with the body with an ordinary household hairdryer. The temperature of the air flow should not be too high, so a hot air gun will not work here.
- Using a flat screwdriver or small spatula, separate the mirror from the body. On some models, bend the terminals at this stage. To avoid damaging the glass, a screwdriver or spatula can be wrapped with electrical tape or soft cloth.
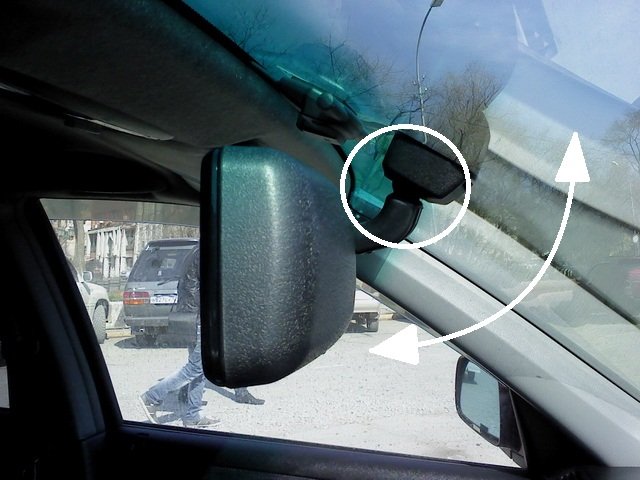
- In some designs, to separate it, you need to slightly press it in the center and, as it were, push it to the side. After that, with gentle movements, the reflective element can be removed.
- Then remove the center screw from the plastic frame (if present).
- All side mirror mechanisms are located under the frame. With a screwdriver, you can unscrew any of them and put them in place. You can independently divide the structure into all its component parts, including the adjustment and folding motors.

Video: side mirror disassembly process
The mirror is assembled in the same way, but in reverse order.
How to fix and how to glue a new one
If you have successfully dismantled the mirror yourself, then it will not be difficult to return it back. As a rule, all actions are performed in the reverse order.
But the selection of glue should be given special attention, since not everyone is suitable for this process.
it is necessary to choose the right glue for attaching the mirror to the windshield
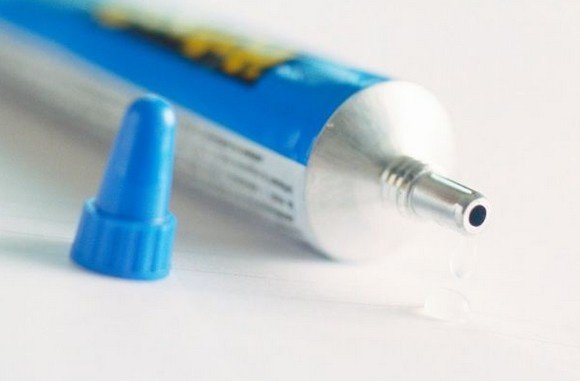
Selection of glue
There are three types of mirrors adhesive:
- chemically curable;
- light-cured;
- compositions based on epoxy resin.
Composition with resins will work well only if you allow it to dry properly. This usually takes from 10 hours to a day. In this case, the part must be tightly pressed all the time. This approach is not very convenient, therefore, such means are not used in everyday life.
Light-curing mixtures act when exposed to special ultraviolet lamps. This is one of the most common production methods. However, if you are not a happy owner of a lamp, you should not purchase such a composition. Sunlight, especially diffused light, is not capable of having a sufficient impact.
For these reasons, chemically curable formulations are the most popular. A special hardener starts the polymerization process. As a rule, they consist of the glue itself and an aerosol activator, although one-component compositions are also found.
Please note that some materials cannot be used to glue the mirror.
- household superglue;
- double-sided adhesive tape.
The adhesive component of both materials is of such a composition that, when used on glass or metal, it cannot completely solidify. The high temperature of the air inside the passenger compartment or the heating of the glass from the sun's rays will soften it, and the mirror will disappear. You can use household adhesives only if the mirror fell completely unexpectedly, and now you need to urgently get to the car service.
I tried it on superglue three times. I confirm: it lasts no more than a week.
How to stick to windshield
Having picked up the right glue, you can begin to return the rear-view mirror to its rightful place. Choose a warm day for this or install a heater in the garage: the air temperature should be between 20 and 25 ° C.
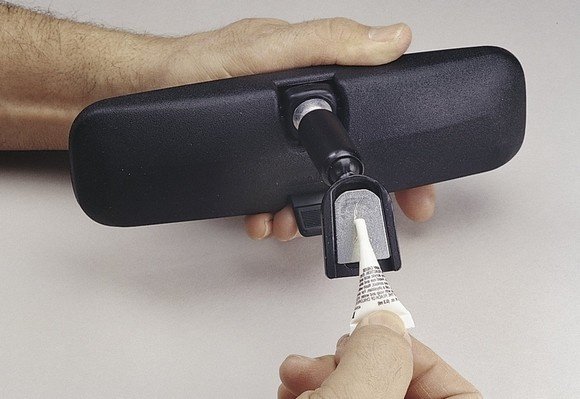
the process of applying glue to the holder platform
- Clean the platform of the holder from the remnants of the old adhesive.
- Lightly sand the surface of the holder to improve the adhesive effect.
- In the same way, sand the area of the windshield in the place of gluing.
- Degrease the holder and glass area.
- Apply a thin layer of glue to the holder.
- Spray a special activator on the place where the part is attached.
- Attach the adhesive side of the part to the glass. Try to hit the trail left from the previous time.
- Press the mirror firmly against the glass and hold for the time indicated on the packaging.
- After making sure that the part is firmly in place, clean the mirror from the remnants of the activator and glue around the holder.
- Install the windshield in its place (if you removed it), according to the instruction manual.
Ready! If you followed all the instructions exactly, the mirror looks like it was installed at the factory or at least in an auto repair shop.
Be extremely careful and attentive! A crookedly glued mirror cannot be moved, so you have to start the whole process over.
How to install on the bracket
If during dismantling you did not separate the bracket platform from the glass, it will be even easier to assemble it. To do this, find the fixing element: it may be a screw or a latch. After that, connect the bracket leg to the platform.
And also there are special brackets that are not glued to the glass, but are installed on the ceiling or other elements of the car, for example, on sun visors.
Installation of mirrors with additional functions
Modern devices not only reflect, but also have a number of additional functions. You can equip them with heating, or even install a camera with a monitor.
Heated
The heating function is very convenient for the exterior side mirrors, as it prevents them from fogging up in high humidity and from becoming covered with ice in cold weather.

the heating element in the mirrors will help to avoid fogging and icing
The heating device consists of the following parts:
- a heating element;
- wiring for a 12V system;
On sale there are both separate heaters and the mirrors themselves with a built-in element. Both are fairly easy to install. To do this, you must perform the following steps.
- Remove the door trim.
- Remove the side mirrors according to the instructions.
- Run the wires through the side of the door and out to the outside mirrors.
- Remove the reflective element after preheating the junction with the housing.
- Remove the screw and remove the frame (if present).
- Pull the wires through the frame body, strip the ends and install the connectors.
- Replace the frame and bring the wires through it.
- Connect the wires to the contacts of the heating element and install it.
- Replace the mirror and assemble the entire structure back.
- Connect the part of the wire that is inside the passenger compartment to the rear window heating relay.
- Check the functionality of the mechanism.
Now, in bad weather, you do not have to get out of the car and clean the mirror yourself. This is a very convenient feature, especially given the low price of the equipment.
Video: the process of installing a mirror with a heater

with monitor
Monitors are a common sight in today's high-end cars. As a rule, they are installed on the control panel and display information about the car, the image from the DVR or camera.

a rear-view mirror equipped with a monitor will show the entire space behind the car
If you can't afford a car with this configuration, but you like the idea of a monitor in the cabin, pay attention to special rear-view mirrors with a monitor.
The most difficult part of installing the structure is to correctly lay the wiring and connect the power. As a rule, wires are attached to the mirror: negative black (-12V), positive red (+12V), blue for connecting a signal source, as well as RCA connectors, which are called tulips in everyday life.
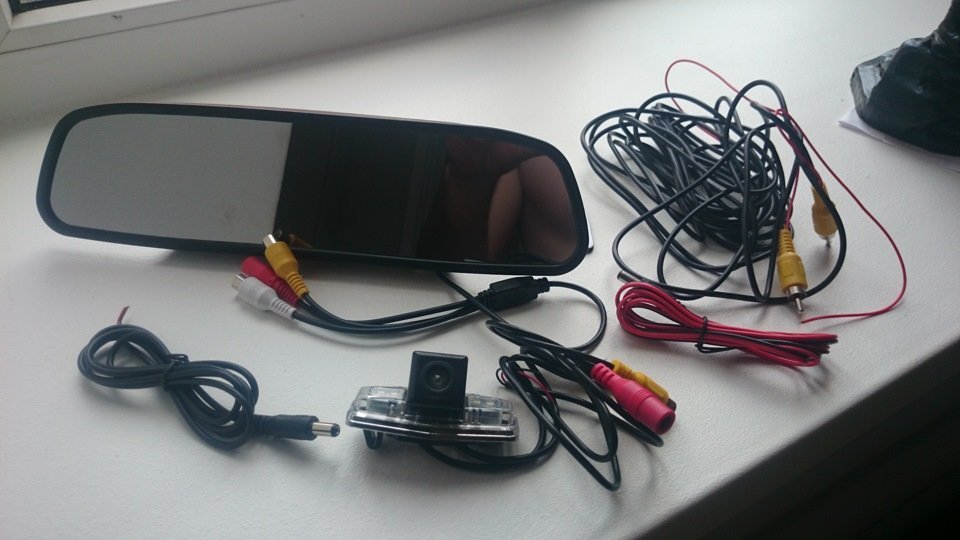
the mirror is equipped with a set of necessary wires
As a rule, monitors have three connectors, one of which is responsible for power supply, and the other two for receiving a signal. At the same time, you can connect both the front and rear cameras. By default, the video from the front camera will be displayed on the screen. But when receiving a signal from the rear, the monitor will automatically switch.
Colors of wires and plugs may vary depending on the mirror model.
Run wires across the floor or ceiling. Choose the best option based on the features of your car model.
The mirror itself, as a rule, has special mounts that allow you to install it directly on top of the factory one. If desired, the monitor function can be turned off, and then you will have a regular mirror, but, unfortunately, with a slightly worse reflectivity.
Video: do-it-yourself monitor and rear-view camera installation

With a camera
Installing a monitor usually makes sense when you intend to display the image from the camera on it. Ordinary mirrors have blind spots, so the camera allows you to significantly expand the view of the area behind the car. In addition, it is very convenient to use such equipment during parking.
rear view camera captures the situation behind the car and sends a signal to the monitor
It is best to purchase a camera and a mirror with a monitor in the kit: this will make it easier for you to connect.
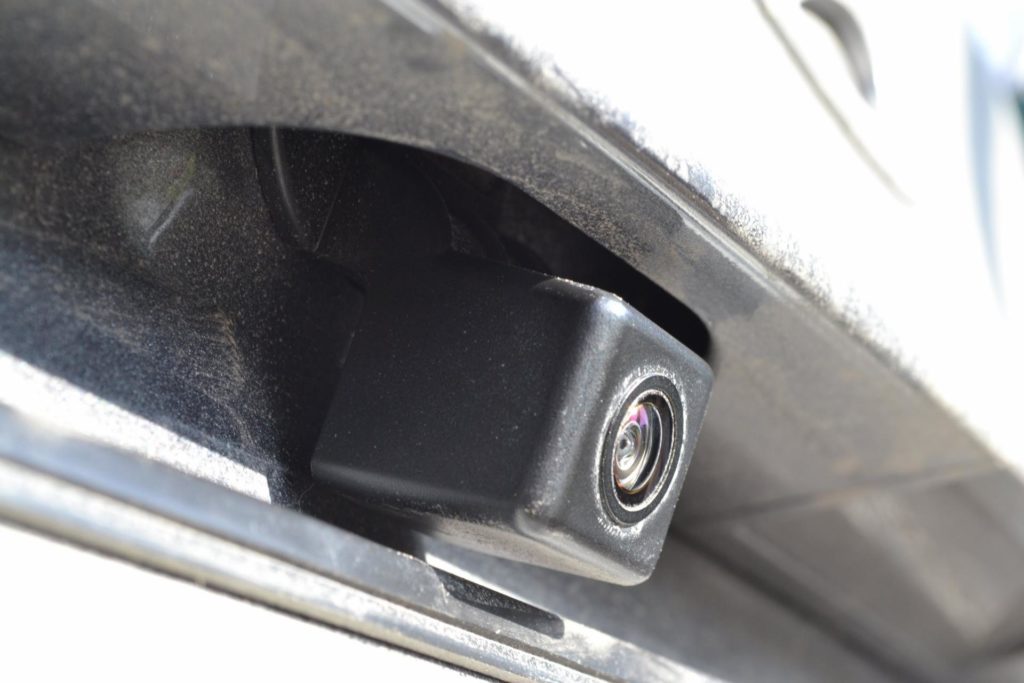
According to the mounting method, all cameras can be divided into several types:
- hinged;
- recessed;
- on the bracket.
Mounted cameras are the most popular, as they are smaller and do not require serious manipulations with the body or other elements of the car. They are usually installed above the number plate. There it is quite invisible, so you should not be afraid that it can be stolen.
All cameras have special parking lines that are displayed on the monitor. From them you can calculate the angle, evaluate the parameters of the machine and understand the distance to the displayed object. At first it may seem unusual, but with experience you will acquire all the necessary skills.
The front and rear view cameras have different optical systems, therefore they are not interchangeable.
The camera comes with all the necessary wiring to connect to the monitor. These include the excitation wire, which activates the monitors with a positively charged current, as well as the power wire.
The principle of signaling is as follows: when you switch to reverse gear, current is supplied to the camera, which, in turn, sends a signal to turn on the screen in the mirror. As soon as reverse is stopped, the image will automatically disappear.
In order for the camera to work, run the wires from the back to the front of the car and connect them according to the instructions. If you purchased a monitor and a camera as a set, it will not be difficult: just connect the necessary plugs and wires according to their charge (plus to plus, and minus to minus).
Possible malfunctions and their elimination
After dismantling, disassembling and installing the modified mirror yourself, some problems may arise. Very often, incorrectly glued mirrors fall off at the most unexpected moment, which can lead to an accident.
What to do if the mirror peels off
The interior mirror can fall off due to physical impact or by itself. The main reason that the bracket construction does not stay in place is the wrong adhesive. If you chose epoxy, the platform holder probably didn't stay in one position long enough. The same problem could occur if you used a light-curing product without special UV lamps. Household glue will also not give a good result: temperature changes and active vibrations of the car can cause the mirror to peel off while driving.
To fix this, the structure must be returned to its place and glue with a chemical hardener must be used.
Sometimes a platform with a bracket can fall off along with a piece of glass. This means that microcracks have already formed in it, which can spread throughout the rest of the glass. In this case, contact a car service: specialists will be able to diagnose and tell you how necessary it is to replace the windshield.
Now on sale you can find brackets on special suction cups. They don't stick as tightly as the ones with glue, but you can take them off and put them back in place repeatedly without worrying about damaging your windshield.
What to do if it cracked
A cracked mirror can cause a lot of inconvenience to the car owner. A serious crack can distort the image, which means it can interfere with estimating the real distance to the object behind. This problem can occur both in the salon and in the side mirrors. Most often this happens during improper dismantling or installation. Although the reasons may be different: for example, a sharp stone flying out from under the wheels, sloppy owners of neighboring cars, and even ordinary hooligans.
Be that as it may, the reflective element should be replaced. To do this, carefully remove the mirror from the housing and install a new one. Carefully follow the instructions for disassembling and assembling the part. If you are not sure of your actions or are afraid of damaging the element again, contact a specialized workshop. The mirror replacement service does not cost very much, but it will save you nerves and money on unsuccessful attempts.
Video: replacing the mirror sheet

Dismantling and dismantling car mirrors can be useful if you are going to modify your equipment. Doing it yourself is not that difficult, especially if you have experience with electrical wiring. Otherwise, contact the experts: with their help, your mirrors will be transformed quickly and qualitatively.